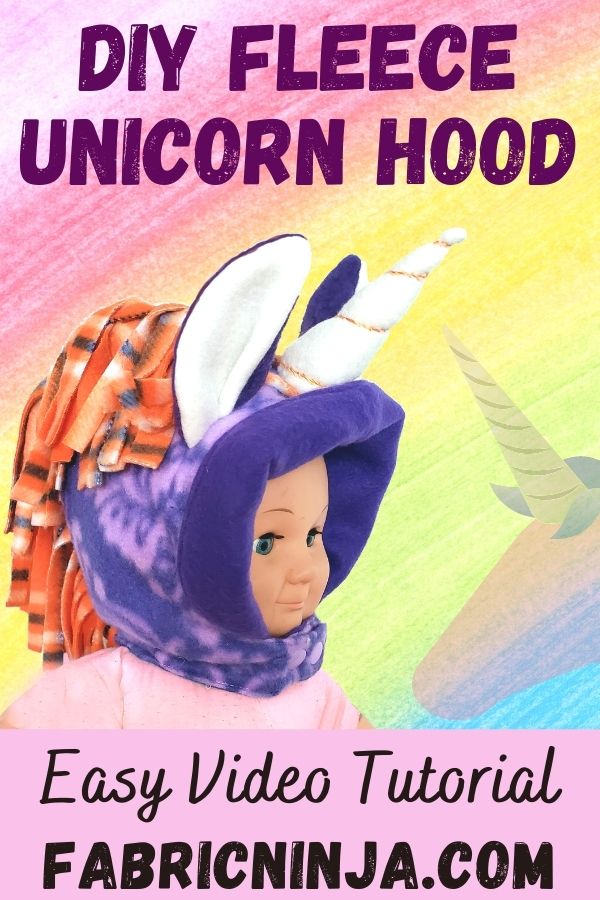
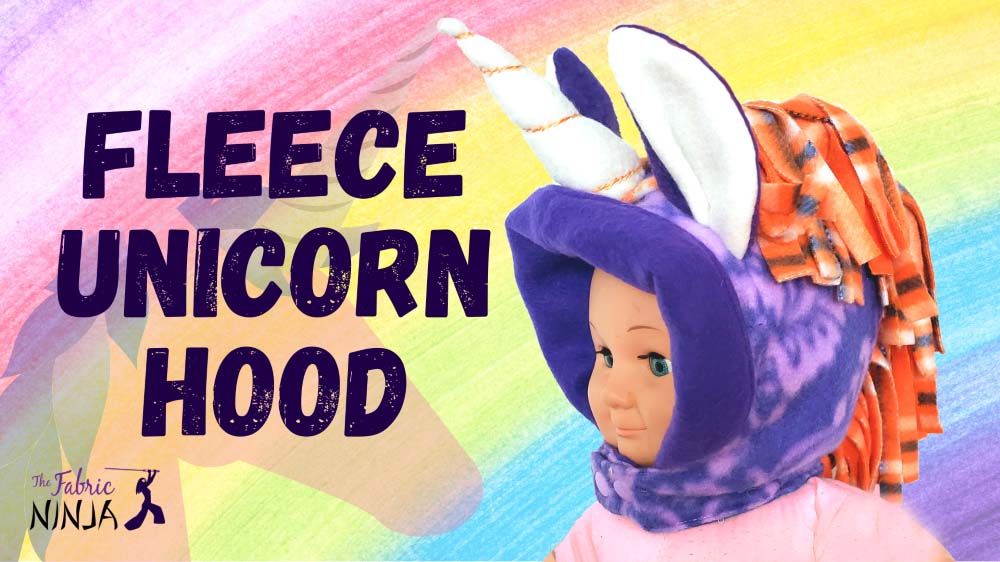
These horse ears and a unicorn horn sewing patterns, are exactly what you need to achieve your unicorn dreams. Just horse ears and a horn, is all you need to add a whole lot of cute to your project. These simple and free unicorn sewing pattern pieces can be used to with an ready made hoodie or hat, or you can incorporate them into your next DIY sewing project. 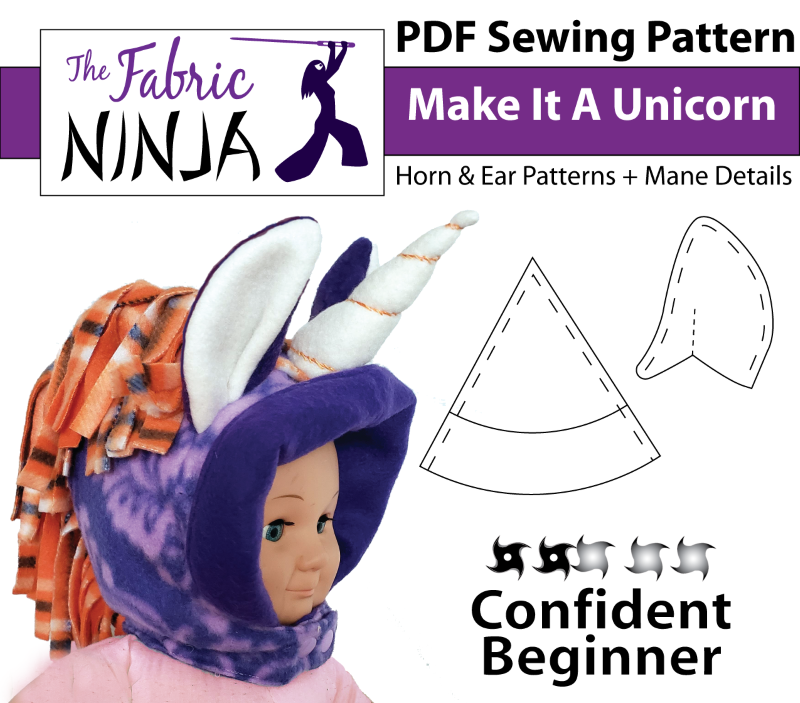
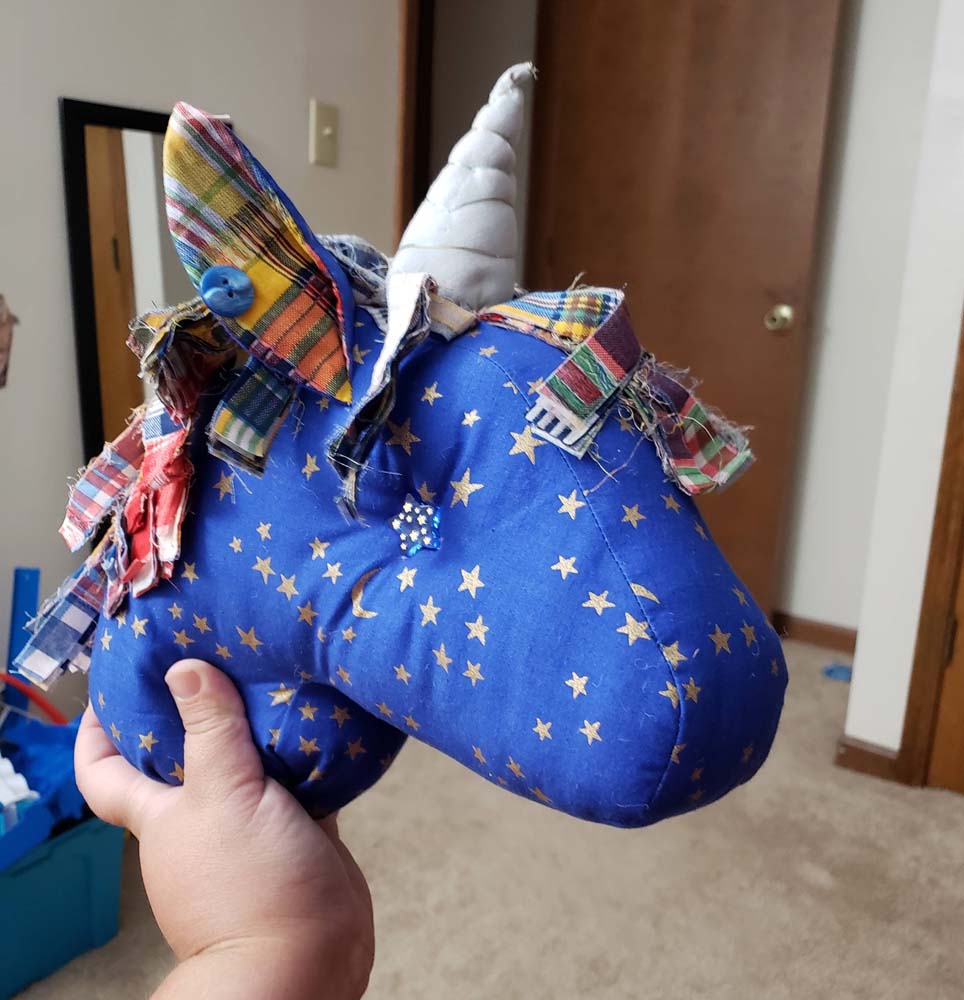
In this post I’m going to use the “Make it a Unicorn” pack with my free “Just Add Ears Hood” pattern. The hood pattern is made to fit your whole family (newborn -> large-headed adult) and all your friends. This free pattern also has Elf Curl and Pixie Point shapes included. Fleece hoods are great for Holiday photos and perfect for outdoor holiday events. I’ve also used the “Make it a Unicorn” pack on other items like this hobby horse head to transform it into a unicorn. You might also like to check out this Festive Elf Hood that used the “Just Add Ears Hood” pattern, as well.
Ready to get the free “Make it a Unicorn” PDF pattern pieces and SVG cut files? Instantly download it using the form below.
If you want all the nitty-gritty hood pattern details, check out the main pattern post. I’m going to quickly cover the main points here. Six sizes: Newborn/Doll, Infant, Little Kid, Big Kid, Teen, Adult. The hood has a chin strap and is fully-lined. Today I’m making it with fleece, but knit and woven fabric can also be used. The pattern has a dart for adding ears. You’ll find lots of ear shapes in the Animal Elements patterns. The hood is designed to allow the face edge to fold back and the neck to fold up. These allow for fit customization and make one hood last for years as your kid grows.
Supplies
Fabric
Layer your fabrics to get the protection you need. Note: Cotton feels cold when wet. I used Blizzard Fleece from Joann Fabric for both outside and lining because I live in Indiana and it is cold, wet, and windy.
Warm & Wet: Raincoat fabric like Rip-Stop Nylon or Laminated Cotton. Lining with mesh like Koolnit to keep the raincoat fabric from clinging.
Cool & Windy: Rip-stop Nylon, Wool, dense Fleece, Soft shell.
Cold & Snow: Fleece, Pre-Quilted Fabric, Minky, Wool, Dense Flannel, Softshell, Dense Knits, Faux Sherpa and Silk.
Chilly & Dry: Flannel, Fleece, Knits like Cotton Lycra, Sweatshirt Fabric, Sweater Knit or Quilters Cotton outside
lined with fleece or flannel.
 Notions
- Snaps or button: 2 to 4 sets. I use KamSnaps.
- Ribbon or string for horn
- Typical sewing supplies like pins and matching thread. Find my favorites in my Resource List.
Sewing Instructions
This free hood pattern also has a step-by-step tutorial, which you can download along with the PDF or SVG patterns. Just click on the link for the type of pattern you want to get the patterns and the detailed tutorial. The following tutorial is an overview.
Would you prefer a video?
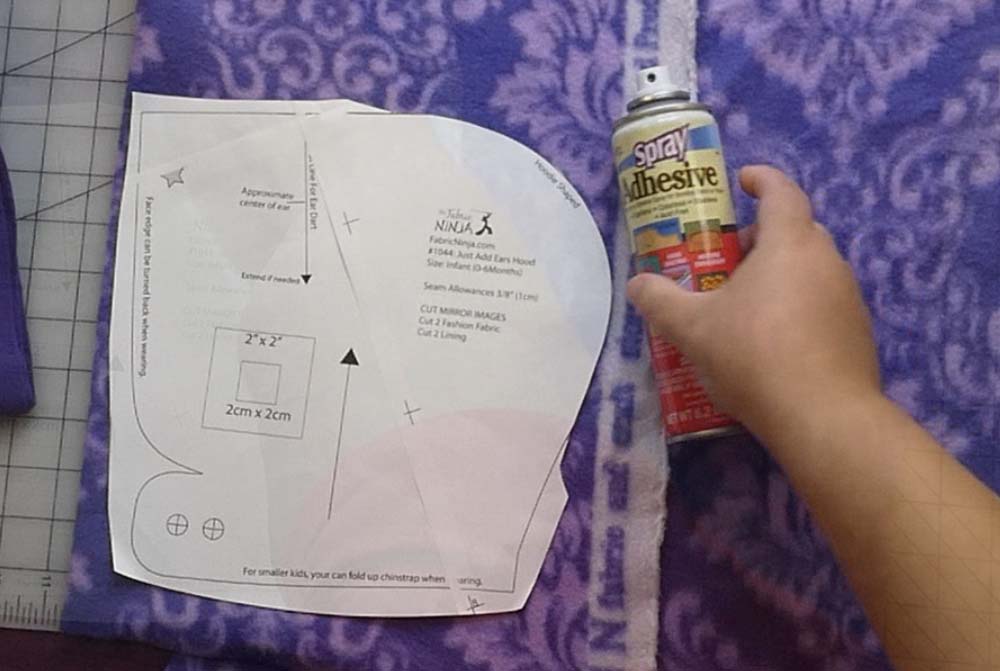
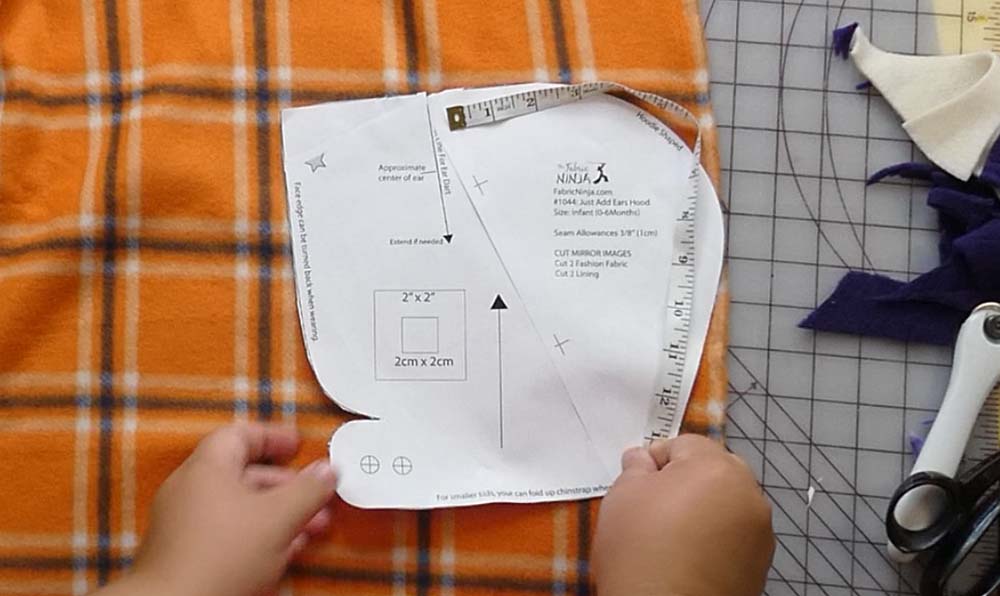
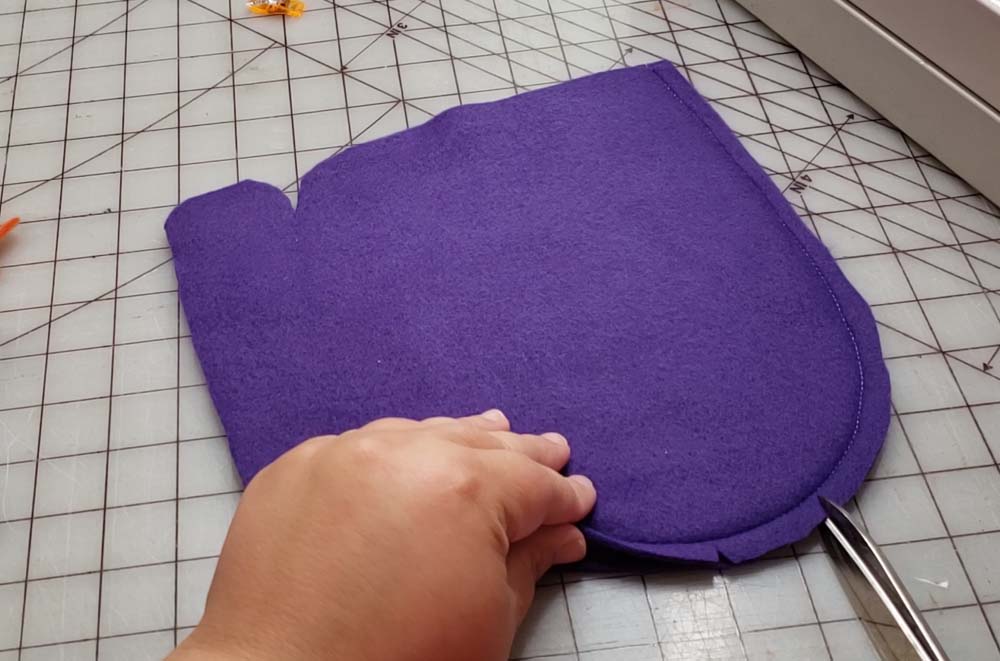
1. Cut out your 2 mirror images of the hoodie from your outside fabric and 2 mirror images of the hoodie shape from your lining fabric. You will have 4 pieces of fabric when done.
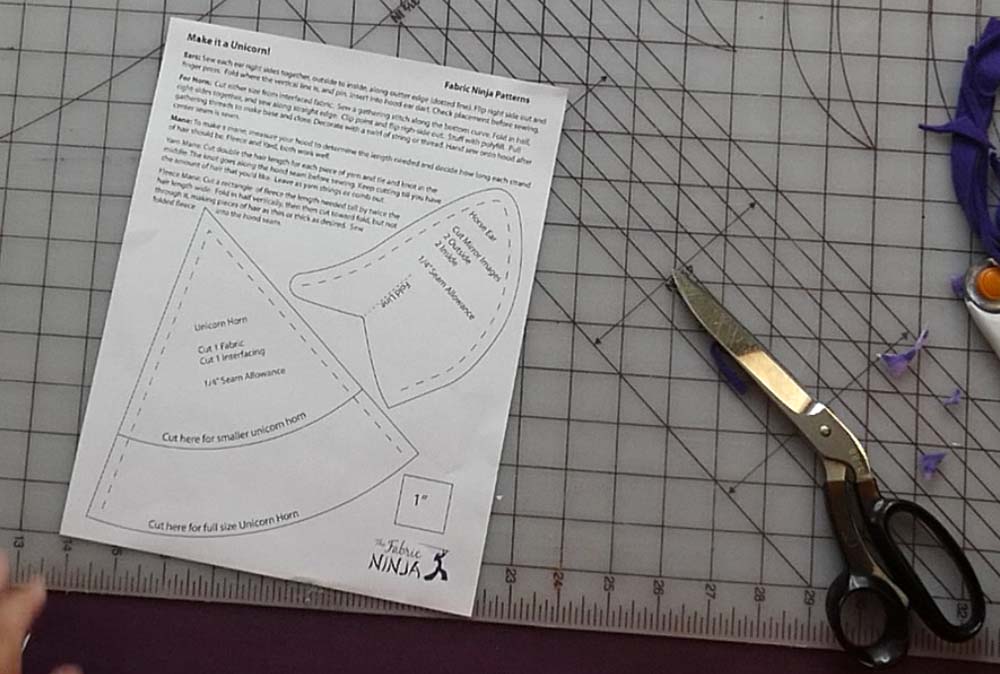
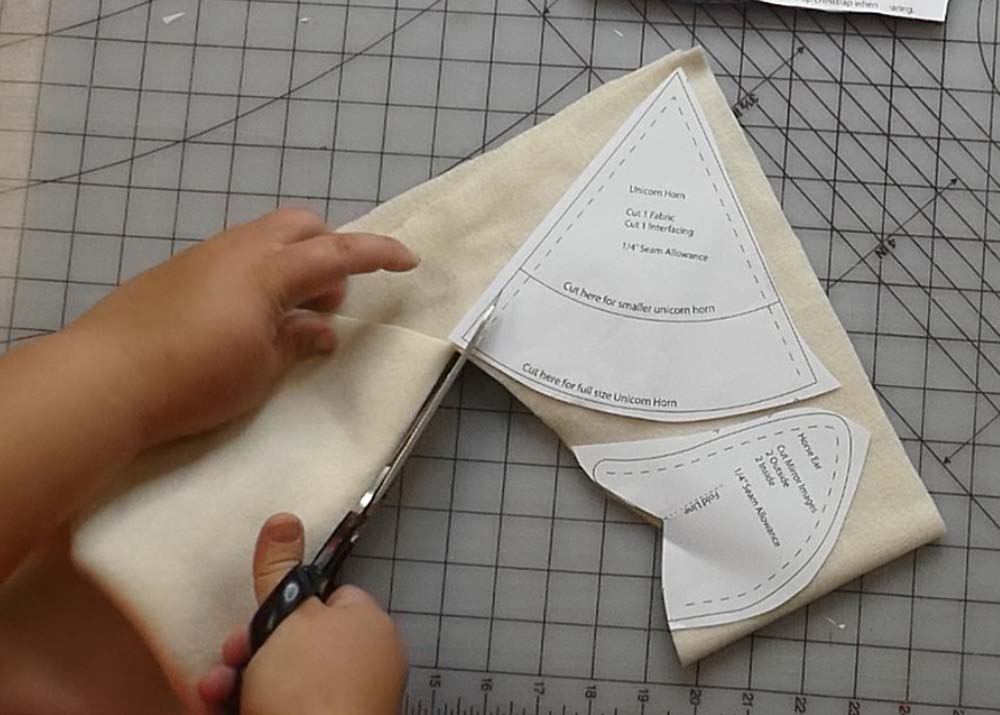
2. Cut out the horse ears and unicorn horn. I am using 2 layers of fleece for the horn, that second layer is my interfacing. You can use any other fabric for the interfacing or real interfacing. If you are using woven fabric, an iron on interfacing is a great option. You need a left and right ear, so make sure you cut mirror images.
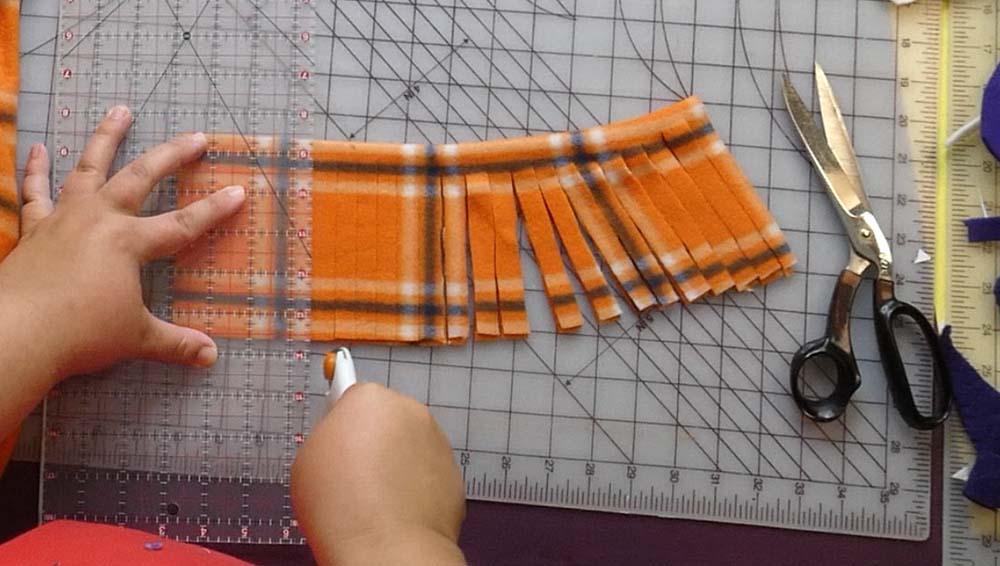
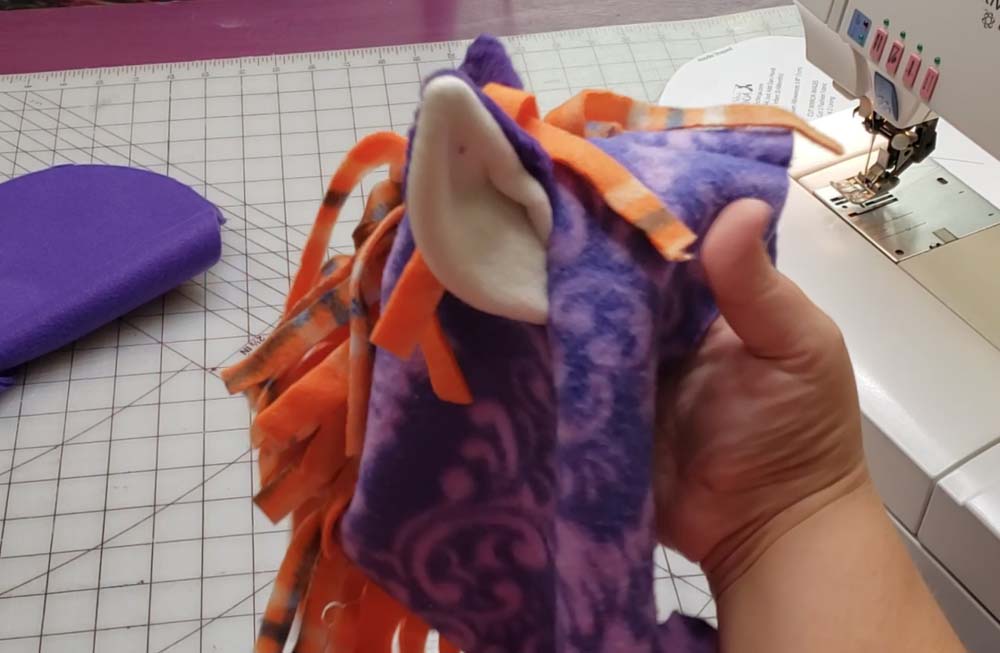
3. Measure your project to decide how long you want the mane too be (from top of head to neck), and how long you want each hair to be. The length of the mane will be your vertical measurement and double the length of each hair will be your width measurement.
4. Fold the mane in half (hot dog style) and cut each hair. Do NOT cut through the fold.
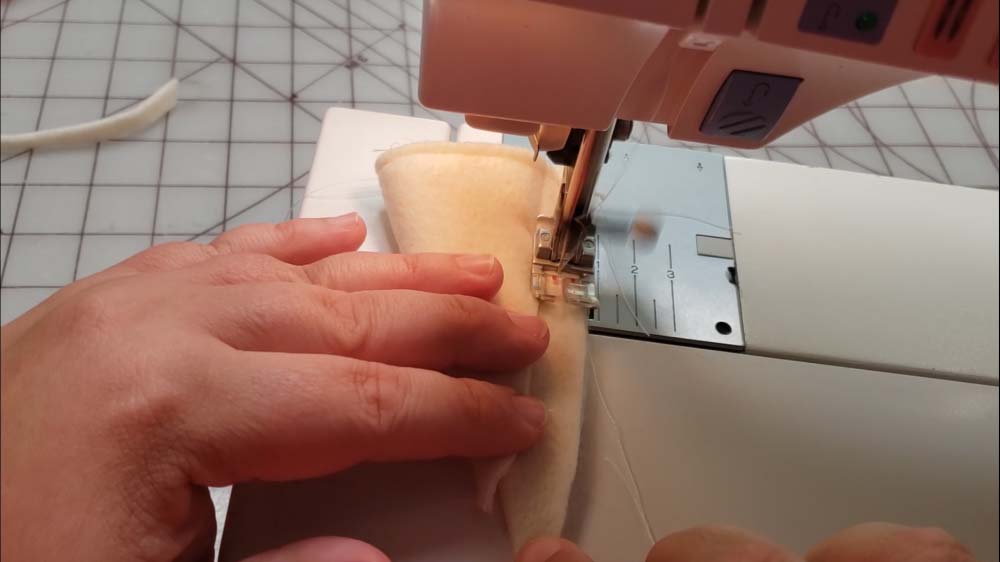
5. Sew ears right-sides together making sure you have a left and a right ear.
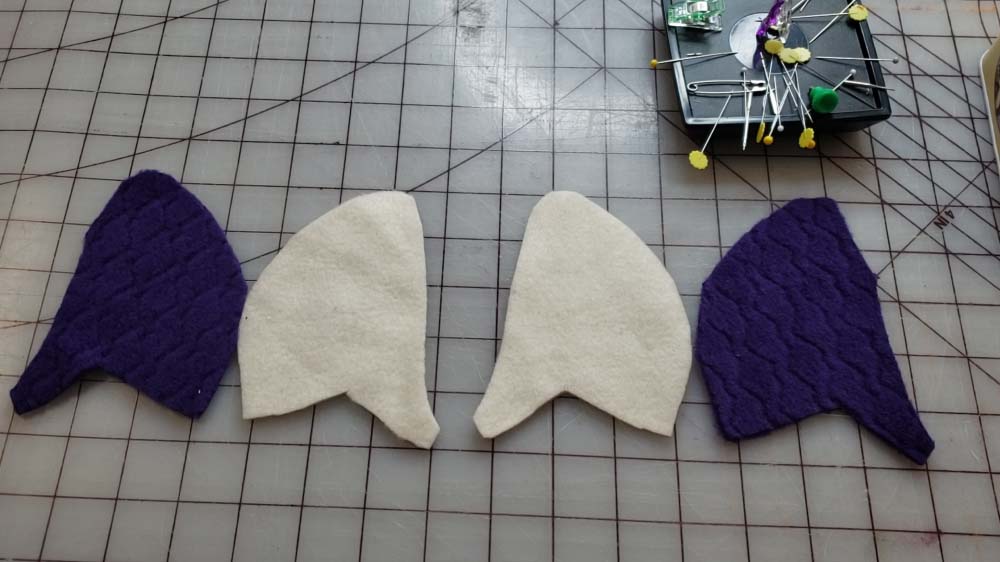
6. Trim ear seam allowance and flip right side out. Then fold them to create the ear shape.
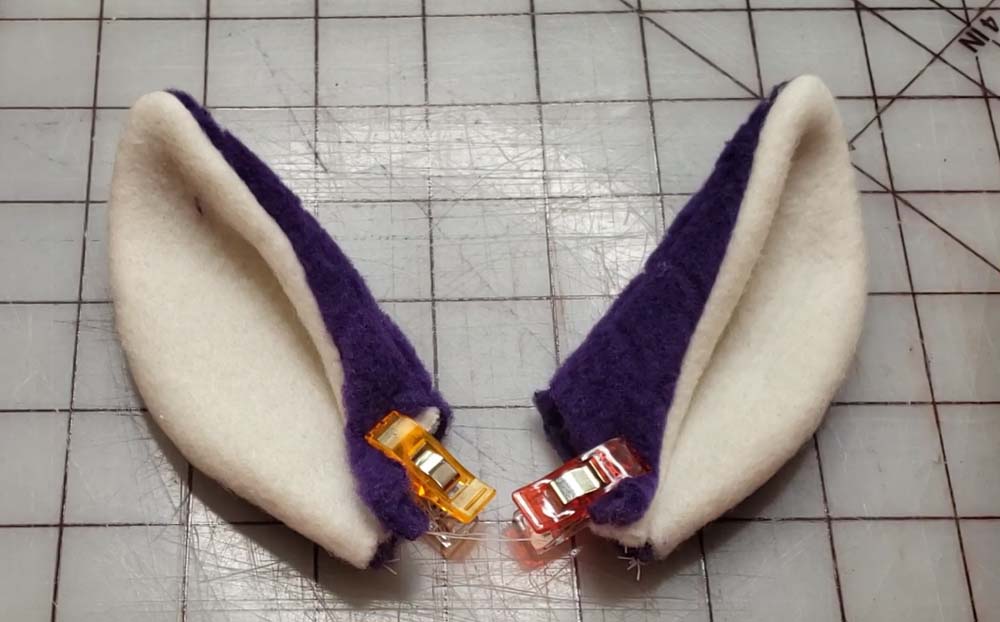
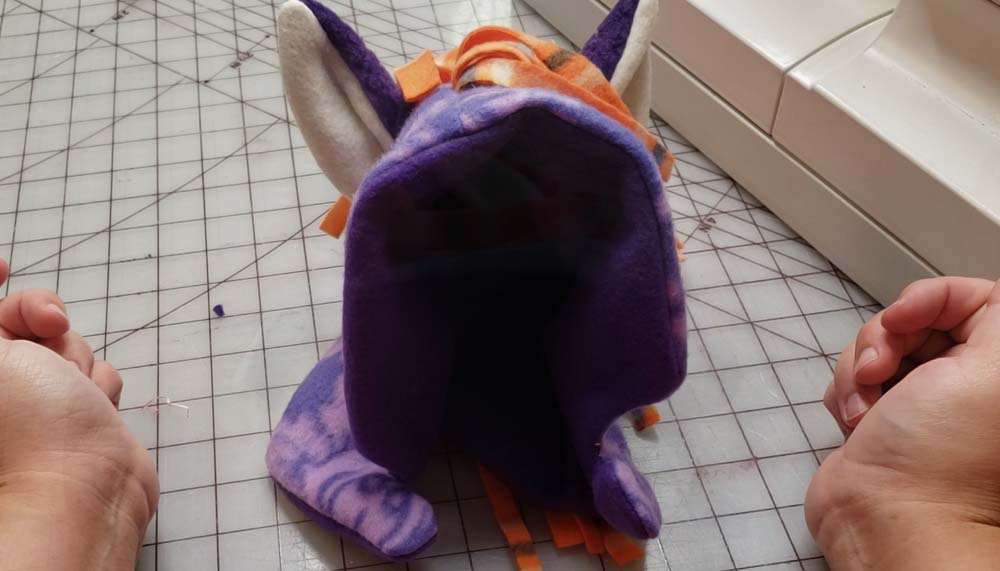
7. Insert ears into the ear slit on the outside hood. Make sure your ears are pointing toward the front and consult the pattern for an approximate center of the ear mark. The deeper you set the ears into the dart the smaller they will be. I am going to drop mine into the seam about 1″ because my hood is a very small size.
8. Sew ear dart starting at 1/4″ and angling off the edge of the fabric after the slit.
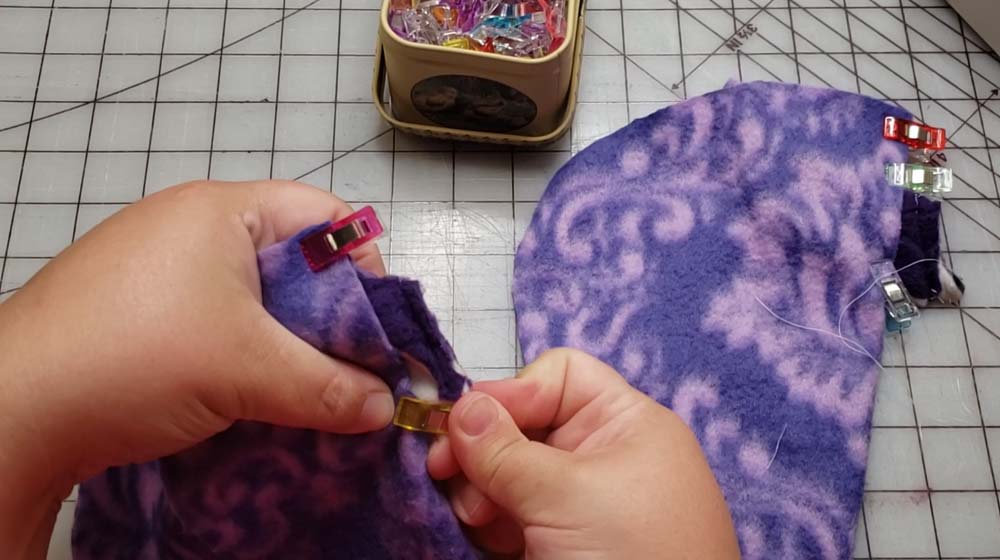
9. Pin and sew mane into place on one side of the outside hood. Mane is sewn on to the right side of the fabric.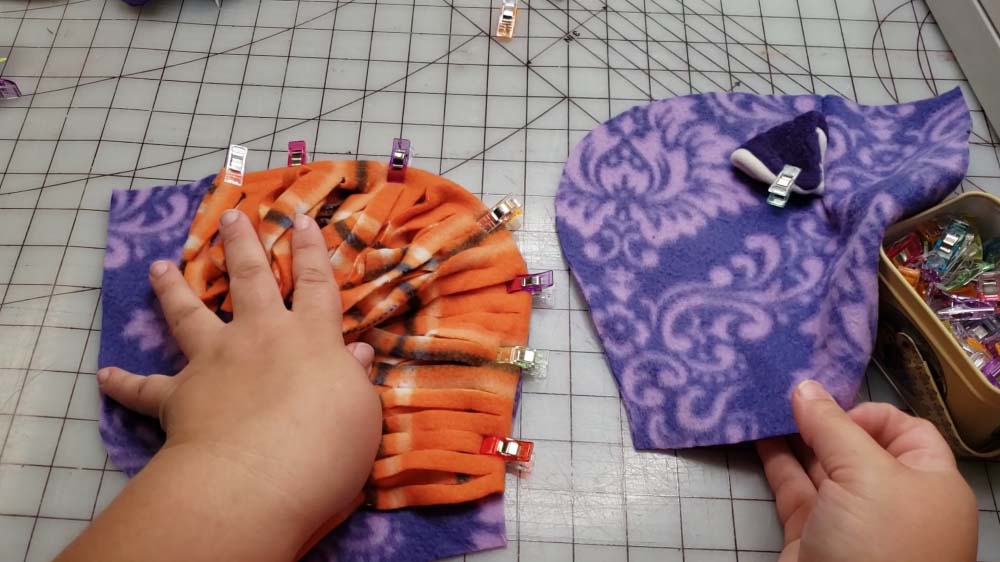
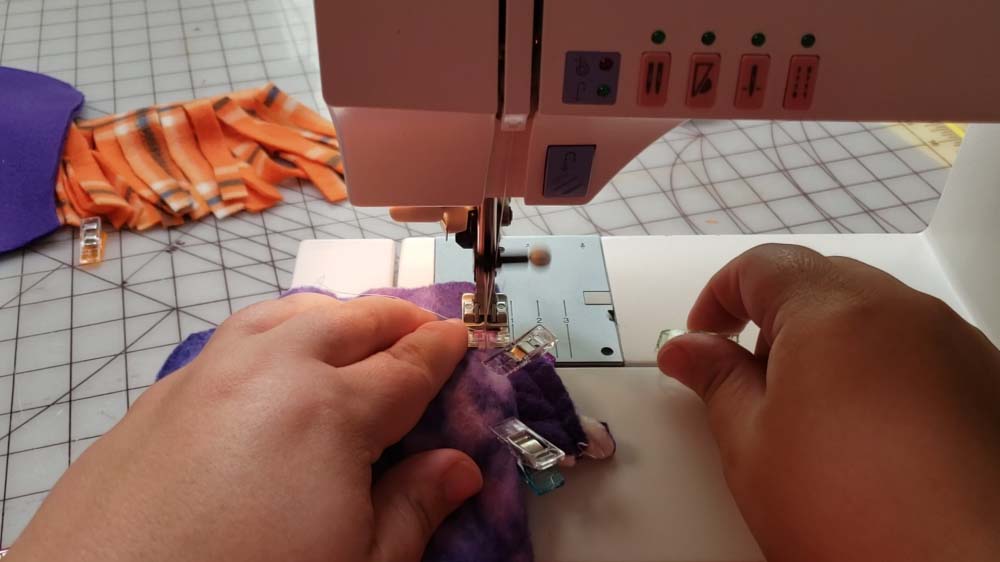
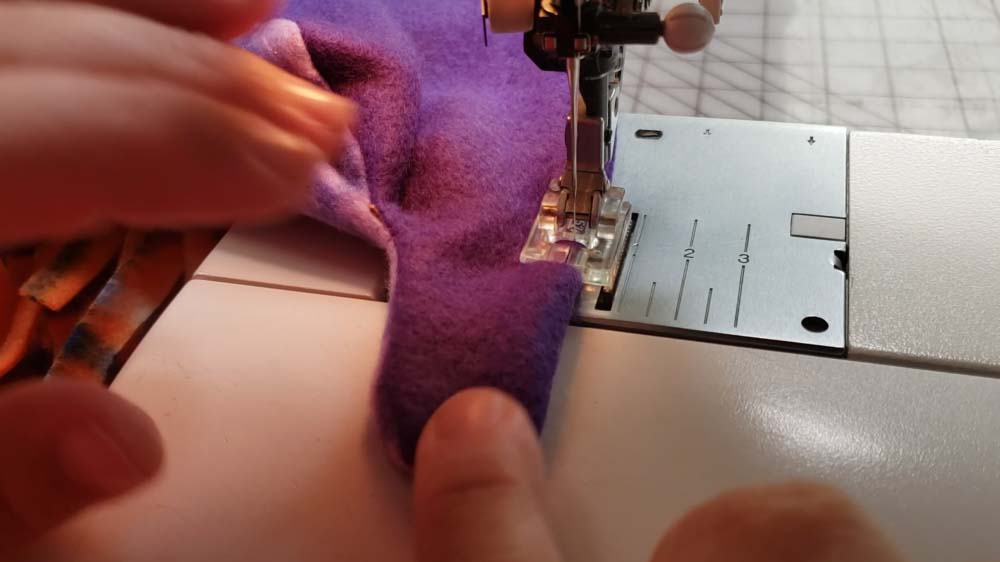
10. Place each layer (outside and lining) right-sides together. Then sew along the curved back seam. Do not sew the face edge or the bottom. A slightly longer straight stitch (3.0) or a narrower zig-zag work great. Your head doesn’t change size when it moves, so you don’t really need to make this a stretch seam.
11. Notch and clip the curves. If you are working with fleece, you can alternately trim the seam allowance to 1/8″ around the curves.
12. Flip the outside hood right side out. If there is any bunching you may need to clip the seam more.
13. Layer it up for sewing. Place outside and lining right-sides together aligning top and back of head seams.
14. Sew around the hood leaving a 3″ opening in the neck band for turning. You can use the same longer straight stitch or narrower zig-zag for sewing this.
15. Notch and clip the curves around the neck band. If you are working with fleece, you can alternately trim the seam allowance to 1/8″ around the curves.
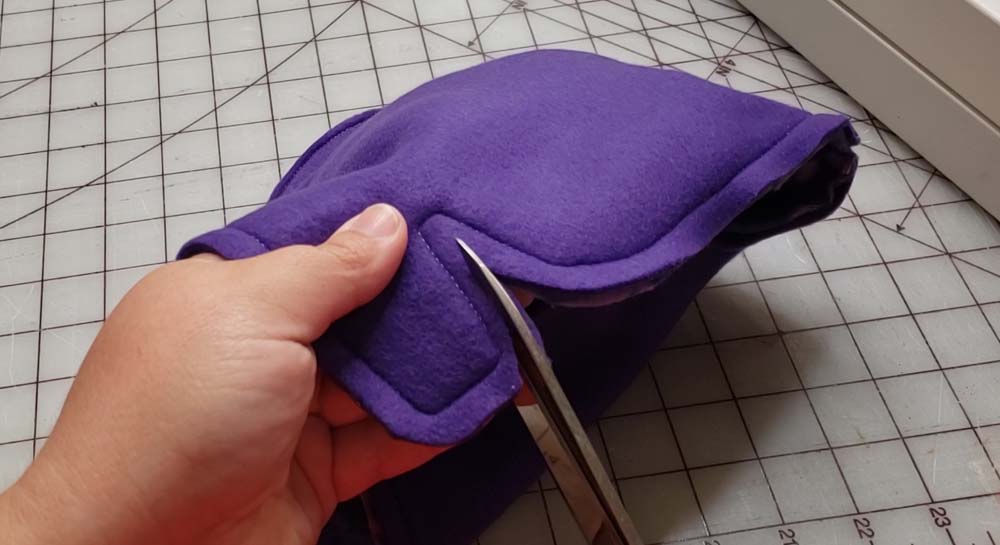
16. Flip right-side out through opening in the neck band.
17. Top-stitch along the edge for stability and to close the turning hole.
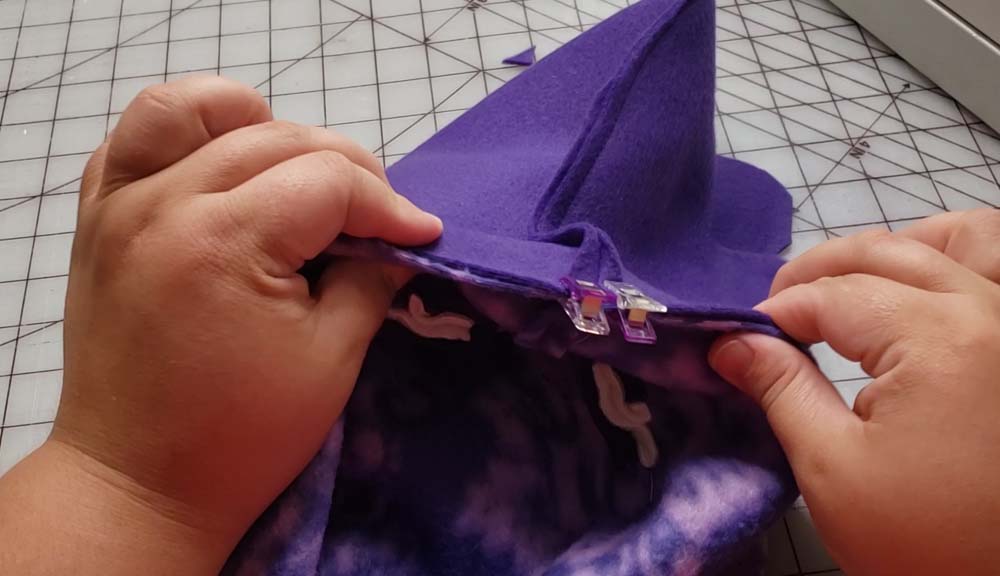
18. Fold horn into a ice cream cone shape and sew up one edge.
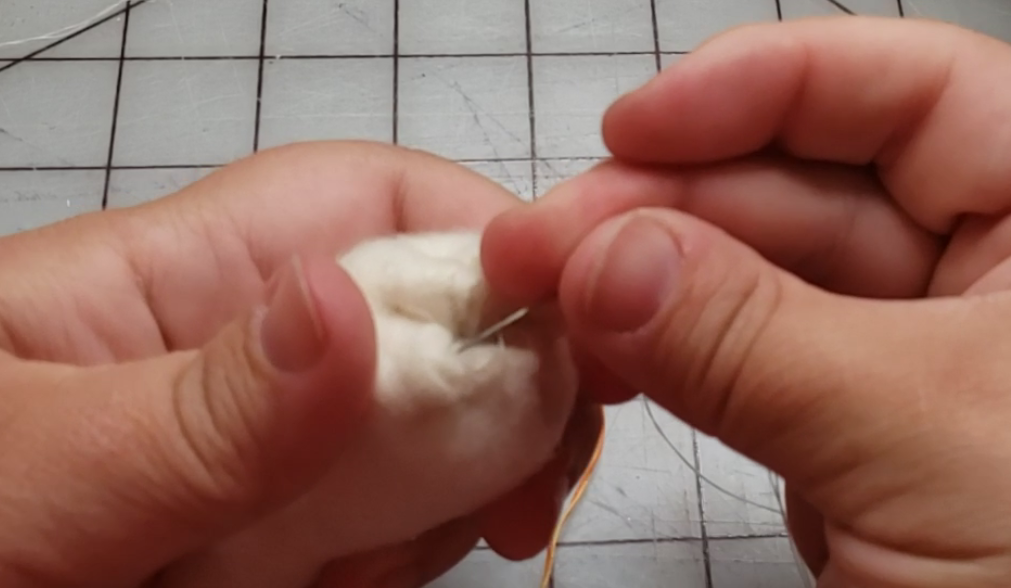
19. Flip right side out and thread the spiral thread up to the tip with a threaded needle
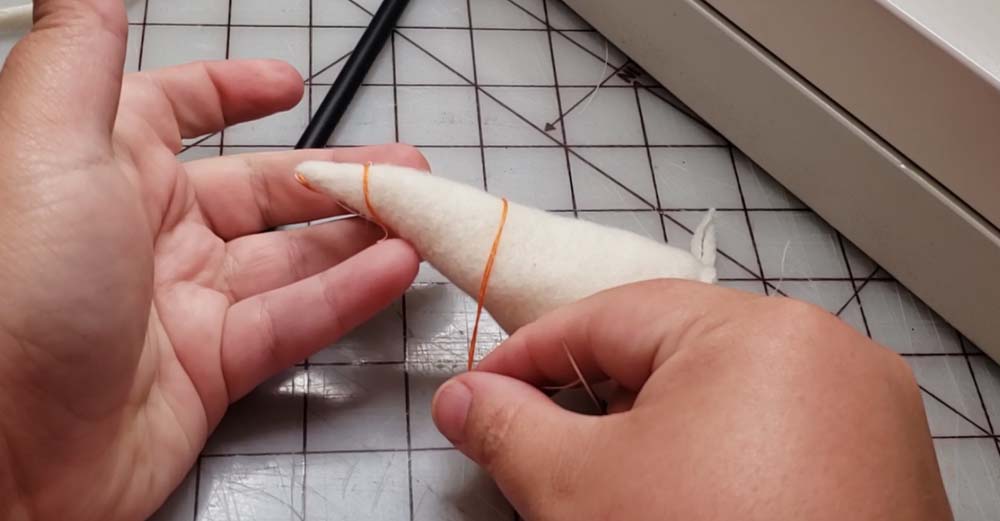
21. Stuff the horn and then gather the base of the horn by hand. Then sew across the center hole catching the gathers to secure the bottom and leave it pretty flat.
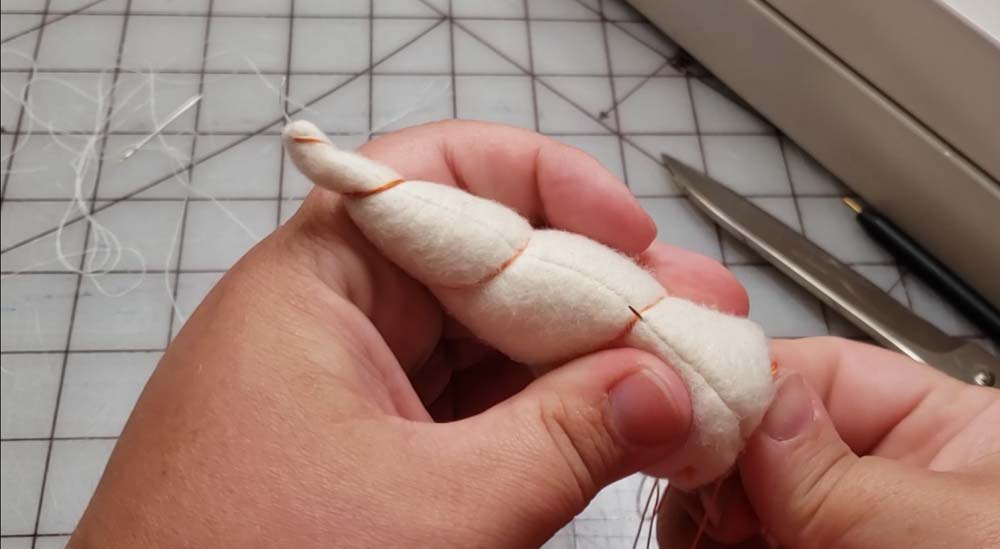
22. Create swirl and reinforce it with small stitches in the seam. Or stitch all the way down the horn in a spiral pattern.
23. Hand sew horn into place on the hood or use 2 snaps to attach it instead.
24. Then add snaps or buttons as desired to the neck band.
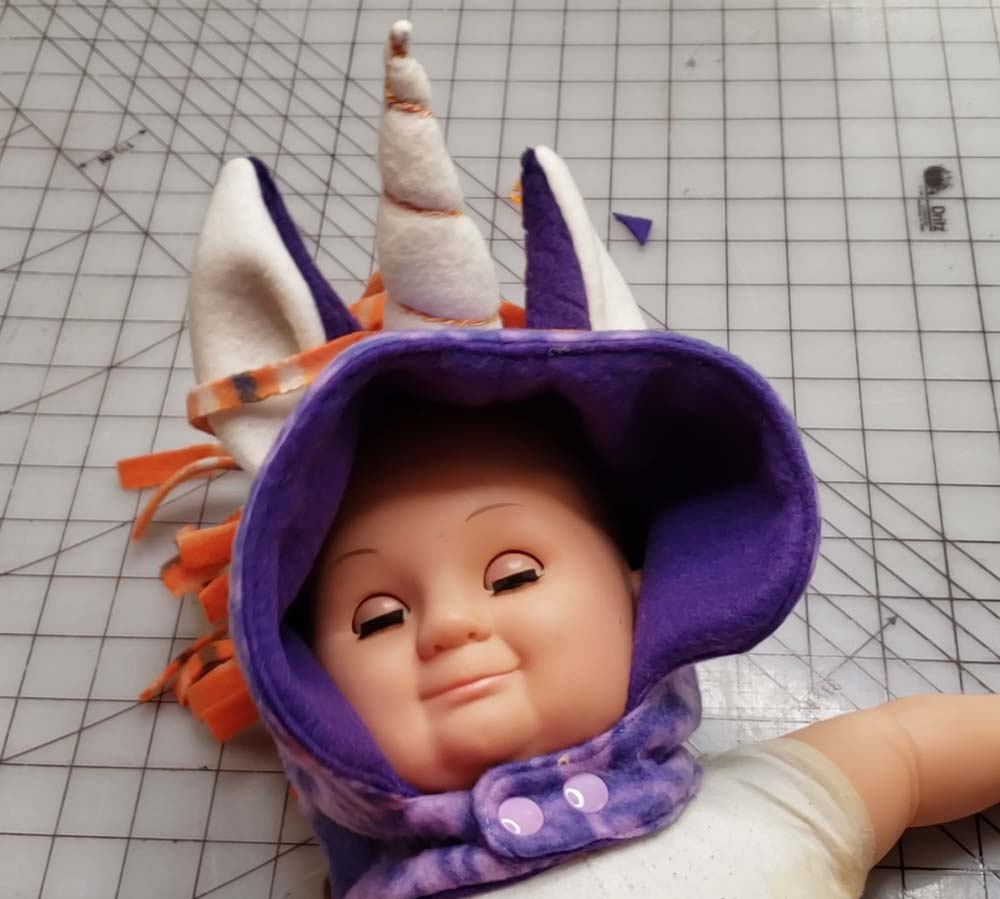
25. Wear with pride! Make more for your friends.
You might also like to check out this Festive Elf Hood that used the “Just Add Ears Hood” pattern, as well.
Ready to get the free “Make it a Unicorn” PDF pattern pieces and SVG cut files? Instantly download it using the form below. Grab the Just Add Ears hood over at this post.
Want to remember this? Save it to Pinterest!