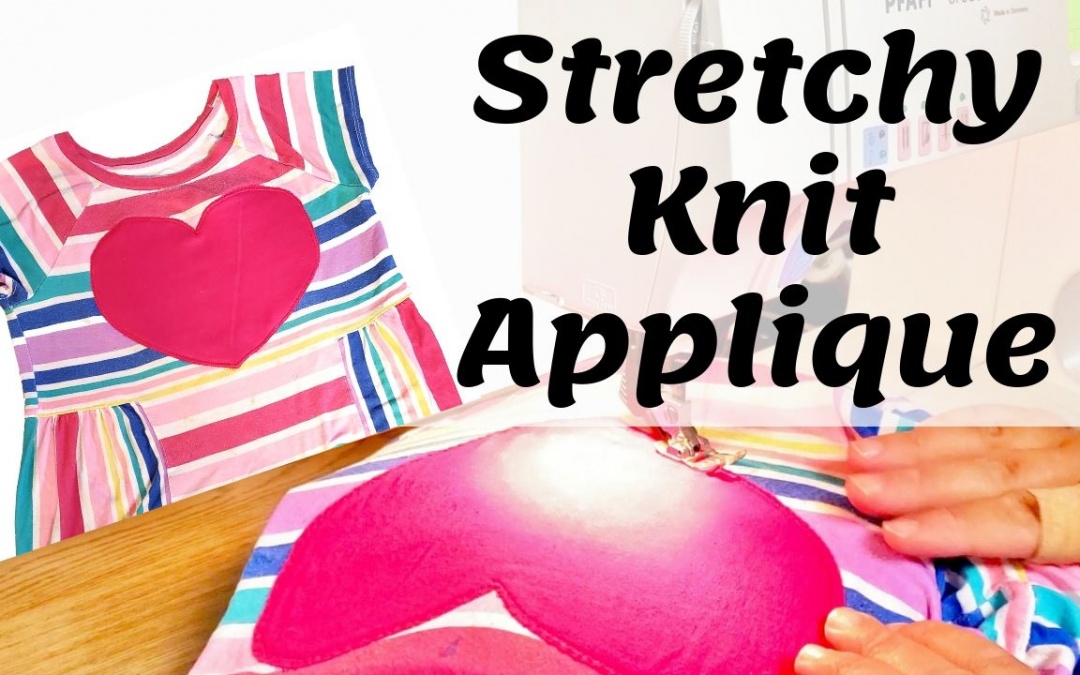
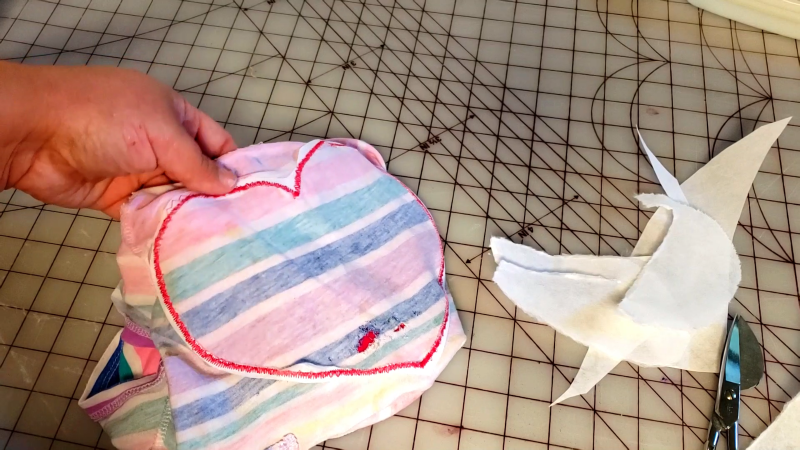
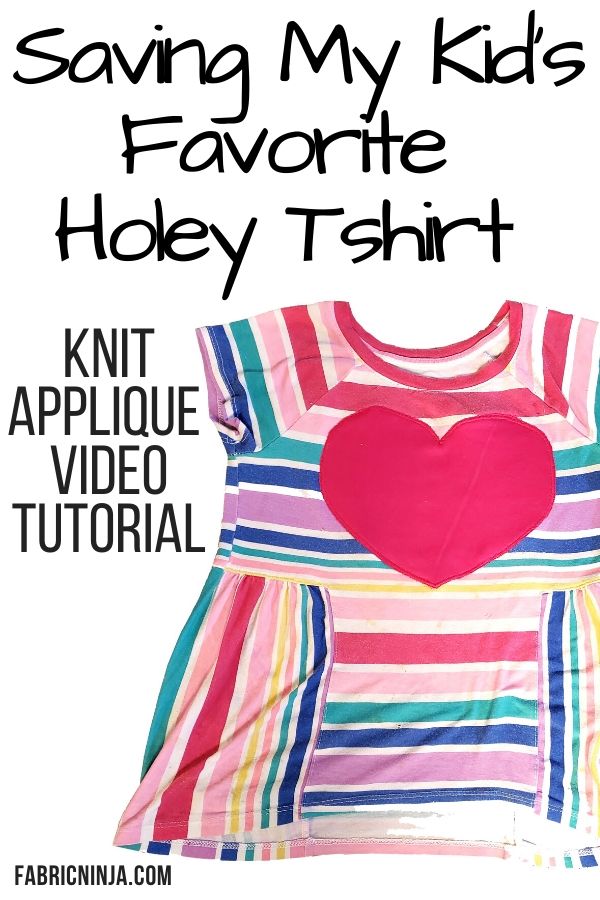
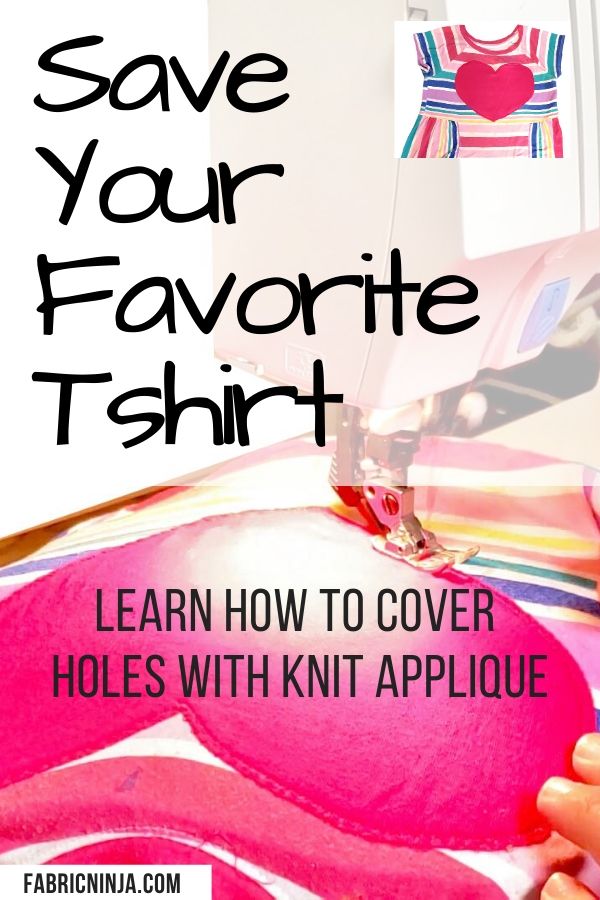
Today’s mission is to save my daughter’s favorite shirt. This rainbow tunic is a made of a very thin and stretchy knit. Doing a simple repair is not ideal here, as the stripes will show the mend, so I’m going to fix this enormous hole by sewing a knit applique over it with my sewing machine.

Applique is just sewing fabric on top of fabric, normally by sewing around the edges. I could certainly put a small knit applique just over the hole, but that actually falls on my daughter’s belly, and I think putting a heart just on her tummy might look a little weird. So, instead, I’m going to “go big or go home” and do this enormous heart on her chest.
Do you prefer Video?
You can watch the tutorial here!
Disclosure: Please keep in mind that some of the links in this post are affiliate links and if you go through them to make a purchase I may earn a commission. I link to these companies and their products because of their quality and not because of the commission I receive from your purchases. The decision is yours.
Fabric Choices
If you want to make an applique out of a woven fabric or a non-stretchy fabric on a stretchy shirt, you can absolutely do that. Just make sure that the shirt has enough wiggle room. For example, if you need all the stretchiness of the shirt in order to wear it, putting a non-stretchy patch on it is going to make the shirt too tight. I know that this shirt has enough wiggle room, so I could have used woven fabric, but I wanted to make sure that it still stretches with her so I’m using knit.
Making a Pattern/Template
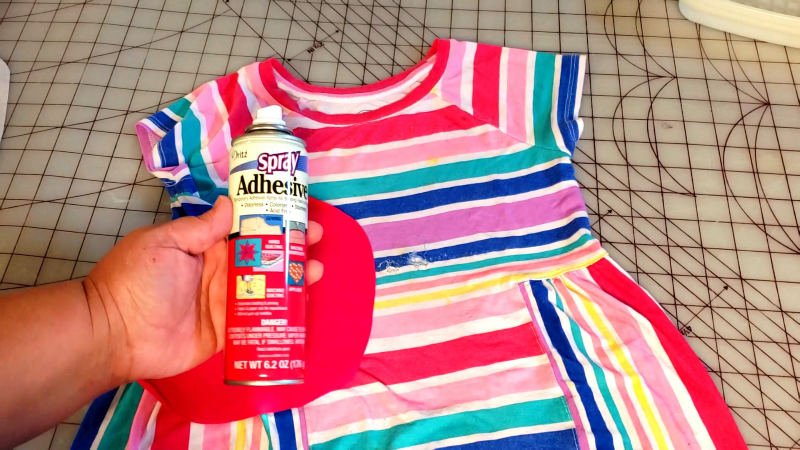
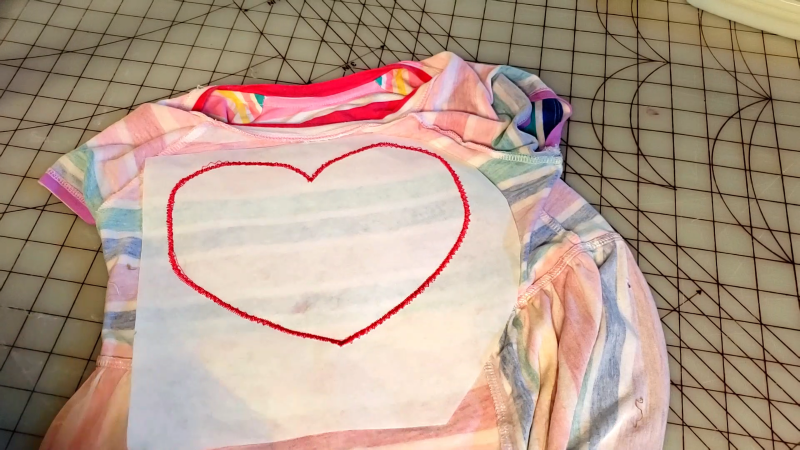
To create the heart shape, I simply made myself a paper template and tried it out for size. I changed the size a couple of times until I got it just right and then I cut my fabric. Today, I am using just some t-shirt knit from my collection. You can either recycle/re-purpose another t-shirt for fabric or get some t-shirt knit at the fabric store.
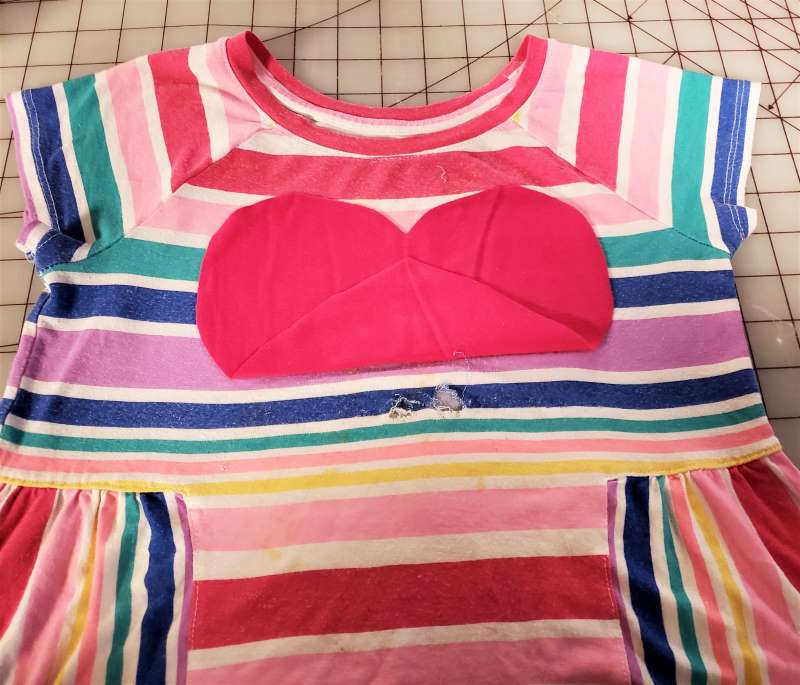
The fabric I am using is called Cotton Lycra, sometimes abbreviated CL. It is made of 95% cotton and 5% Lycra, and is the weight of mid quality t-shirt. It’s a little bit heavier than the shirt itself which is a lighter rayon Lycra. In general, the fabrics should be of similar weight or the applique should be lighter, even if they are different materials. These are close enough that it’s going to work, with the knit applique being just slightly heavier.
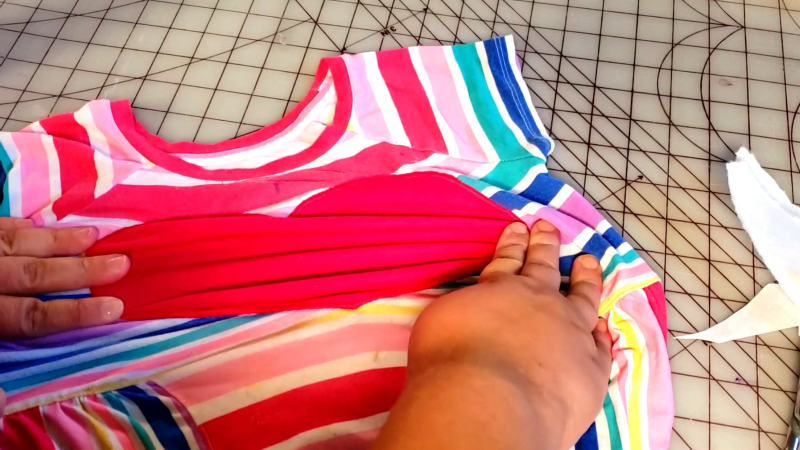
I’m going to temporarily stick the heart into place with a little bit of spray baste adhesive, but you can use pins. I know that some people within the embroidery community do not like temporary spray adhesive. They say it gums up your machine. I have never had that happen or had any problems with it, but this is the only kind of spray adhesive I’ve ever used. Perhaps other kinds do actually cause problems, but this one has always worked for me.
Centering the Design
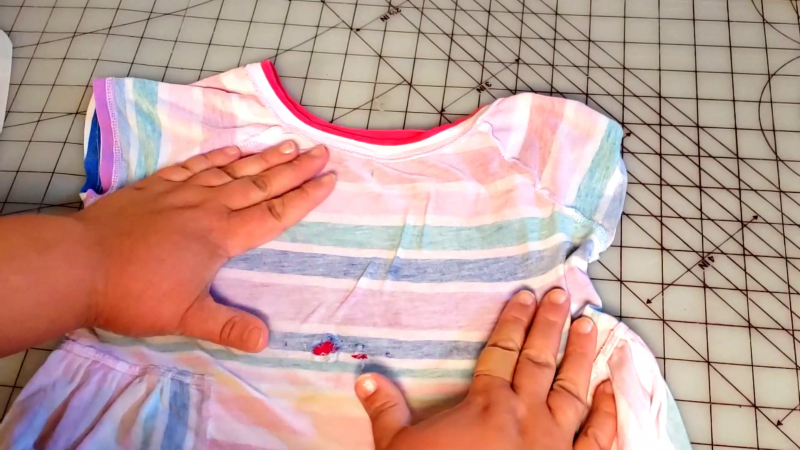
My applique needs to be centered to look right, but your project may be different. To center the heart, I use the seams near the waist and the raglan sleeve seams as guides. You can mark the center by folding the shirt or you can eyeball it. Whatever works best for you.
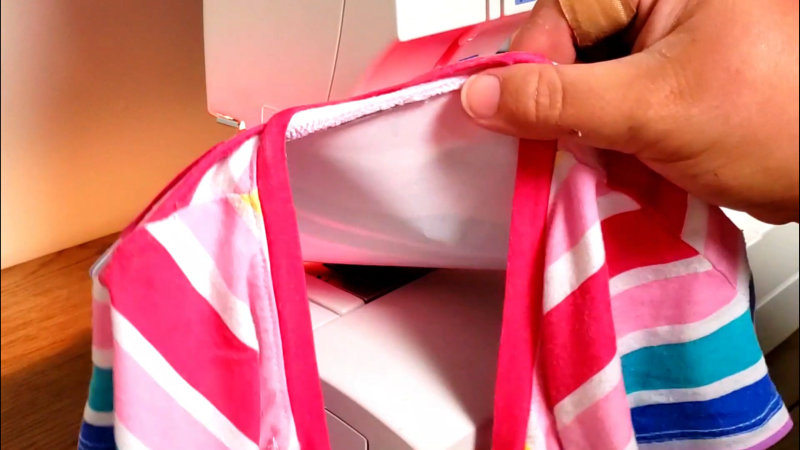
Once I have the knit applique in place, and it’s not moving (adhesive or pins), flip the shirt inside out and check for bumps and puckers under the applique. If you have any bumps head back to the front of the shirt and work them out before sewing. I had quite a few puckers, so I had to work on it for a bit.
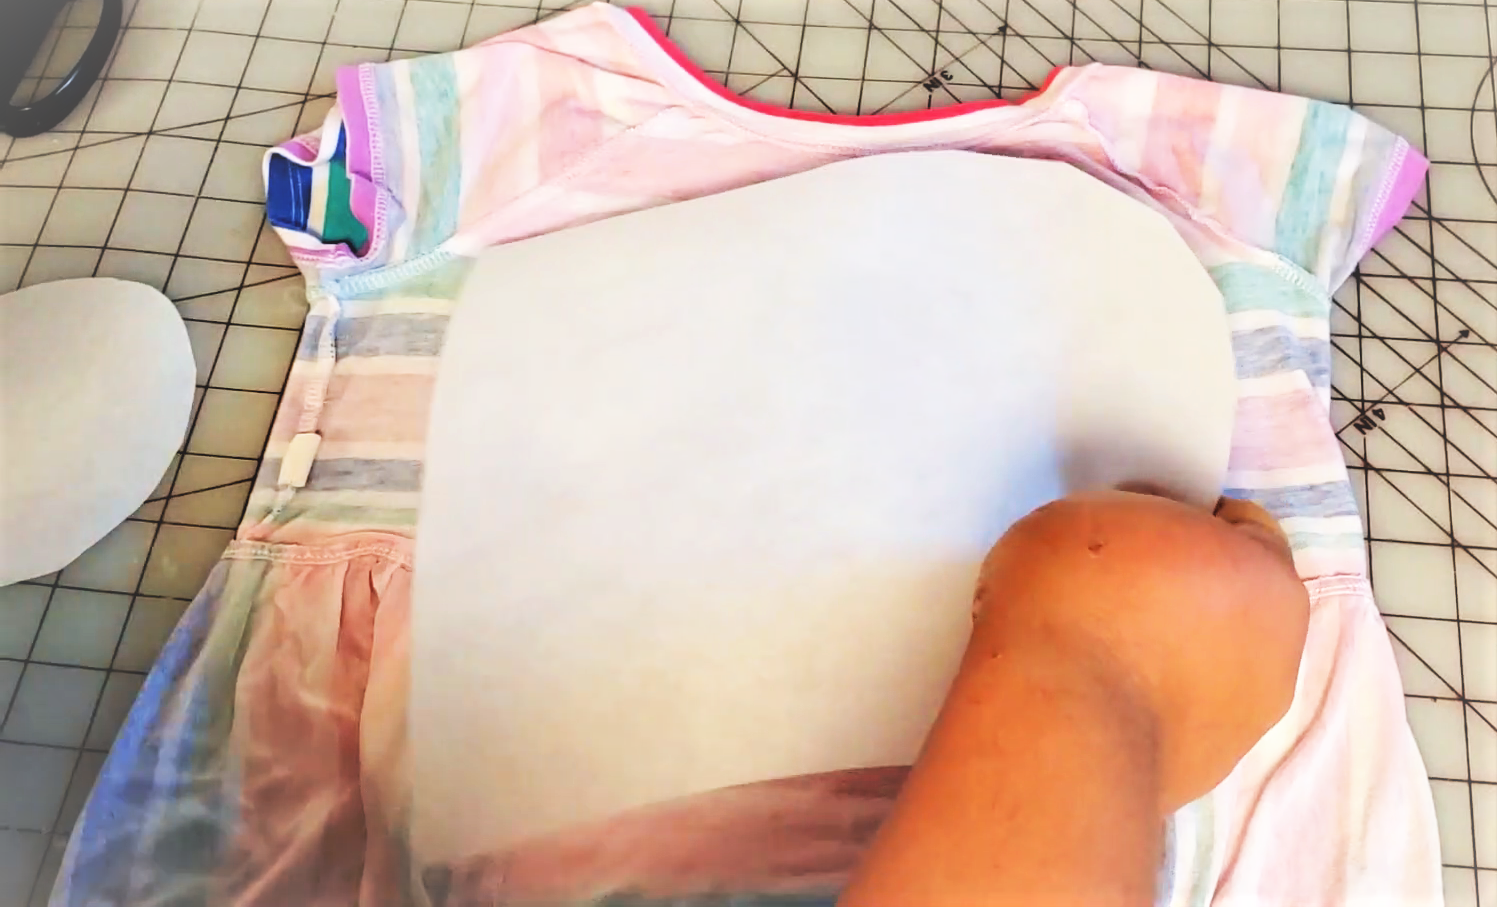
Reinforcing / Stabilizing
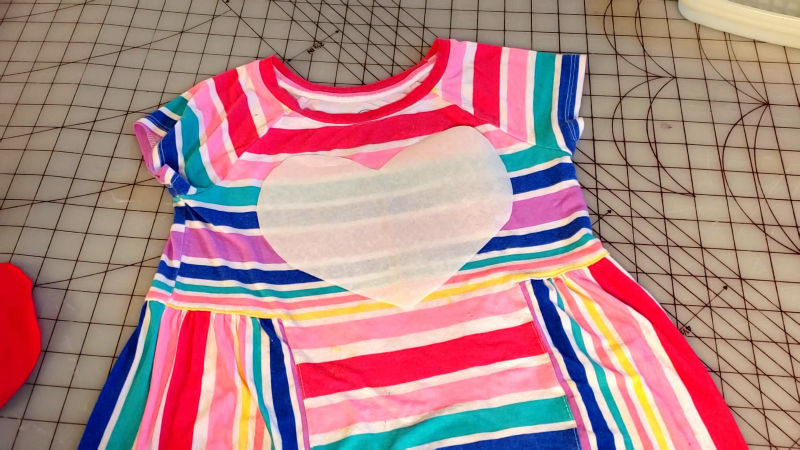
You could just head to your sewing machine now, and just sew the two layers together as is. This is pretty easy if you are working with a stable knit or woven. However, my project needs another step because the shirt fabric is so thin and lightweight. If I don’t add stabilizer, there is a really good chance that I could manage to stretch and distort the shirt and heart out of shape while sewing.
I am using the same tear-away stabilizer that I use on my machine embroidery. So when I’m done, I will just to rip it off and only a tiny little bit underneath the stitching will be left. You can also use cut-away stabilizer, or any non-stretchy fabric. A little more temporary spray adhesive and now that is stuck to my shirt. Time to sew!
Sewing
It’s time to sew! The first thing I’m going to do is replace my needle with a ballpoint needle. Ballpoint needles are specifically designed for knit fabric. They actually stitch between the fibers instead of cutting the fibers. I am using a size 11, but a 10, 11, or 12 (70, 75, or 80 metric) are all good sizes for this.
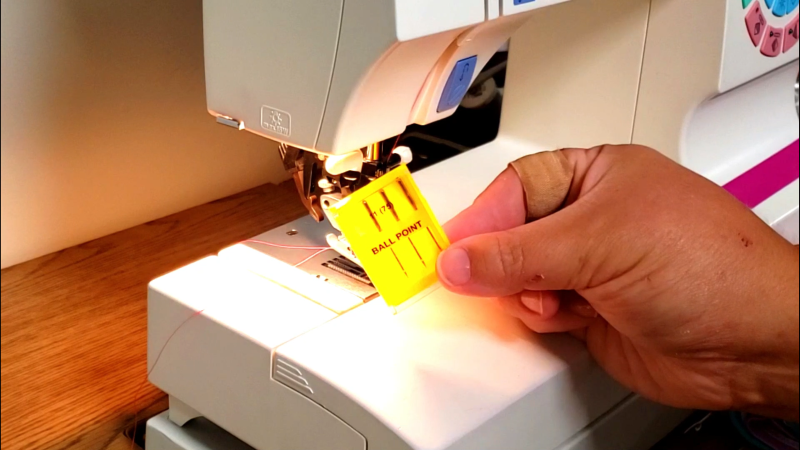
Have you ever had a shirt get little, tiny holes along a seam line? These holes are from the needle cutting as it was sewing. This happens when a sharp needle is used on knit, or if your needle has a burr. A new ball point needle will make sure it doesn’t happen to your project.
Can I use a universal needle? Sure, but it’s not the best choice. The point of a universal needle is half way between sharp and ball point, so they don’t do either job very well.
Want to learn more about needles? Grab a needle guide using the form below
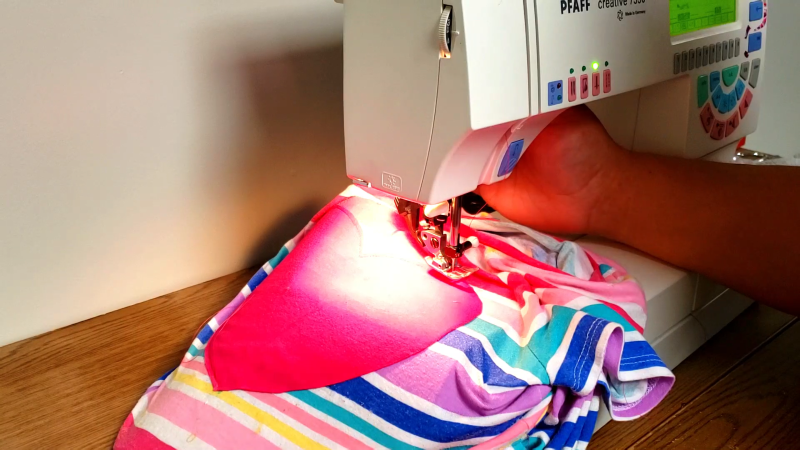
Back to sewing! When positioning the shirt under the sewing machine, it’s very important to make sure you are only sewing though one layer of the shirt, and checking often while you are sewing. I have accidentally caught the other side of a shirt so many times. So, check, check, check.
For the stitching I’m going to follow all the steps that a good machine embroidery file would have. An embriodery machine is programmed to do all these steps so that the satin-stitch is beautiful and smooth. You won’t see any lumps from the edge of the fabric and the satin stitch will look dense.
- Straight stitch
- Zig-zag stitch
- Satin stitch
Straight Stitch
First, straight stitch around everything. This holds everything in place before we really start doing much. I’m going to make my straight stitch a bit longer than normal: 3 or 3.5.
Are you thinking, “But a straight stitch doesn’t stretch!” You’re absolutely right. A straight stitch does not stretch. This part of the shirt doesn’t need to stretch much. It’s not along a seam line and it will be able to stretch on either side as well. So, it’s not really a problem. If you are doing this on a high stretch & close fitting garment, like a leotard or swimsuit, leave off the straight stitch. Go right to step 2, zig-zag.
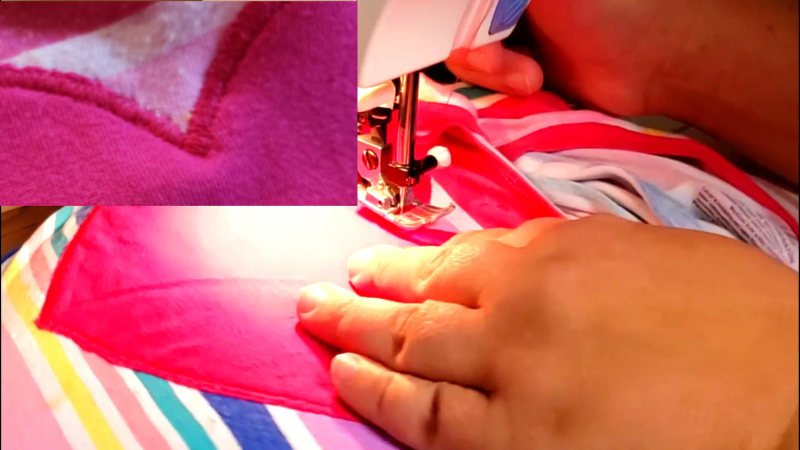
When I get to the corners, I stop with my needle down, lift my presser foot up and pivot a little, or a lot as needed. A heart has lots of curves and corners and crevices, so you need to take your time. Remember to make sure to keep the rest of the shirt out of the way. You can help any of these little puckers smooth out by just rubbing your finger over it. Lifting your presser foot for a moment will also help if drag lines and pulls form next to it while sewing.
I have gone around the heart one time now. I’m going to trim off my beginning threads, but I’m not actually going to stop my upper thread. I’m just going to keep going on to step 2, zig-zag
Zig-Zag
This time I’m going to do zigzag. I am using that the zigzag that my machine automatically does, which happens to be a 2 in length and 3 width. This step is really trapping that edge so it doesn’t pop up. Make sure you are sewing just off the edge of the fabric so that edge is completely sealed and stuck down.
I can be a little confusing of what to do when you get to points. You just need to think about which way the needle will be headed next after a pivot. On the top “innie” point, I make sure my needle is zig-ing toward the heart before I pivot. Then when I come out it’s going to zag the other way covering its self, and not stitching further into the heart.
The “outie” points are the opposite. Stop the needle as it goes away from the heart. Pivot and then the next stitch will overlap the other ones a bit, not leaving a gap. This may be hard to visualize or remember, so try it out. Make yourself a practice piece and learn how to navigate those corners.
Satin Stitch (not Satan)
The satin stitch takes a long time and goes really slow. If you don’t want a satin stitch, feel free to stop here. What is already done is perfectly acceptable. For very stretchy fabrics that also fit close to the body, like a leotard or swim suit, you should stop here. The satin stitch can inhibit stretching. I’m just going to keep going.
You want your stain-stitch stitches to be really close together. Really, really close together. That’s what makes it look like satin because it’s so smooth. Play with your machine’s settings and take it down probably farther than you think you need to. You can absolutely give this a try on a scrap piece of fabric to give you an idea of what you want.
My machine is set to .5 length and 3.5 width. I could have probably gone smaller, but this was ok. My tension is set right about three, because that’s my setting for button hole, which is also a close zig-zag. If your machine has a buttonhole tension setting, that would be a great option to use for satin stitch. You want the top thread to pulled slightly to the bottom, as there is a tendency for the bobbin (bottom) thread to get pulled to the top when doing a satin stitch.
Remember, if you notice your knit along the edge of presser foot kind of getting bunched, just lift up your presser foot and smooth it out.
Follow the same steps above at the “innie” and “outie” points to make the stitches overlap and not have gaps.
Fixing Problems
I didn’t quite catch all of the knit as I went around the corners. I can go in with my scissors, and carefully trim away a little bit of that fabric. You’ve got to be super careful not to cut the shirt though. If you cut the shirt, what you can do is you can go back and just make the satin stitch wider and cover up any little holes that you managed to put in it. But let’s not try to put more holes in it. After all, that’s why we’re here in the first place, right?

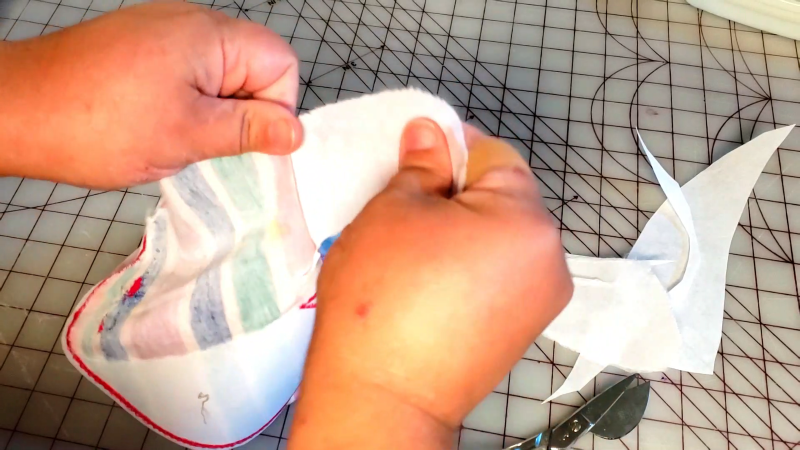
Remove Stabilizer
Let’s remove this stabilizer. Just grab an edge and give it a pull. If it doesn’t release easily, try another angle or a ripping motion.
Since my stabilizer is not tearing well, I am going to roughly cut out around the heart. I love my duck bill applique scissors from Gingher, and Tula Pink for this. I just love their shape. You don’t have to use these fancy scissors. I just really like them.
Now I will try tearing out the center. It worked! The center removed much easier. There is a little bit of stabilizer that’s still in the seam, but it will come out easily once washed.
Because we’ve taken that stabilizer off the back, it means the whole shirt is still stretchy, which is so wonderful. It means this shirt can be comfy, cozy, and get lots of wear because it’s comfortable.
So, there is our big, beautiful heart knit applique, covering up those enormous holes. I still don’t know how she managed to put so many holes in this shirt. But she loves it, and I’m here to make sure she keeps getting to wear it.
Do your kids put a lot of holes in their clothes? I want to hear about it. Tell me how you fix them. Thank you for joining The Fabric Ninja and have a wonderful day.

Video Tutorial
I enjoy checking your website. Thanks for your time!