
I LOVE to sew useful things! Projects that I get to see and use every day make me happy, so what better project than a cord wrap and phone charging pocket for a phone that I already use every day. The inspiration for this project happened when Aimee (from Sewing for Geeks) and I were deciding on a teen focused sewing class. Tech accessories seemed like a great fit for the modern connected teen. The Cord Wrap and Cell Phone Charging Pouch are actually perfect projects for anyone learning to sew, because they’re made of felt. Felt edges don’t unravel, making for an easy and forgiving project for any new sewists.
The supplies for these projects are easy to get and inexpensive. Better yet, you don’t need a sewing machine, so you can work on your project anywhere. You totally can use a sewing machine to make the cord wrap and cell phone holder, but you don’t need it. In this post you will learn how to make the Cord Wrap. If you wanted to make the Cell Phone Charging Pocket head over here!
Get the Cord Wrap and Cell Phone Charging Pocket patterns and cut files instantly by filling out the form below. They are available in SVG for those with cutting machines, and PDF for those who want to cut it out by hand.
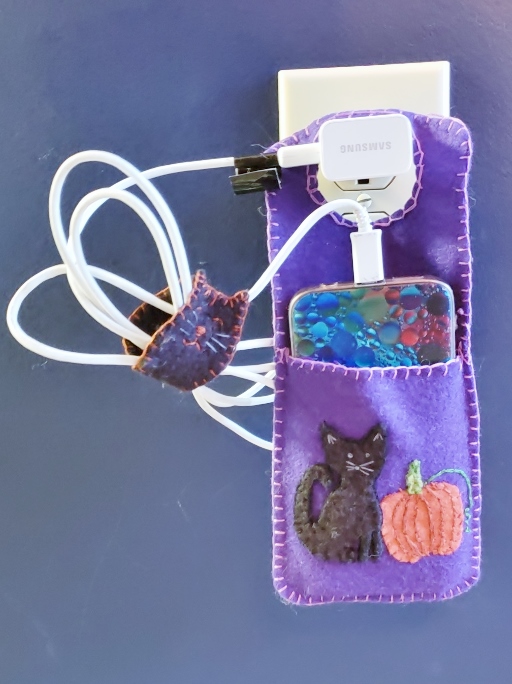
Update 12/2/19: We’re seamstresses and not electricians, so very thankful for recent advice from some of our followers who are electricians. A hook (like this Command hook that won’t damage a wall) will not put stress on your outlet or your charging block. It can also be hung from a bedpost, doorknob, etc. This will protect your phone, your charging cables, and your hand-sewn phone accessory. There aren’t any changes to the construction, just remember to select the size or shape of your hanging hole to match your chosen hanger.
Do better with video? Watch it here!
Ready to get started?
Get the Cord Wrap and Cell Phone Charging Pocket patterns and cut files instantly by filling out the form below. They are available in SVG for those with cutting machines, and PDF for those who want to cut it out by hand.
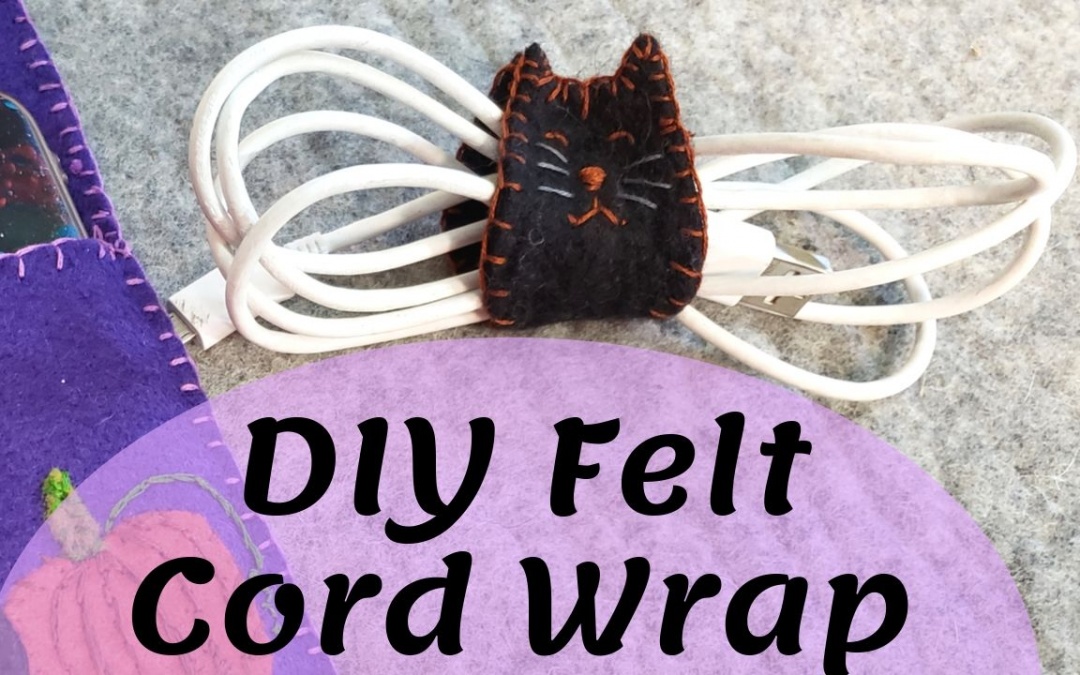
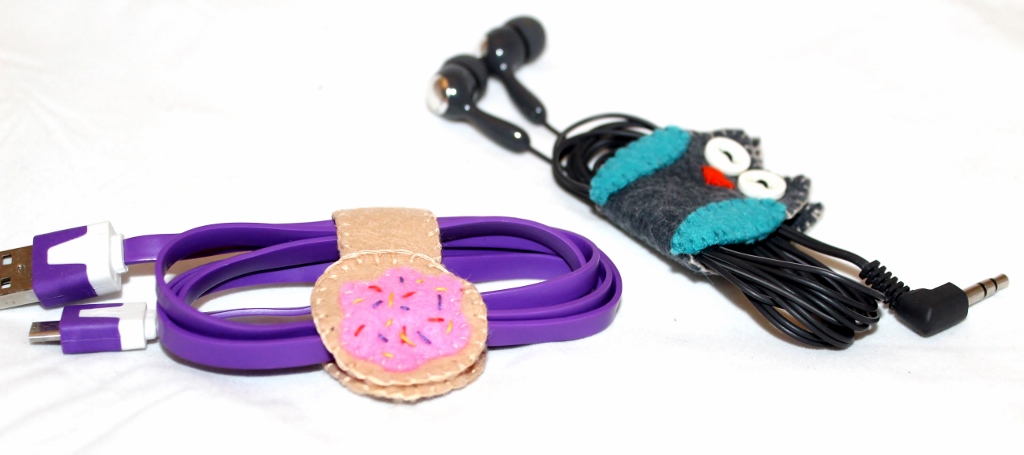
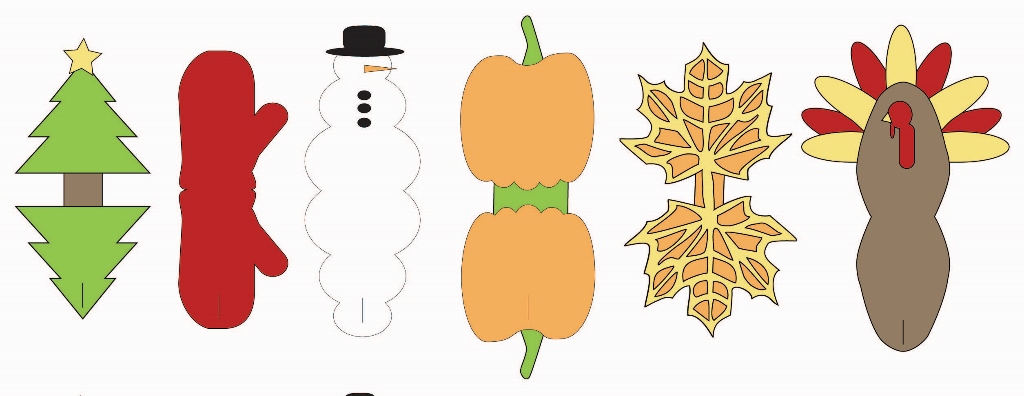
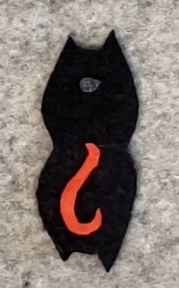
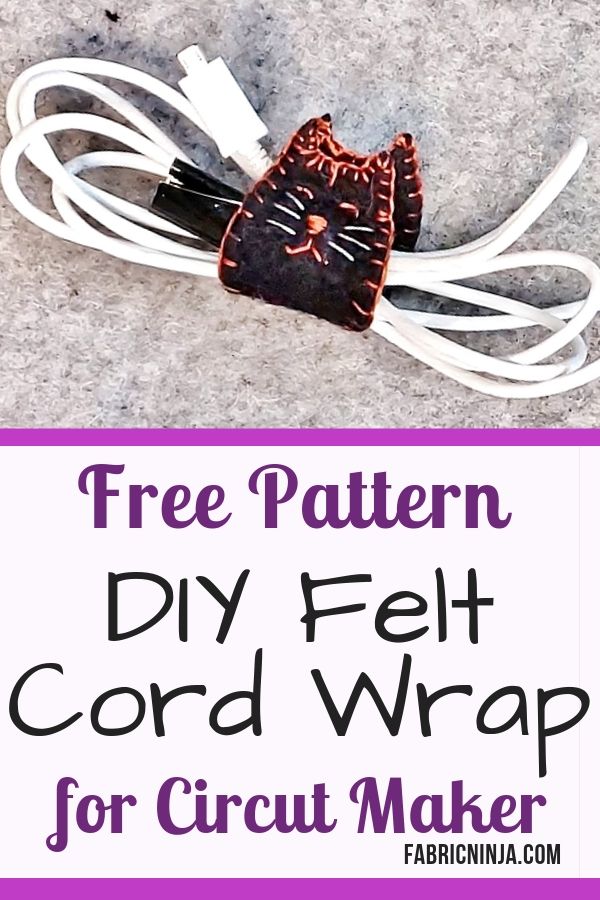
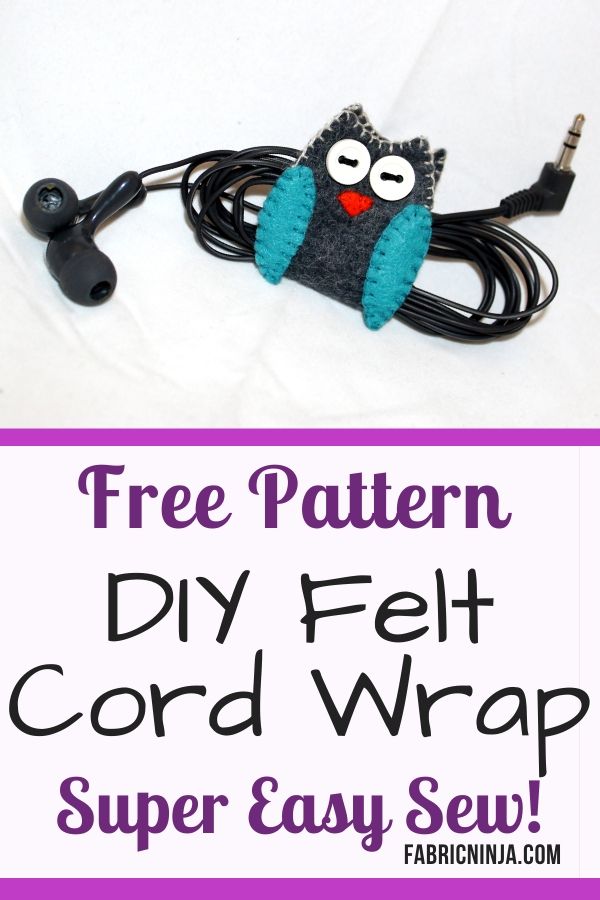
I decided to do a Halloween theme for my accessories; I’m kind of a Halloween junkie. I made an adorable black cat cord wrap and a cat and pumpkin cell phone charging pocket. Halloween not your jam? That’s ok! The pattern sheet has pig, cat, dog, or owl shapes. They are just a way of getting you started. You can personalize these in any way you want. I also have a set of fall decorations, leave, pumpkin, and turkey you might like. If you are in to Halloween and fall like I am. Or Christmas ones a snowman, mitten, and Christmas tree.
Want to make the The Cell Phone Charging Pocket? Click here to go to that blog post.
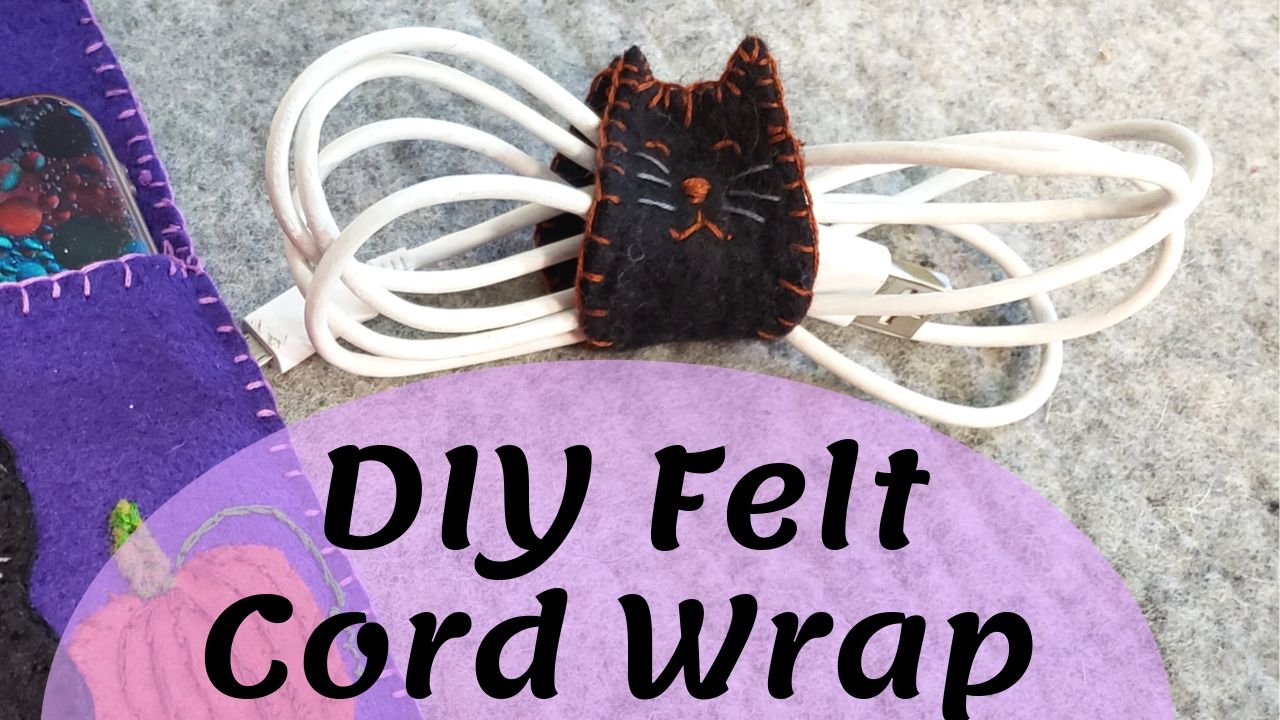
DIY Felt Cord Wrap
The cord wrap is easy to use and keeps your power cord or headphones from getting tangled. Just place your looped cords in the middle and button around it all or button through the middle of the loop.
Supplies
- Felt: One sheet main color, additional felt scrap in accent colors (See info below about what kind of felt)
- Embroidery Floss: 1 skein to match or contrast main color. Additional colors for accents.
- Crewel Needle: Has a larger/longer eye that will make threading your needle easier
- One Button.
- Cricut note: The buttonholes have already been cut for you and are .4″ long. A 3/8″ (9mm) button will fit nicely.
- Tech accessory Pattern Sheet. Available in my Resource Library.
Basic Sewing Supplies
- Scissors
- Needle threader (optional)
- Marking Pen, Chalk, or Marker
- Pins or Temporary Spray Adhesive Like Dritz 403
If you’d like to know more about my favorite sewing supplies, look through my resources page.
More About Felt
Felt can be made of several type of material. Wool or wool blend (Rayon & Wool) felt is generally a little thicker than poly felt, and is really nice to work with, so it is what I recommend. Can’t find wool felt? That’s ok, use what you can find. Craft felt is normally 100% Polyester and often quite thin. Eco felt is also plastic, but tends to be thicker. Make sure that you don’t get sticky back felt, it is not fun to sew with. You can also Upcycle wool sweaters for felt by putting them through the washer and dryer.
Marking Felt
Like fleece, felt can be difficult to mark. Sharpie works really well on felt. If you choose the right color, it will just darken the felt a bit, which makes the marks easy to hide, if you don’t cut all of the marking off. You can also hide your marks on the backside.
Assembly Directions
These instructions are written for a person sewing and cutting by hand. If you are using your cutting machine, upload the SVG file to Design Space, then remove all the pieces you don’t want to use. For example, if you are making the cat, you can hide or delete the owl and dog pieces. Then press cut, and prepare the mats as needed. The Cricut Maker does a great job cutting felt with its rotary wheel.
New to Cricut? Watch this video to learn how to upload the files to Cricut Design Space.
Step 1: Print Pattern and Check Scale.
Print your pattern out at 100% / No Scale / Actual Size; whatever option your printer has. On the printed page you will find a square that is marked with its size. Measure it to check that it got printed the right size. The pattern sheet has the charging pouch and the cord wraps on it. You can ignore the charging pouch pattern for now. Find the post about it here.
Get the Cord Wrap and Cell Phone Charging Pocket patterns and cut files instantly by filling out the form below. They are available in SVG for those with cutting machines, and PDF for those who want to cut it out by hand.
Step 2: Pick your Pattern
Now is the time to think about what you want your end project to look like. If you’re not feeling super creative right now, you can use the pattern sheet to give you a pattern for a pig, a cat, a dog, or an owl. You can get all these animal shapes from the same template. Just use the end you need and place the center dashed line on folded fabric.
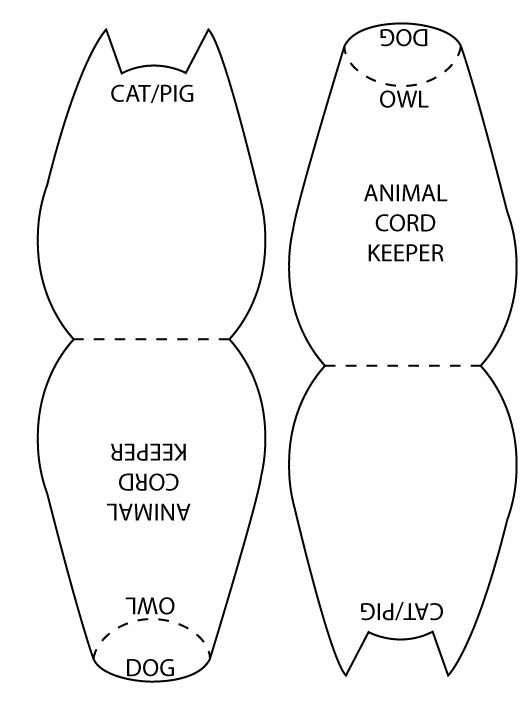
When the end with two points is up it can be used for a cat or a pig because they both have pointy ears. So you can use this end of the pattern piece to get either of those animals. And if you would like an owl, you turn it over, and use the dotted line to give you that nice owl swooping ear shape on the top. If you want a dog it’s actually rounded at the top, but the dog appears when you put it upside down like that. And then you can put your ears on, the dogs eyes, and the nose. So you can use this pattern piece to create any of the animals I’ve shown you here or quite frankly any animal that you can imagine. This is just a jumping off point for you.
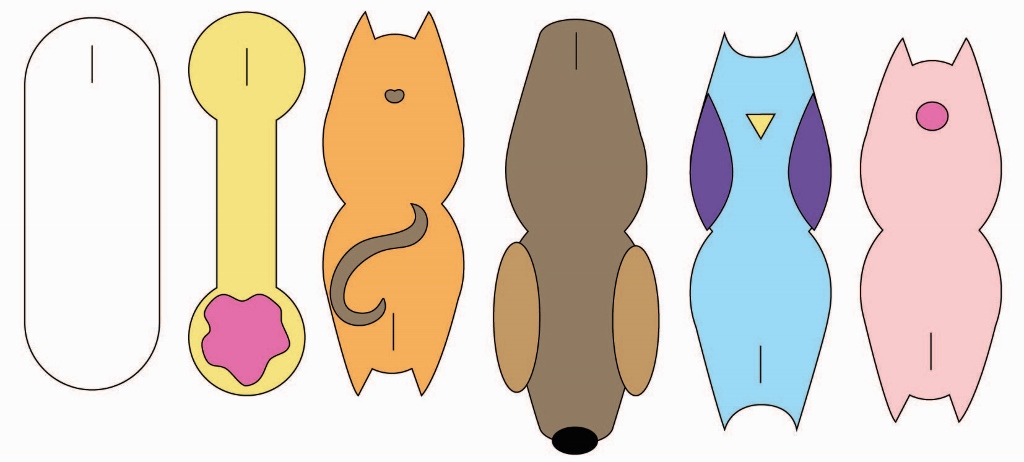
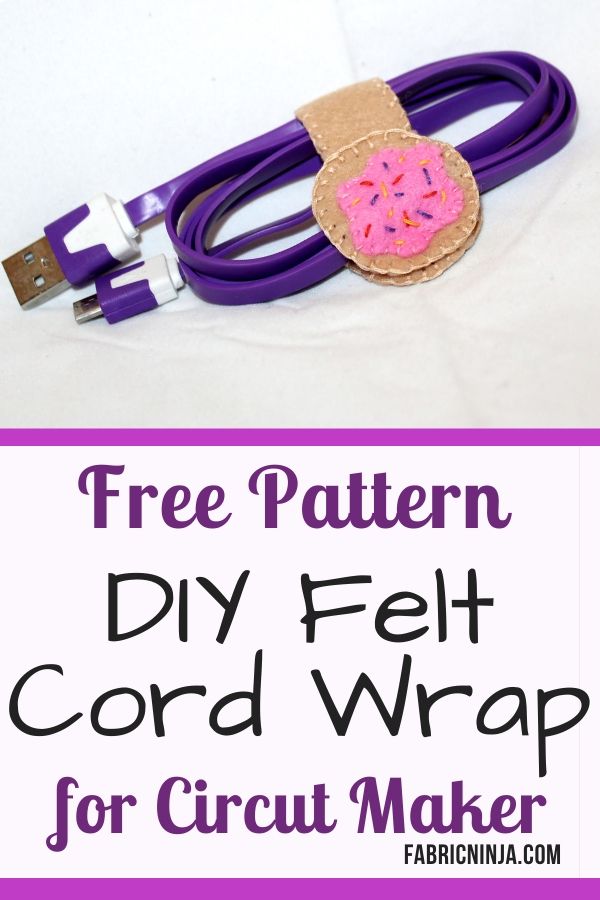
Not into animals? How about a donut or a blank canvas that you can decorate with a sports team logo or your initials? Your design can layered felt pieces, or made of one felt piece and only embroidery on it. I also have a set of fall decorations, leave, pumpkin, and turkey you might like. If you are in to Halloween and fall like I am. Or Christmas ones a snowman, mitten, and Christmas tree.
Take a moment to design and cut out / make pattern pieces for your embellishment.
Step 4: Cut Felt
Lay your pattern on top of your felt and hold in place with pins, tape, or temporary spray adhesive. Trace your pattern pieces and cut them out. Also cut out any embellishment pieces, such as a tail or wings.
So I have a black piece of felt here and I’m going to put the cat pattern piece on it. You can pin this in place, tape, or use some temporary spray adhesive, it just makes my life a little easier. Now I’m going to fold the fabric in half along the center and cut around the outside edge of the pattern. You can also trace it then cut. Just make sure that the felt is large enough to cover the pattern piece on both layers.

Next I will cut out an orange cat tail and a cat nose. The nose piece is super tiny, I don’t really suggest you try to actually cut that pattern piece. Just know that you can make a little bitty circle for the cat nose or you can just embroider the nose on, which is what I ended up doing. So cut out any other pieces that you want.
Step 5: Layer it up
Place all cut pieces on top of the main cord wrap body. Check their size and location and adjust as needed. Remember, because this is going to fold around the cords, the head and butt of an animal shape will be upside down from each other when it’s flat.
Think about where the buttonhole will be, generally on the back side. Mark your buttonhole location now with chalk or a sharpie. It will be just a bit longer than your button. You don’t need to cut the hole yet, just make sure you know where it will be. Not too close to the edge. Move elements away from the buttonhole area, or plan to cut them so the buttonhole goes through them. Cricut note: The buttonhole has already been cut for you. They are .4″ long. A 3/8″ (9mm) button will fit nicely.
Now set aside your small pieces. Be careful where you put them, so they don’t disappear.
Step 6: Reinforce outside – Blanket Stitch
So the next step is finishing these outside cut edges. The edge is going to get a lot of wear over time and a line of stitching along it will definitely keep your cord wrap from stretching out of shape. I am going to use blanket stitch, but you can do another stitch if you want.
Now it’s time to load your needle. Cut a length of embroidery floss in the color you want to use first. A good length is from your finger tips to your elbow. Thread that is much longer can get more easily tangled
.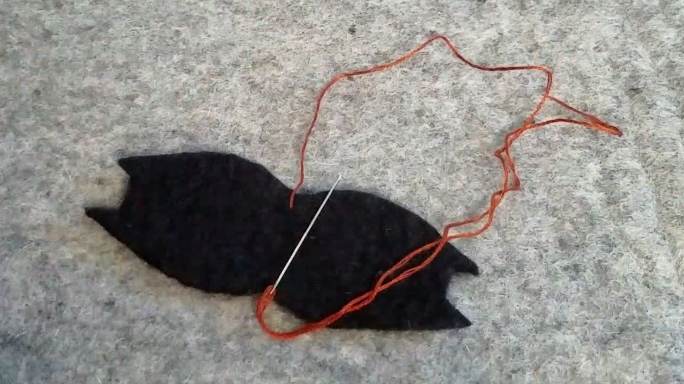
Divide your thread, if desired. Embroidery floss has 6 strands/threads that are lightly twisted together. Spin the floss in your fingers to divide the threads and choose how many you want to sew with. I used 3 strands of embroidery floss for most of my decorations (the whiskers are 2 strands). If you like the thickness of the lines I made, try 3 strands to start with. You can use 1 thread all the way up to 6 threads.
Thread your needle. Having trouble? Try some spit on the end of your thread or use a needle threader. Make knot in the end of your thread, in your preferred method. I make a quilters knot, but you can use the spit and roll method. Just make a knot.
Blanket Stitch: Also called Buttonhole Stitch
- Starting with my thread coming from the back to the front.
- Take a stitch next to the first, in the front and out the back, with the needle pointing upward.
- The needle is going to go through the center of my thread loop (tail).
- Pull up the slack, not pulling too tight. That is the first stitch.
- Make the next stitch, also going to go through the center loop again.
![]()
That starts to create a line of thread that’s going along the top edge and lines that are coming up. This will protect the top edge of the felt from being roughened up because this thread actually sits on the edge and protects it.
So you just keep taking another stitch going through that loop again. We just keep taking those stitches and letting that thread lay right along the edge.
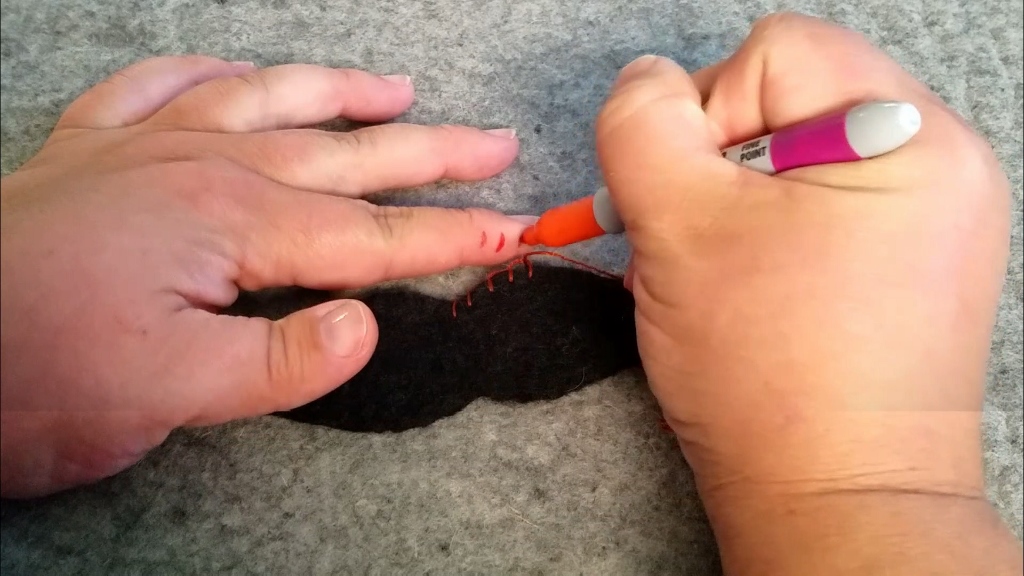
Even Stitch Hack
So one of the things to make blanket stitch look really beautiful is to have all these stitches be the same length apart, and that’s hard. It’s something that people who have sewn for a long time just kind of eyeball and are able to do, but it’s not something that you’re expected to do the moment you start doing this type of embroidery work. So what you can do is you can help yourself out. You can either mark yourself dots along the stitch line, to help keep everything even. Or you can actually just mark your finger. When you go to take a stitch, your finger is right there, and you can follow it and just take a stitch at the next mark on my finger. A super easy way I can keep all of my stitches even as I go.
Okay I’ve made it to the ears. And these ears are pretty tiny, so I have started to make my stitch smaller. You can see it’s kind of wide here, and it’s gotten narrower as I got up to the top because I want to be able to do several stitches on these ears. Remember I said everything was about keeping it even, well sometimes you don’t keep it even – on purpose.
![]()
Thread getting tangled? Try ironing your thread or use bees wax / thread conditioner on it to help it behave better. I tend to just fight with mine, but these hacks really work.
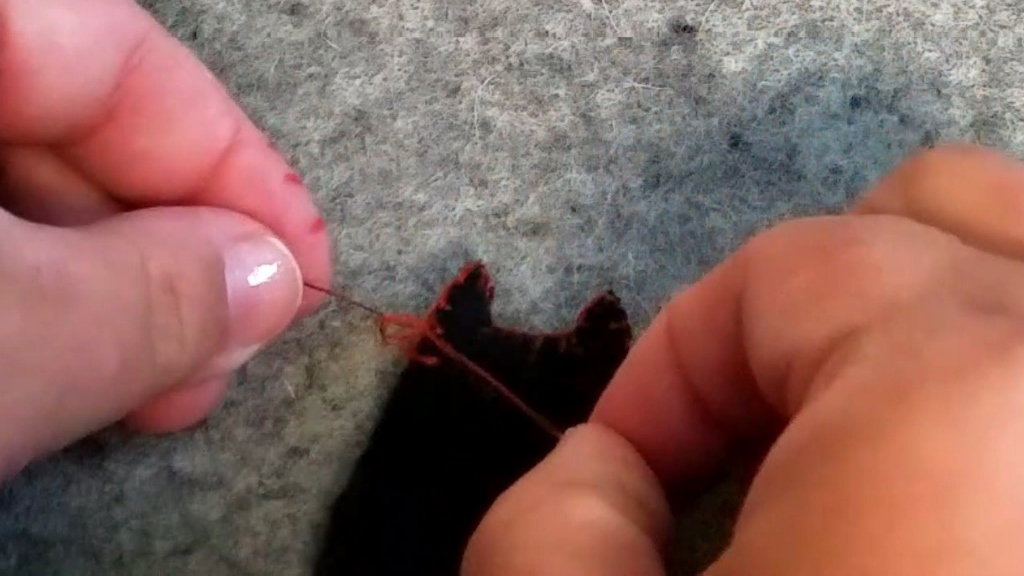
Running out of thread?
When you are ready to start or stop your thread, it is pretty easy. You might be running out of thread, or just want to change color. Either way it’s the same. We are going to hide our “dirty work” on the back.
So, I’ve made it around one side of the top and I’m running out of thread, I just took a stitch and my needle is on the back. I turn my project around so I can see the back. Now I’m just taking a shallow stitch in the felt, not going all the way through the thickness, and I’m not pulling too tight. I want to be able to grab that thread loop when I start my new thread. I’m just anchoring it.
Now I’m going to take a little stitch around a thread loop and slide my needle through the loop. If you have lots of thread, go through that loop a few times. When you pull it will create a knot. If you are running out of thread, take the needle off and split your threads. I have two on one side and one on the other. Now I am just going to make a knot twice.
You may have a different way that you prefer to end off, that is totally cool. Do it the way that you want to.
To start a new thread, fill your needle and knot off the end. Then take a stitch basically where we were from the back to the front. You can choose to repeat the stitch that you were on, or not, it’s really a personal preference. You can grab that thread loop that you have on the back and go through it so the line of thread along the edge continues. If you leave enough slack you’ll be able to get your stitches the same length.
Now we’re up for the next stitch, and just take it right here, and then I can continue on like normal.
Step 7: Decorate
Place any cut out felt decoration in place. Remember the cord wrap folds in the center around the cords, so when you look at it flat the head and butt will be upside down from each other. Remember to think about the buttonhole. If you avoid covering it, it will make sewing the buttonhole easier.
Once you like where they are, give them a bit of a rub. Felt sticks to felt, so that will mostly keep them in place while you sew. If your pieces are not staying still enough, you can pin, use a glue stick, or a spray baste.
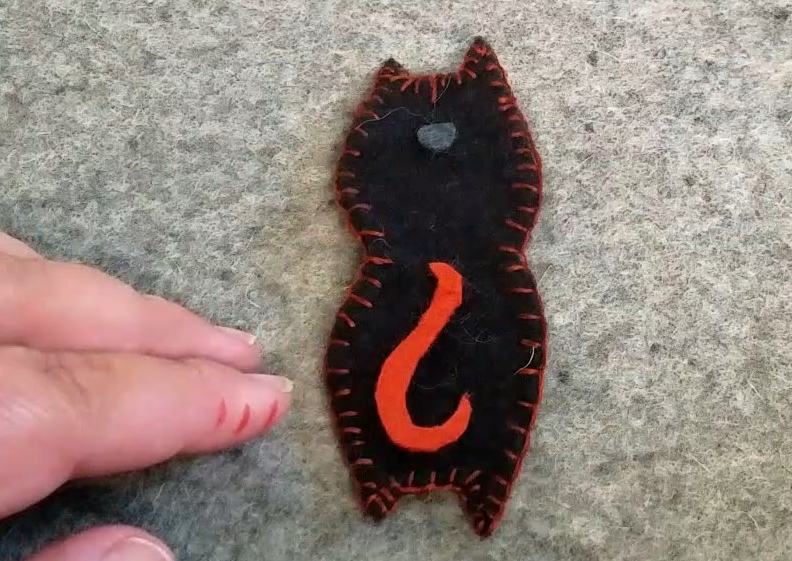
Starting from the back of the felt, sew around your layered felt pieces to hold them in place. Then add details like eyes and nose.
I have threaded my crewel needle with three strands of embroidery floss again, in my main contrast color, and I have a put a knot in the end. I am going to so some line work for the cat’ss face and attach the tail with whip stitch along the edges, and chain stitch down the center. Then I change my thread color to grey, using 2 strands for the whiskers. I make eyebrow by creating a horizontal line where each one goes, and then make a tiny stitch in the middle that creates the raised curve shape.
The number of stitch names can feel overwhelming, but you don’t have to worry about them. Sew in any way that feels right to you. Stitches were invented by people trying things out, so just stab that fabric till you like it.
Step 6: Button & Buttonhole
The button and the buttonhole is going to be the last thing I add. You can use pretty much any random button that you have. A 3/8″ (9mm) button is a nice size and also works for the pre-cut buttonhole (Cricut version)
Basic steps:
- Mark buttonhole. It will be just a bit larger than the button.
- Test the button through it
- Bind button hole
- Align everything, mark center through hole for button.
- Sew on button.
Buttonhole Stitch
You actually have already done this, it’s the same as the blanket stitch, but just faces the other way.
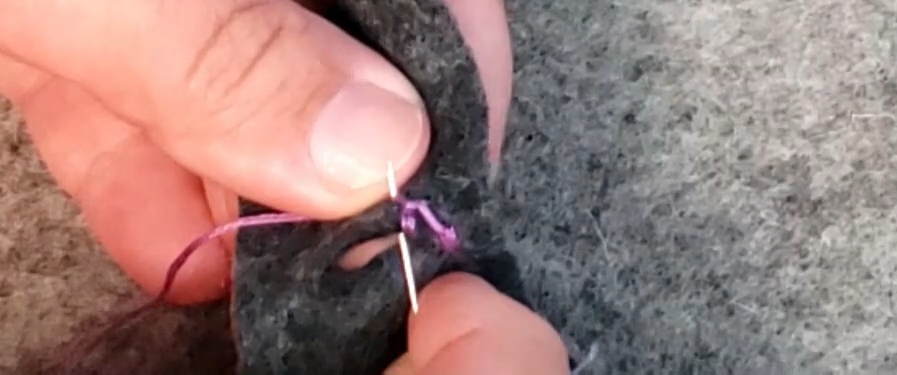
I start with pushing my threaded and knotted needle from the back to the front at one end. Then I start by sewing a stitch right across the end. This strengthens the last part of the cut so the cut can’t go any farther and rip. Stop with your needle on the front side.
Now I’m going to do the stitches just like I did before with blanket stitch. In this case I’m going to have that running thread be on the fabric instead of the edge. Poke your needle through the cut and poke upward again 1/4″ to 1/8″ from the cut button hole. Pull the needle out catching the thread loop just like before.
Now that I’m at the other end, I’m going to take some stitches across to make sure that it can’t rip this way either. I’m going to turn around and I’m going to head back the other way.
Here we go, we got a button hole. Push your needle to the back side and tie it off in your preferred method.
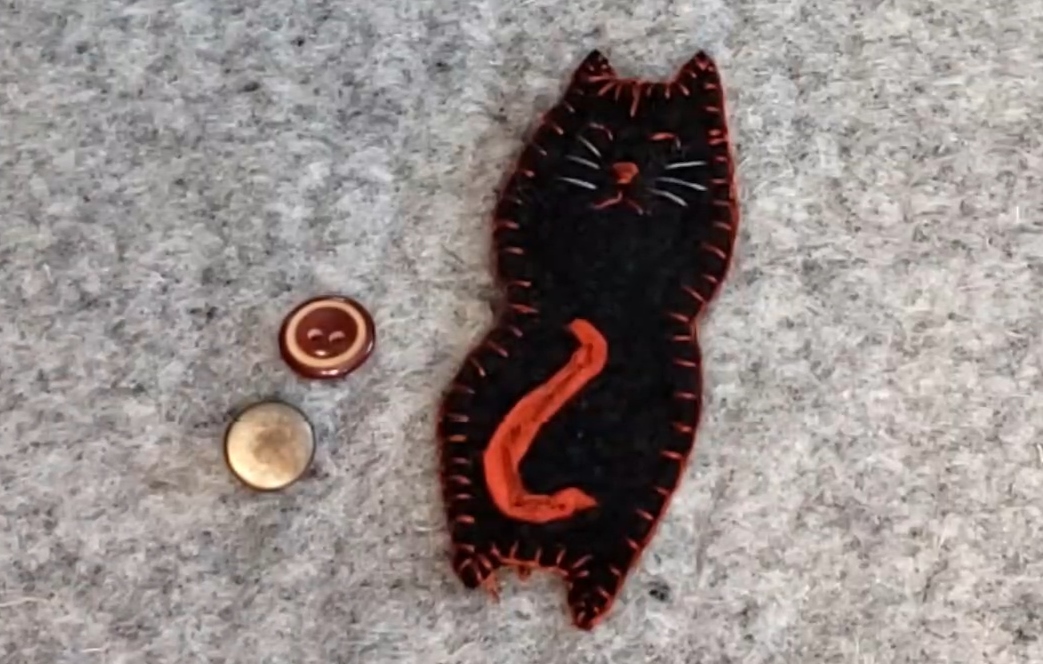
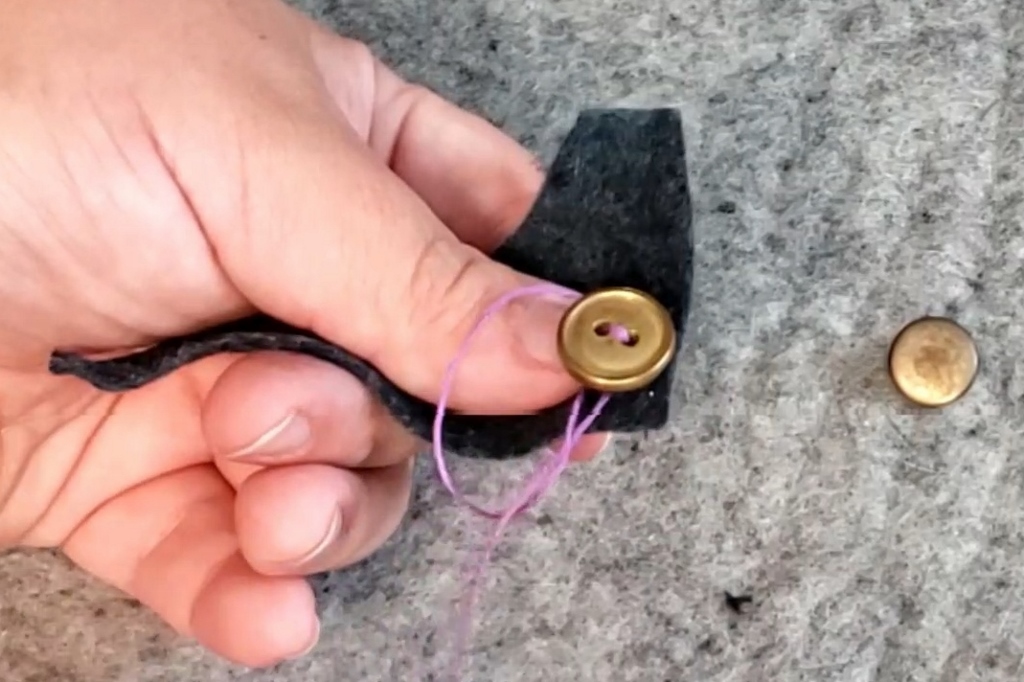
Button Time
Now that you have a buttonhole it’s time for the button. Fold you cord keeper, lining everything up and mark a dot through the center of the buttonhole. This is where your button should go. This button is going to actually be sewn on the back of the cat face, so that when this folds over, it will go through a buttonhole that’s located on the cat butt.
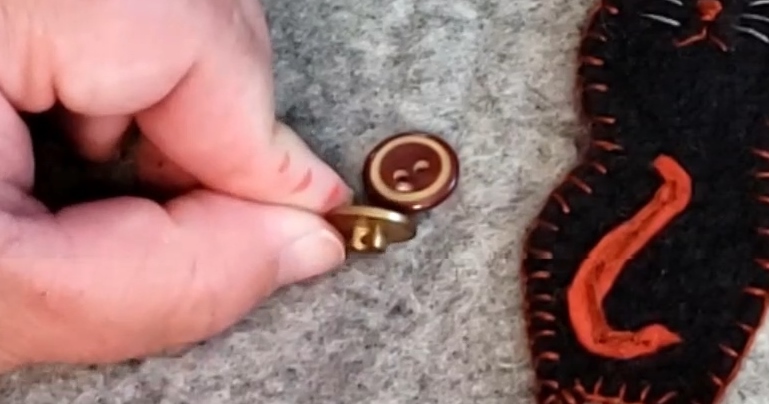
There are two basic types of buttons, a flat button, and a button with a shank which is the part that stands up underneath. The shank lifts it up so that when it’s buttoned the shanks to go through the thickness of the fabric so that it sits nice and neat. This button does not have a shank, so we will have to create one as we sew. Because the shank button is an easier one to sew on, you just sew it on. I’m going to do the hard one.
This is a flat button sewn with a shank. This button is sitting smooth to the surface, but if I unbutton this, you can see that it sits above the surface. It has enough height to make up for the thickness of the felt that’s going to be sitting under it. So when I button this, that felt sits under there and is actually quite thick.
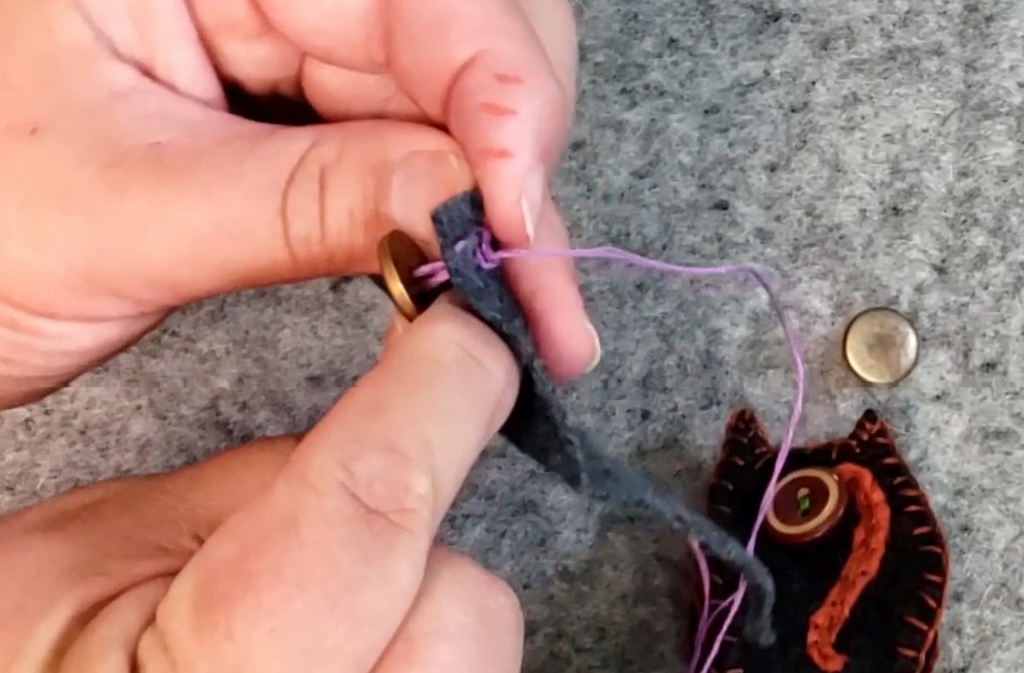
Because I am sewing into the back of the cats face, I need to attach my thread by taking shallow stitching and tying to threads that are already there. Buttons get a lot of stress on them so you want to attach it well.
Next up you’re going to take a stitch from the bottom through your button and back down though another hole. Now take a shallow stitch into the felt or around other thread.
This is where everything can go wrong. While you’re pulling things up you don’t want to pull tight. You want to leave some slack. You want to leave enough room which is the thickness of the fabric you’re going through. Here I’ve pulled tight and there’s just not any room under it for the felt to be which means that over time this button will end up breaking cause it’s under too much stress.
So I’m going to take more stitches through the button. It’s very easy to pull too tight. Sewing over something can also help keep that space. So you could put a matchstick under the button or a piece of fabric along the edge to keep you from sewing too tightly.
So every time I take a stitch, I try to pull very loosely and then wiggle it to make sure there’s still a lot of room.
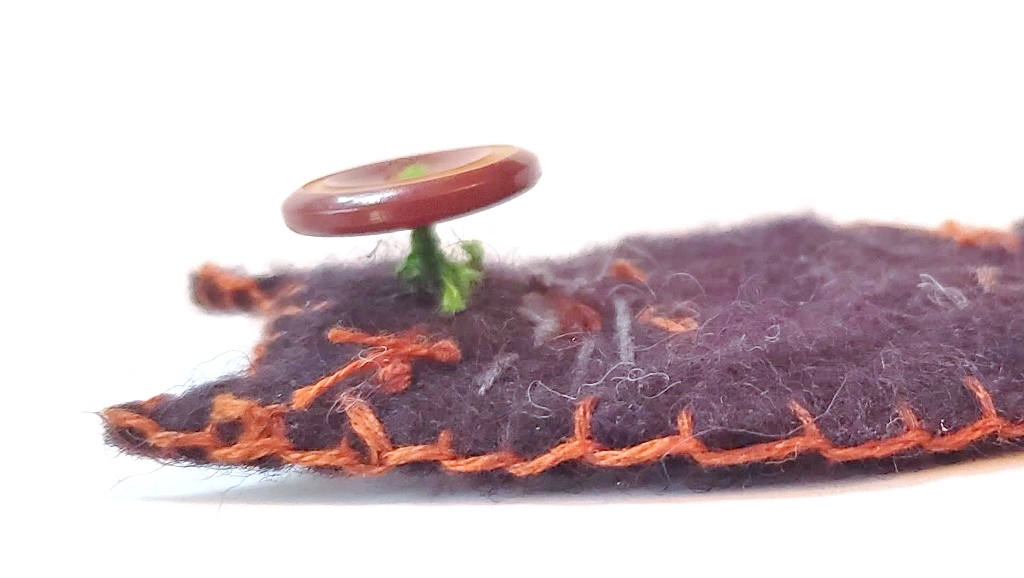
Now my button is attached it’s time to make the shank. I end with my needle and thread just under the button. Then I start wrapping thread around the stitches. I’m going to go around and around and around. This is easier if you put it down, you kind of hold your thumb under the button and you just start making passes. That will wrap around those threads and make a shank or a stem.
Go around as many times as you need, then secure it in place. You can secure it on the back if you happen to be able to do that on your project. The cat doesn’t really allow you to go all the way through because that would mean you were going into the cat’s face. So I secure those in kind of the same way as I made the shank. So I’m going to go around the button and then I’m going to cut through the loop, one, two, three time. I’m basically making a quilters knot, but underneath the shank of the button.Then I pull tight and then there will be a little knot underneath my button.
There we go, now you have a button!
Let’s try my button through that now. Will it fit? Ta da it will fit, and that shank is beautiful, it makes everything sit very cleanly. Who are you going to share this project with?
This adorable cord keeper is ready to hold onto your charging cable. Lay it inside your kitty cat, and button it around. Now your cords stay perfectly gathered together. If you have also have a cell phone charging pocket (TUTORIAL HERE), when you’re not charging you can just stick those cables right inside the pocket and hang this up so that you have it exactly where you need it.
Thank you for sewing along with me! Remember to check out Aimee at Sewing for Geeks. I love collaborating with her!
Get the Cord Wrap and Cell Phone Charging Pocket patterns and cut files instantly by filling out the form below. They are available in SVG for those with cutting machines, and PDF for those who want to cut it out by hand.
Want to remember this? Pin this Felt Cord Wrap tutorial to your sewing Pin Board.
I sew all the time and “never” even thought about doing something as simple as this. So glad I saw your course. It reminded me that even though we may be doing something for years (or decades), it’s never too late to learn something new. Think I’ll be making some of these real soon. Thanks for the reminder of using those basic skills learned long ago to put back into play and make people smile. And your instructions are spot on for someone just learning the basics.