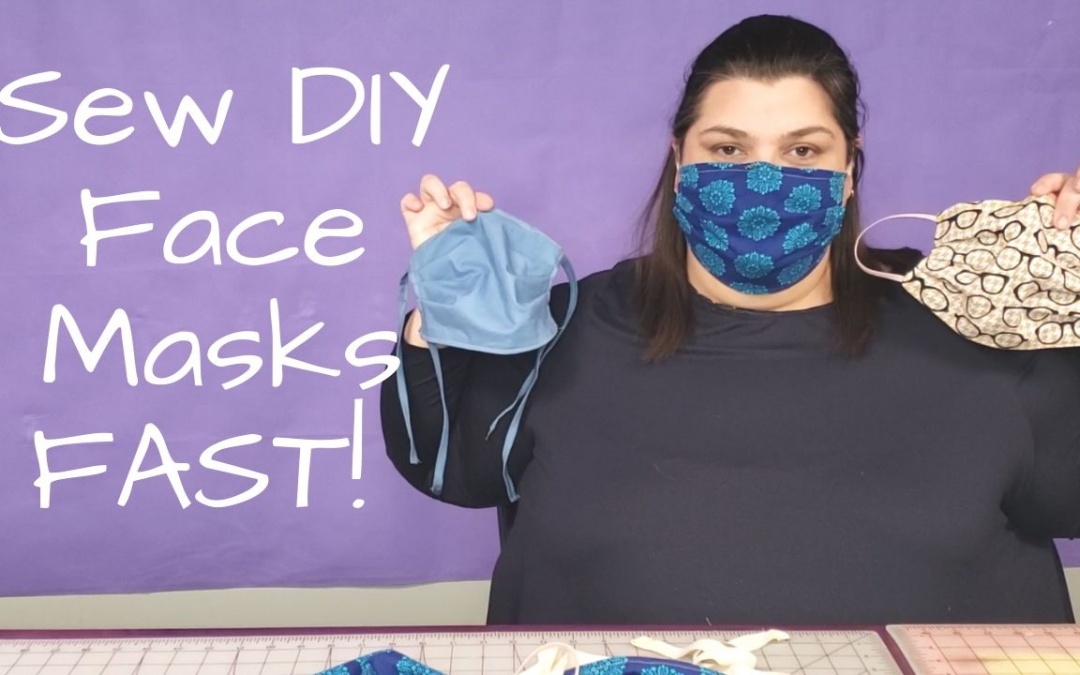
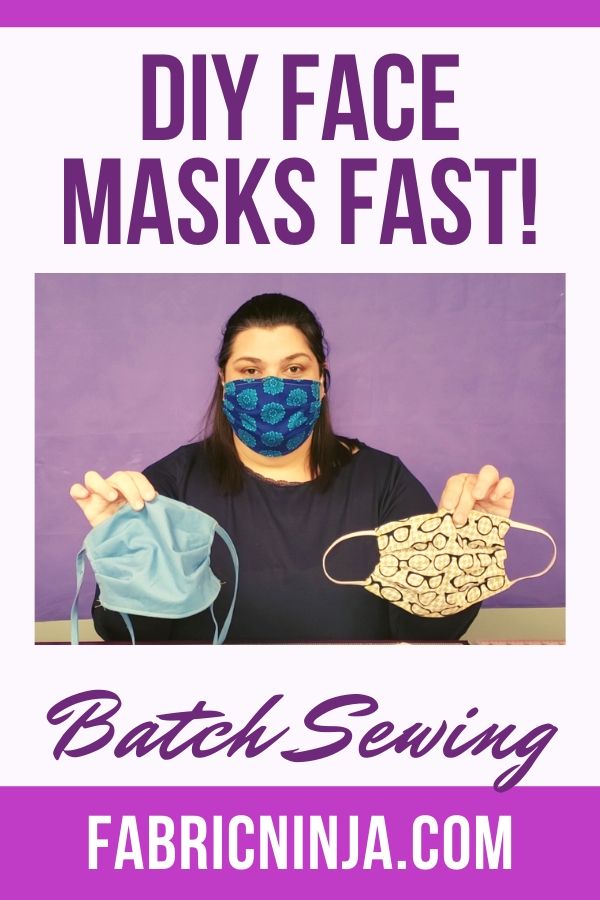
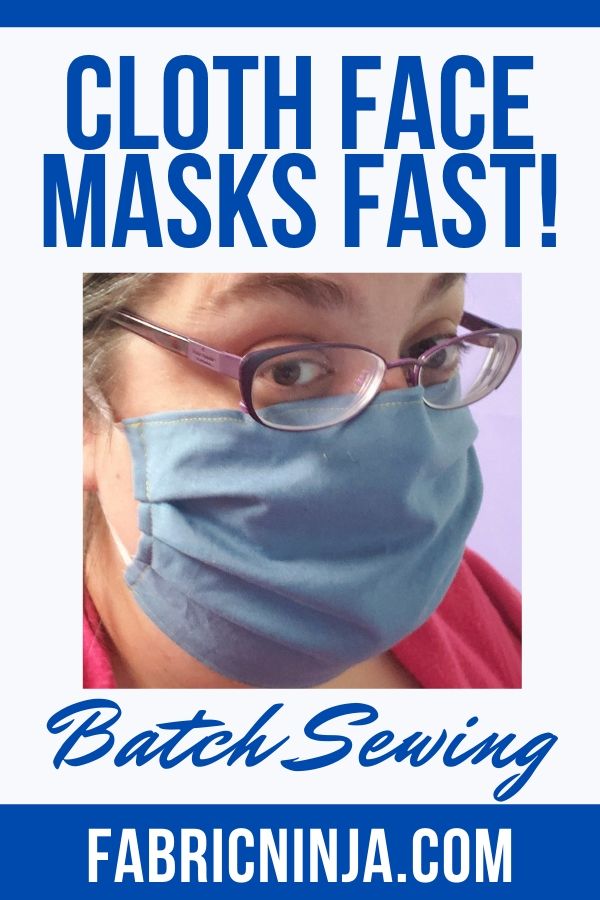
Here is the gist, face masks are in short supply for healthcare professionals. The CDC says that cloth face masks are better than nothing. So let’s get to making some face masks help protect medical works, extend the life of N-95 masks, and for immunocompromised people. Heck, everyone can wear a DIY face mask if they want. These instructions are specifically for batch sewing, making lots of DIY face masks as quickly and efficiently as possible to meet the needs of our brave and hardworking health care staff. The pattern I am using has the options for a mold-able nose bridge and a filter opening. This is an easy project that even a beginner can do.
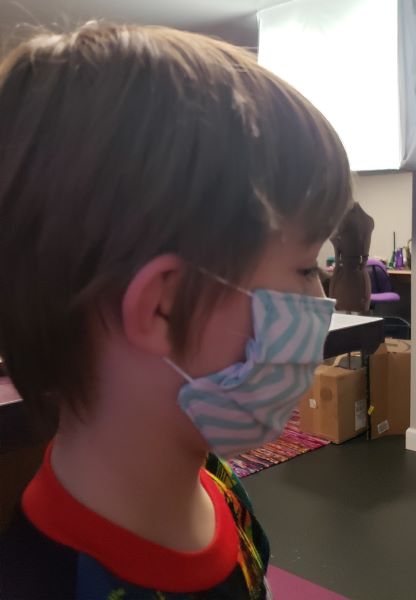
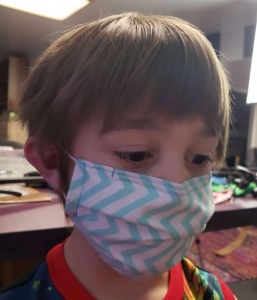
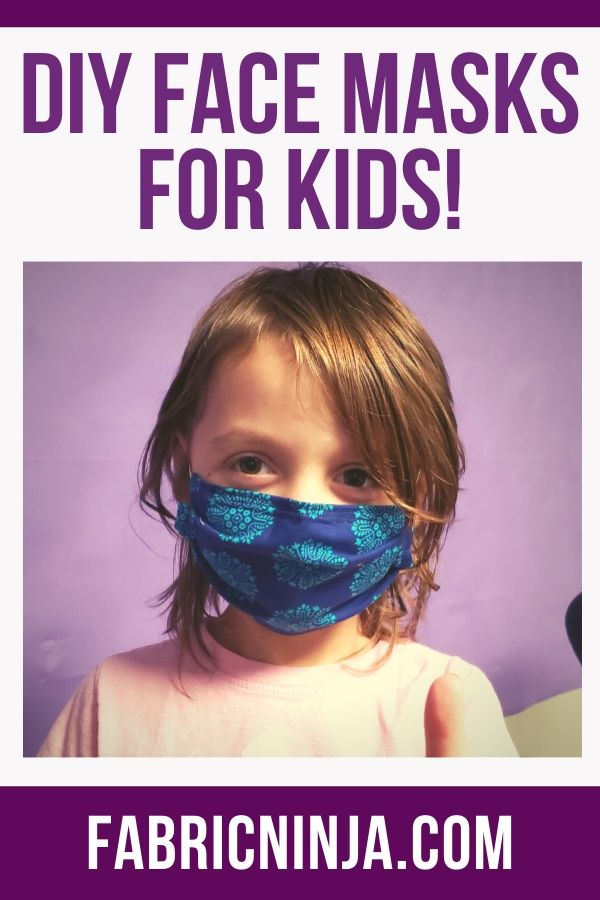
Update: More information on kids sizes now available. I’ve added cutting notes to a make a mask fit a 6 year old.
Looking for the Clear Front Smile Mask? Go here for the patterns and instructions.
The World is Quickly Changing!
Do you want updates? Information on this page may change as we learn more cloth masks and filters. If you would like to be kept up to date, please subscribe to my newsletter. You will get updates on this page, as well as simple sewing projects, and get access to my sewing resource library “freebie library”. Interested? Sign up below.
Newsletter Subscribe
Fabric masks? Are you crazy?
N-95 filter masks are the hospital standard when dealing with infectious disease. When these face masks are not available or are in short supply, the CDC says that DIY cloth face masks are better than nothing. So let’s get to making some to help protect medical works, extend the life of N-95 masks, and for immunocompromised people. Heck, everyone can wear a DIY face mask if they want.
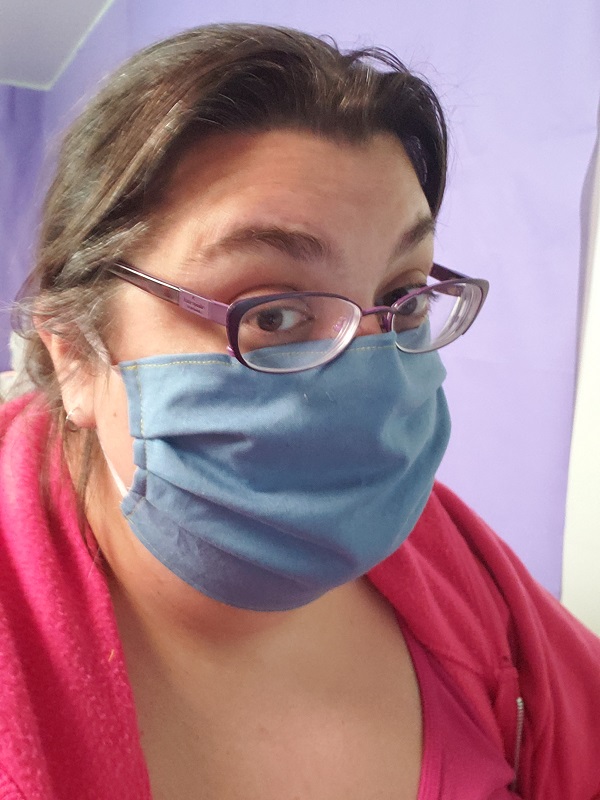
Fabric masks without filters can be used on their own or over medical masks to make them last longer by protecting them from contamination. When body fluids come in contact with a mask it should be discarded. A fabric mask covering the medical mask saves the medical masks which are in short supply. Some medical workers, like EMTs are only issued one N-95 mask a day. The fabric mask can be thrown in the hospital or home laundry and used again after washing and drying on high heat.
Disclaimer: I’m not a medical professional or scientist. I’m a seamstress with an MA in Museum Studies. I am simply taking information from a ton of places and sticking it in one place. I’ll add links to the original sources of information.
Metric note: I’m aware that my conversions are not exact. I rounded the numbers to make it easy for you. This DIY face mask does not require massive precision.
Mask Pattern
There are basically 2 mask shapes. Fitted and pleated, with a hybrid of the two also possible. The instructions on this page are for a pleated mask which is very similar to the Deaconess pattern and looks like a surgical mask. If you want a fitted mask with no pleats check out Anna’s Fitted Vet Mask.
Anna’s Fitted Vet Mask
Anna worked with a mask she had and made design alterations to fit a wide range of medium to large faces in her vet office. Download the PDF here or just save this JPG. This mask pattern has been changed a little and now is available in 3 sizes. Check it out in the Smile Mask Post.
Anna’s Fitted Vet Mask 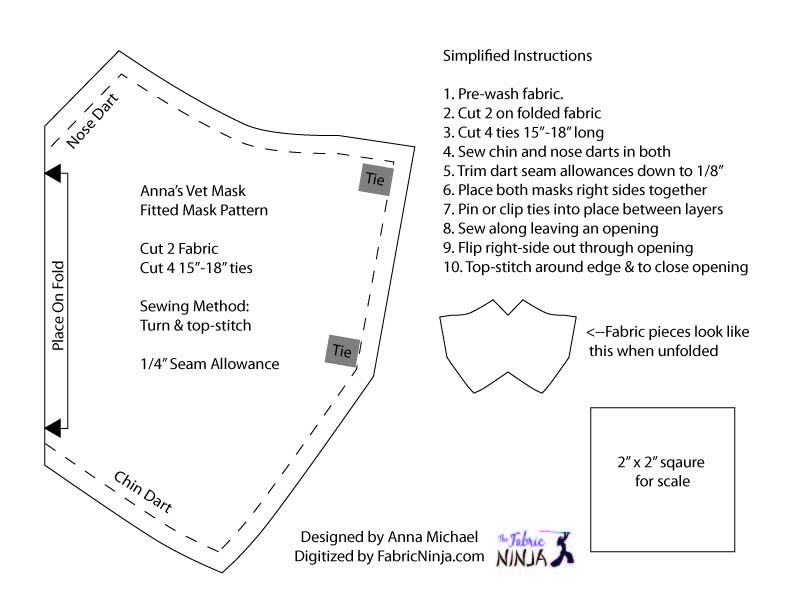
Watch the Video here: https://youtu.be/UJhmQLw-r9Y
The Pleated Mask
Written Instructions You Can Print!
Don’t have reliable web service? Download these instructions when you do. No pictures, but very through instructions for every step.
Mask Instructions – 4 Pages. PDF includes links.
Supplies
This is a video talking about a bunch of mask making materials you may already have at home.
Supply List
- Woven Quilting Cotton or Sheets or T-shirt Fabric : You don’t need much for one mask, but we are making a bunch. A half yard of standard 44” fabric will make 4 adult and 5 youth masks . Want to learn more about mask fabrics, what is recommended, and how much they filter? Check out this post which goes into detail.
- Elastic or ties:
- Thin Elastic: Cut the elastic 7” (18cm) long for adults and 5″ (13cm) for kids (6 years)) and tie a knot at each end of cord elastic and 1/8″ (3mm) flat elastic. 1/4″ (7mm) flat elastic doesn’t need knots. So it’s starting to get difficult to find elastic. It’s out of stock in many places, so here are a bunch of options.
- beading cord elastic
- 1/8” (3) or 1/4″ (7mm) flat elastic
- Fold over elastic
- Hair ties
- Shock cord 1/16″ (1.5mm) or 1/8″ (3mm) – The 1/16″ is better if you can get it. I suggest using an extra inch in length if using the 1/8″, as it can be stiff.
- Links to places that still have elastic
- Ties: 4 ties each about 12” long (30cm) or longer up to 18″ (45cm)
- twill tape
- gross-grain ribbon
- Double Fold Bias tape and sew along one side
- Fabric ties using 1.5” (4cm) of fabric folded in 4th and sewn down the open edge.
- Cut 1” (2.5cm) strips of knit fabric and pull them to make ties. They won’t unravel.
- Thin Elastic: Cut the elastic 7” (18cm) long for adults and 5″ (13cm) for kids (6 years)) and tie a knot at each end of cord elastic and 1/8″ (3mm) flat elastic. 1/4″ (7mm) flat elastic doesn’t need knots. So it’s starting to get difficult to find elastic. It’s out of stock in many places, so here are a bunch of options.
- Mold-able nose bridge (optional): 4″ (10cm) of metal for adults. 3″ (7.5cm) for kids. Thin wires need twice as much to double them.
- Twist ties (plastic covered not paper covered) – use 2
- Pipe cleaners
- Thin Wire – craft or floral wire 20-26 gauge seem to work well doubled – think angel hair spaghetti
- Wire – thicker wire (think spaghetti) could work single
- Typical sewing materials like thread, etc.
How to Sew Fast Video!
Getting Ready
Pre-wash your fabric. Seriously I mean it. You have to get any shrinking out of these. Hot wash, hot dry if you have the ability. No washer at home? Wash in the sink with hot water and iron it dry. You don’t have to pre-wash elastic.
Kids Size is biased on a 6 year old.
Cutting
- Cut the mask fabric the full width of the fabric by 14” (35cm) tall adult size & 10” (25cm) for kids. So you will have a long piece of fabric.
- Speedy Ninja tips: Use quilting ruler and rotary cutter. Using a bed sheet for fabric? Rip the fabric for an easy straight edge.
- Fold in ½ hot dog style and iron the fold
- No iron? Run the fold in or use a heated hair appliance like a straightener. .
- Cut multiple mask widths from the folded strip – 9” (23cm) adults & 7.5” (19cm) kids.
- Suggested: Use rotary cutter and rulers to cut width
- Alternate: Mark with ruler and marker, or make a template for quick marking.
- If you plan to leave an opening to insert a removable filter, finish both long raw edges. Do this with a zig-zag stitch down both of these edges or a serger. Mask made for yourself, not a hospital, can have pinked edges. It will fray, but minimally.
Mark The Pleats – if you are good and eyeballing stuff, skip this step.
Or use a fork! Seriously
- Open mask blanks and lay them out right next to each other aligning the bottom cut edge and offsetting 1/2″ or more.
- With a ruler across the whole off set pile mark the following for adults (3 pleats)
- From the open bottom mark: 1.75” (4,5cm)
- From the last line: 1” up (2.5cm) Pleat
- From the last line: .5” up (1cm) Space
- From the last line: 1” up (2.5cm) Pleat
- From the last line: .5” up (1cm) Space
- From the last line: 1” up (2.5cm) Pleat
- Stack the other way and mark the other edge the same way.
- When you are done each mask blank will have 6 marks along the sides across from each other. The 1” (2.5cm) spaces will be pleats and the .5” (1cm) marks will be spaces between the pleats.
For kids sizes (fit model is 6 years old) mark 2 pleats
- From the open bottom mark: 1.5” (2.5cm)
- From the last line: 1” up (2.5cm) Pleat
- From the last line: .5” up (1cm) space
- From the last line: 1” up (2.5cm) Pleat
Prepare Your Sewing Machine
- Fill a couple of bobbins
- Put in a new needle (size 12/80 or 14/90 sharp or universal)
- Thread your machine
- Do a small test sew and check the tension.
Ready to sew
Next to the sewing machine you should have
- A pile of mask blanks
- A pile of elastics
- A pile of nose wires (optional)
Read this process before you start sewing.
Seam allowance is 1/4″ (1cm) or the edge of your presser foot. Do you best, don’t worry if you are a little off.
- Open blank and side one elastic or tie up to the fold on the edge you are sewing.
- Elastic or tie goes inside between the folded layers (Elastic 7″-8″ (18cm) adults, 5″ (13cm) kids)
- Knots and cut ends go in the seam allowance area.
- Refold and sew starting at the fold. – You are not pleating right now)
- Sew one side a bit.
- Place other end of elastic or another tie between the layers a little bit (1/2″ or 1cm) up from the bottom to avoid the seam that will be sewn there.
- Keep sewing all the way to end of the side and back-stitch
- Chain sew the elastics or ties into the same side of the next mask. Keep going till you run out of blanks.
- Chain sewing mean, don’t take the project out of the machine. Keep sewing right onto the next piece.
- Do the same for the other edge of the mask. Now both edges are sewn and the bottom is open.
- Sew the bottom of each mask leaving a 3” (7cm) hole unsewn. Back-stitch on either side of the opening.
- If you are wanting to add a removable filter, make this opening bigger. 4″ (10cm) should be large enough, but you can leave it the whole width if you want.
Flipping Right-side Out
- Reach inside the hole grab the elastics or ties and pull them out the hole to flip the mask. Use a chopstick or pencil if needed to poke out stubborn corners.
- You may be tempted to iron these right now. You can, I’m not going to stop you, but you really don’t need to.
Mold-able nose bridge
- Fold your piece of metal in half if it is thin.
- Drop the piece of metal that you are using into the open bottom.
- Slide it into place along the top approximately in the center. Hold it in place with a clip, pin, or just your hands while you sew.
- Sew zig-zag stitches across the center of the metal to hold it in place. Make sure your zig-zag is wide enough not to hit the metal. but as narrow as your are comfortable with.
- Do this with each mask .
- Sew across the top (top-stitch). If your metal piece is still wiggly, sew it into place by sewing close to the edge and then farther away where the metal piece is and then back close to the edge. Back-stitch at the beginning and end of the top.
Make The Pleats
- Top-stitch down one edge of the mask folding the 3 pleats as you go. Back-stitch at the beginning and end of each side. Sewing 1/4″ – 1/2″ from the edge is ideal, but it’s ok to make it a bit wider.
- Each 1” (2.5cm) gap is a pleat. Fold one line to the other and sew over the pleat.
- The 1/2″ (1cm) gaps are spaces between the pleats.
- Chain sew the pleats into the same side of the next mask. Keep going till you run out of blanks.
- Do the same for the other edge of the mask. Now both edges are pleated and the bottom is open.
- Optional: Add a second row of stitching to the pleats for security.
Closing the Bottom
Do you want to be able to add a filter to the inside of your mask? If you want to add a filter then you are done. Leave the bottom open so you can stick filters inside. Learn more about filter options here. You can sew the seam allowance to the inside of the opening to make the hole prettier. It’s optional.
- To close the bottom opening, line up the edges of the opening, pinning if needed.
- Sew across the bottom less than 1/4″ from the edge so that you catch the seam allowance around the opening. Back-stitch at the beginning and end of the bottom.
Done! Take a picture and show off you mask on the Fabric Ninja Facebook Group.
Making masks to donate?
Ask your community. Know a nurse, doctor, or EMT? Ask them if they need masks or if their department does. Keep things as local as possible and save on postage.
Don’t just show up at a hospital with masks or other supplies. Make sure you have arranged drop-off with the hospital so that they are expecting and want your delivery. They will arrange for you to deliver them in a safe way.
The Relief Crafters of America are coordinating mask needs. You can request masks or find where to send masks on this webpage about the materials.
Want to remember this? Save this DIY Mask Blog to Pinterest!
You have done an amazing job on this tutorial. You would make a great teacher, if you are not one already. Thank you.
Made your Fitted Vet Mask. It was perfect! I only made a minor adjustment. I really liked how it completely covered my chin and nose. THANKS!
Wonderful to hear, thank you for sharing!
Thank you so much! Oh, I found the Pleat Fork routine at your Face Book page. So thanks for that as well.
Liz
So glad it was helpful!
Thank you so much for your thorough tutorial, Alice!
Are these size medium or one size fits all?
When you mentioned pleats, I wasn’t sure if you specified the direction. I read they must always point downwards to avoid collecting particles or acting like pockets.
Thank you so much, again!
It’s pretty much one size. I customized it for my large husband, and made it a bit wider just cause he also has facial hair. And for teens or petite woman, you could just use less elastic, or let them tie a small knot if they need it smaller. Or let an ear saver take up the extra.
As for pleats, facing down is the best, but if you flip it over they are facing the other way, so the inside just becomes the outside.
I really enjoyed watching your video on the batch sewing for the masks. You are a natural at teaching!
Thank you!