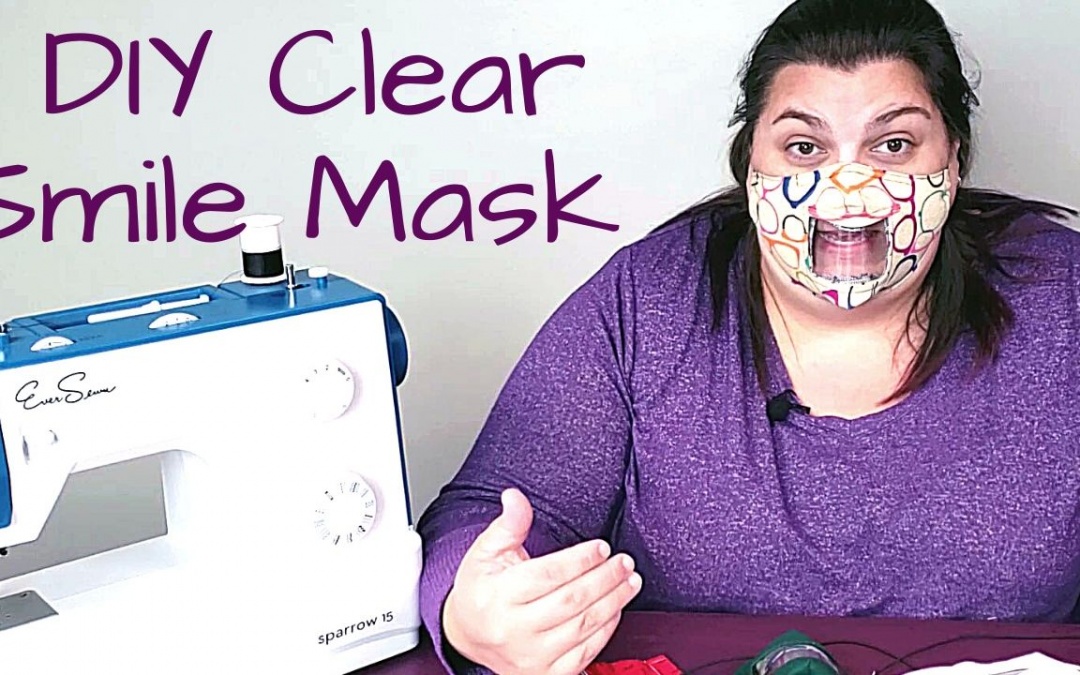
You’ve probably seen a million tutorials about DIY masks. Then you come across this one that has a clear front. Whoa, that’s weird! What’s up with the crazy clear mask? This mask is designed specifically to help the hard of hearing and deaf community to enhance their ability to communicate and stay safe. Let me explain.
As a hard of hearing person, I’m finding the era of masks very difficult. Specifically because I rely on seeing mouth movements to clarify the sounds I don’t hear. A clear front mask makes a big difference in my ability to communicate and feel comfortable.
Ready to get the pattern & SVG cut files?
Video
Since we are talking about communication… would this information be easier for you in a video? Go watch the captioned video here.

So You Lip Read?
Seeing a person’s lips and face move allows me to better understand what a person is saying.I rely on the movement in the face to help me understand what people are saying. In sign language (ASL) the face and lips are used to express moods and concepts.
Note, I’m not saying lip reading. It is called lip reading, but that phrase is a bit of a misnomer. People think that you can magically know what someone is saying by only seeing their lip. No! Have you watched the videos, “Bad Lip Reading”? Yeah, the lips are not all of the conversation, but they are an important part. And that’s why I’ve made the smile mask.
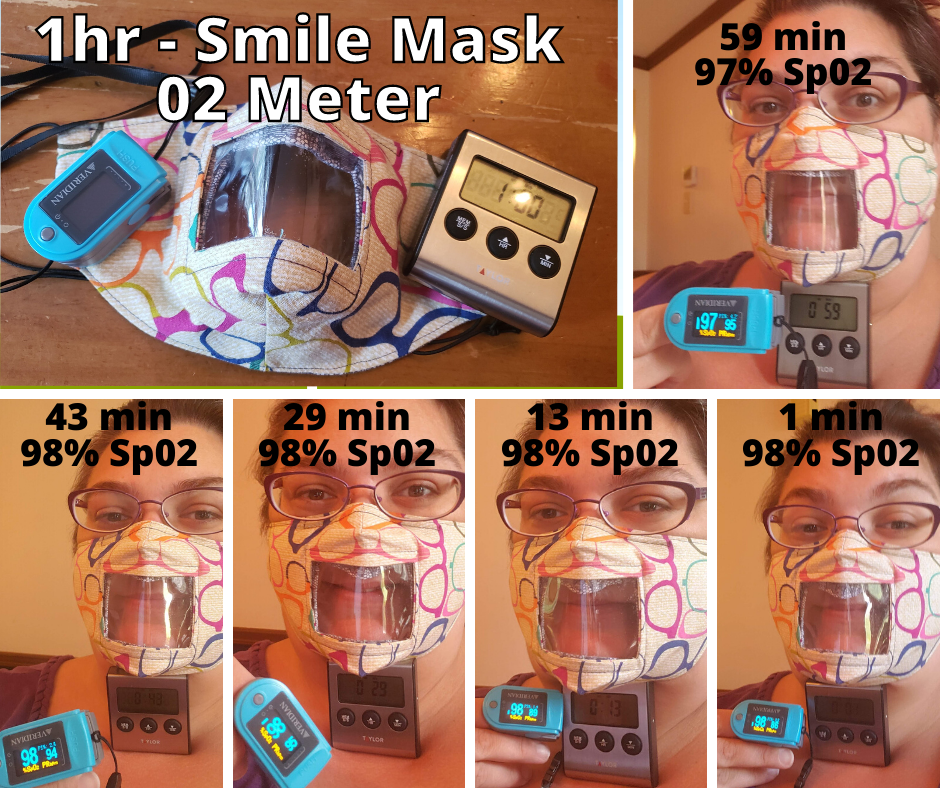
Is it hard to breathe out of?
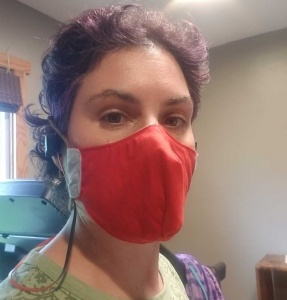
This mask is no more difficult to breathe in than any other mask for me. The design has been tested, and is safe as there is lots of fabric still to allow for air to move in and out. This seems to be a popular question, so I wore my mask for 1 hour and used a pulse oximeter every 15 min. Note the timer was counting down. So 59min is the first photo. I have asthma and my O2 runs 96% to 99% on a regular basis.
What is the clear material?
The mask has a clear front, it is made out of vinyl that’s somewhere between 8 and 12 gauge. I have seen people make it with four gauge, it looks really thin, and I’ve asked them to do a quick dryer test to see if it will survive. You can also use a shower curtain.
How do I wash it?
It’s easy to wash. Just stick it in with the rest of your laundry in the washer and dryer. You clean your mask, just like any of your other clothes. You don’t need to do anything special. The vinyl is not going to melt. Vinyl (polyvinyl chloride) becomes stretchy at 180 degrees. Your dryer should not go over 180 degrees because that’s one of those cutoffs where dryers are supposed to shut off. So if you happen to have a dryer and the shut off is not working, I guess there’s a small possibility that you’ll end up melting this, but it’s going to be really unlikely because most dryers don’t even get that hot.
Does it Fog?
The only thing I have to do when I’m ready to use one, is I need to treat the inside of the vinyl with anti-fog. The anti-fog that you need for these is dish soap. All you do is wipe some dish soap on the inside and then buff it off with a paper towel. Low cost anti-fog and works great.
Eventually you will notice larger water droplets starting to appear on it, and that’s just simply because there’s moisture in your air, it’s going towards the vinyl and it is condensing because the air on the other side is a different temperature. All clear masks will get some condensation, this is just science. Having the dish soap on the back, which is a surfactant, keeps it from getting those microscopic water droplets, which is what the fogging is. So it keeps the tiny droplets from happening. Eventually big ones happen, but you can easily see through them, and they just kind of slide off and go to the surrounding fabric. So you don’t have to worry about it, it’s just the nature of these masks.
The Mask Shape / Design
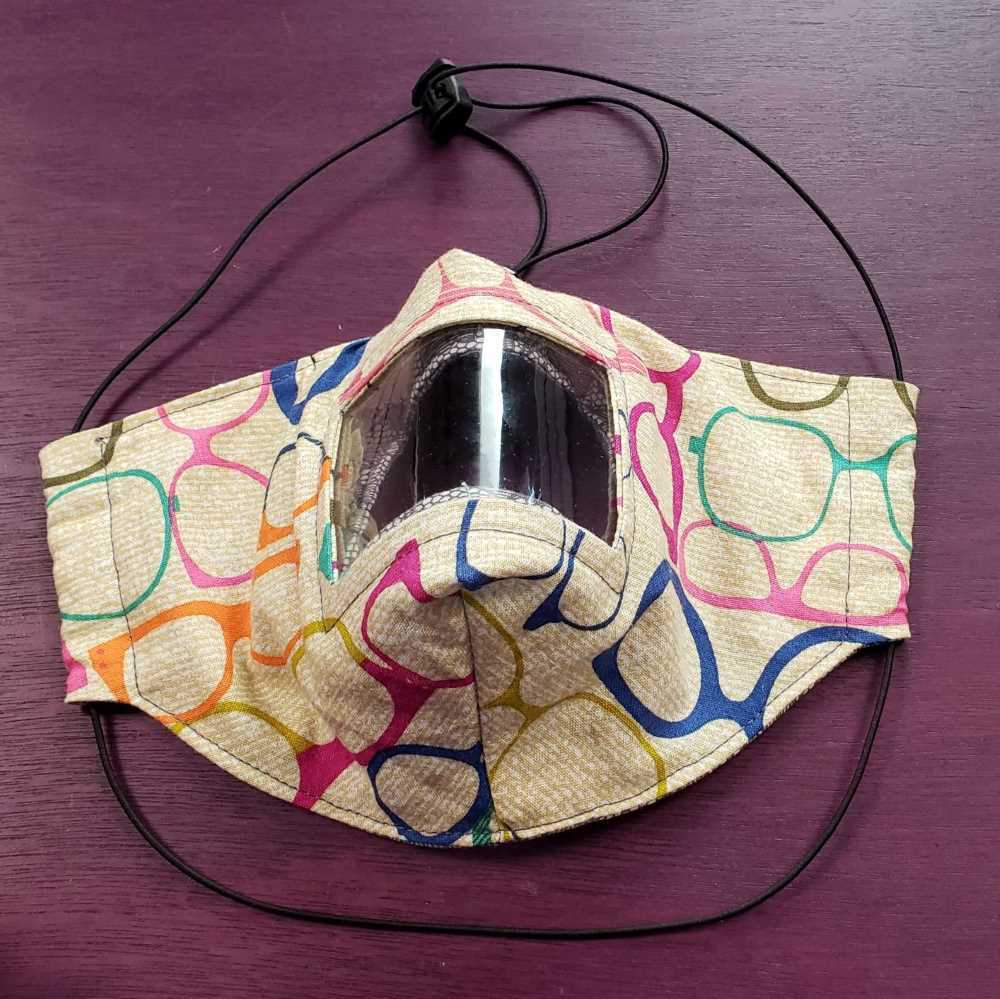
I have used a mask pattern that really sticks out from my nose, and that’s because when you’re speaking your lips move a lot. The basic flat deaconess mask with pleats is not ideal, because when your lips move they can really touch the front, which is not very comfortable or sanitary. Additionally, these pleats on the edge are not able to pleat any of the central vinyl, so it loses some of the fit.
The pattern I’m using today Anna’s Vet Mask. Anna is my friend, and she has created this mask and tested it on her entire veterinary clinic, and anyone else she can get her hands on. It has a side casing option or you can just sew your elastic or ties right in. The pattern has the darts already cut out, so you’re not relying on measuring or figuring where the darts are. All you have to do is sew along the edge. You can get the original pattern on my other mask post.
This pattern is on the fold, so if you’re going to be making a ton of them, print yourself out two, make it big and flat, so you can put it on a large stack of fabric and chop them all out at once. Don’t know how to cut on the fold? Learn how to Cut-On-The-Fold here.
The method for making the window opening in the center is very much like a welt pocket. It is called a bound slit or a faced slit because we are not actually making welts.
Sizing
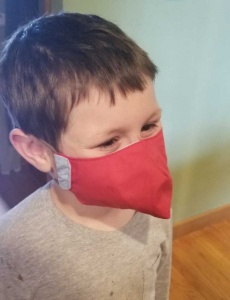
Most people use size large, but there is also a size small for those people who are thin, petite, or down to seven-year-old children. I do have one size even smaller for kids age 3-6, because children that small sometimes have parents who need to read their lips. Remember, children under the age of two should not be wearing masks.
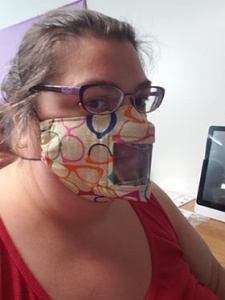
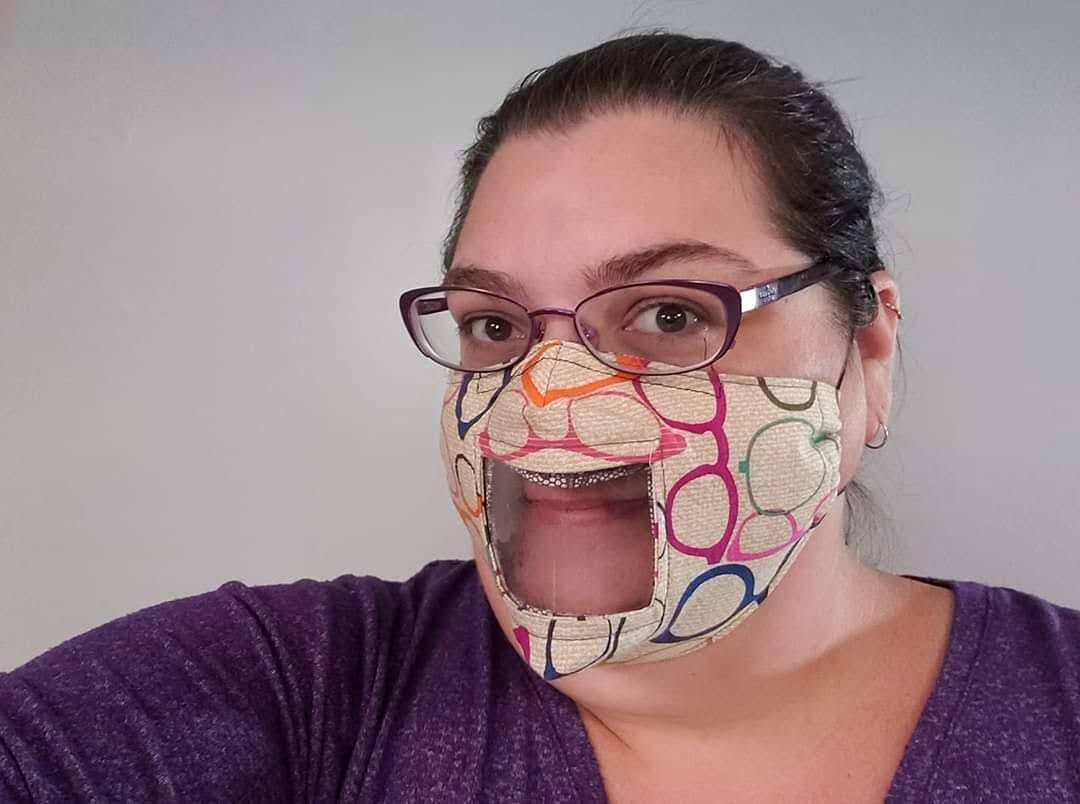
The first image is a me, a plus-sized woman wearing the size large. The next two images are both size small. First being worn by a thin woman, and then by a 7 year-old kid. She can wear the size large, but the small is a better fit.
NEW: Extra Large Size now Available
Who should wear these?
- Grandparents may find this mask particularly helpful as it makes grandchildren a little less afraid of what’s going on, because they can see you smile.
- Teachers or Therapists that are helping children work on their speech and letter sounds.
- Those who work with the elderly
- Those working with high anxiety populations
- Friends and family of the deaf and hard of hearing
- Those who want to promote the use of accessible face coverings
Other Options
While I’m talking about the uses for this mask, I want to add a little note here about some other options. There are times where you might be better using a face shield instead of one of these masks.
A face shield is a very large clear piece that generally goes on a headband, and you can use a face shield so a person can see your entire face. If you’re not in a position where you are needing a mask, a face shield may work just as well. You can even stick a hoodie over it and squish it down, ala Kenny from “South Park”, and you can get a lot of coverage.
I just wanted to mention that in case the mask is just not something that’s right for your situation.
Let’s Make a Mask!! Watch the video or read how to below.
Supplies
Learn more about mask materials and filters here.
Fabric: 100% Cotton Fabric – Like Quilters Cotton or Sheets.
How much? One half yard will make 3 masks. I suggest that you get 2 half yards to make the inside and outside different fabrics. Then you can make 6 for that 1 yard of fabric.
Clear Vinyl: 8, 10, or 12 gauge. Like would be on a sofa in the 80’s
How Much? One mask takes a 3”x4” rectangle. A 1/4 yard will make a lot of mask windows.
Elastic or Ties: 1/8″ cord elastic, 1/4″ elastic, knit ties, etc.
How much? List below is per mask.
- Full Head Loops: 1 yard (36”) cord elastic per mask.
- Ties: 18” each tie, four needed (2 yards – 72”).
- Ear loops: 9” each loop (1/2 yard – 18”)
Smile Mask Pattern, in your size. Find it in the Free Resource Library
Getting Started
- Wash your fabric to remove all shrinkage. I wash and dry on high.
- Print out the Smile Mask Pattern or get the SVG cut files (From the Free Resource Library)
Prep Pattern
Check Scale Square (Make sure you actually measure that scale square. If your pattern didn’t print the right size your mask will not be the right size in the end)
So I’ve roughly cut out my pattern and now I’m also going to cut the top and bottom window lines so that I can transfer the window marks right after cutting out the mask. After cutting the 2 lines I fold it to the back along the end line. I just find this easy to do. It also gives a little more stability to the center of the pattern.
Cut Fabric
- Cut 2 of the mask pattern. One will be the outside and one on the inside (lining). I suggest two different fabrics, to tell the outside from the inside on a quick glance.
- Fold fabric right-sides together then place the pattern on the fold. Pin in place or use temporary basting spray. Then cut out the mask. Remember, do NOT cut the fold.
- Don’t know how to cut on the fold? Learn how here. https://fabricninja.com/cut-on-the-fold/
Mark the Window
The window mark needs to be on the backside of your fabric. If you’re using solid color fabric, pick whichever one you want and just go with it.
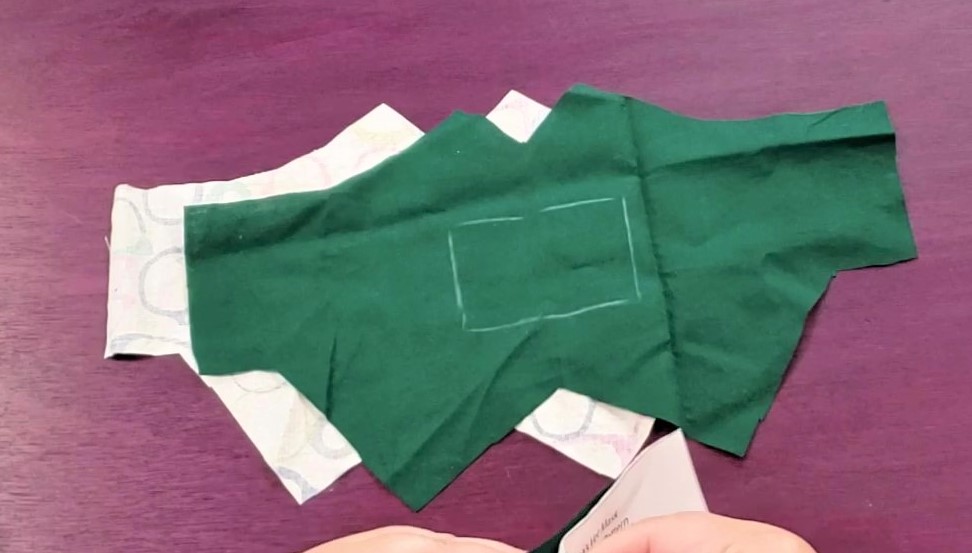
Cut Facing Pieces
The main fabric pieces are cut and now we need a facing piece for the window and the vinyl. They are both cut from the other pattern piece. Cut two fabric scrap and one vinyl. If you prefer to use your rotary cutter, the pattern piece is labeled with the cut size. The facing is made of scrap fabric, meaning anything you have laying around. You don’t have to cut them out either They literally need to be bigger than the facing square, that’s it.
Cut the Vinyl
Drawing on and cutting clear vinyl is exceptionally annoying. Some people like to use the backing paper to draw your pattern on, and then cut it out with the vinyl on top of it. Unfortunately temporary spray adhesive because it will forever gunk up the vinyl. If you’re making a lot of these masks, just cut yourself a long strip that’s the right width, and then just chop it into the smaller pieces. That will work incredibly well.
Sewing
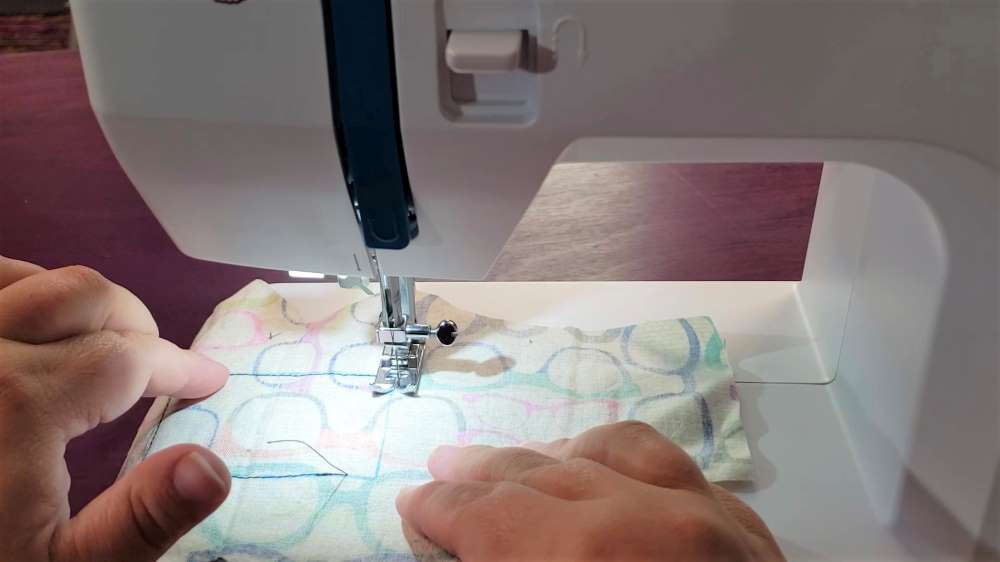
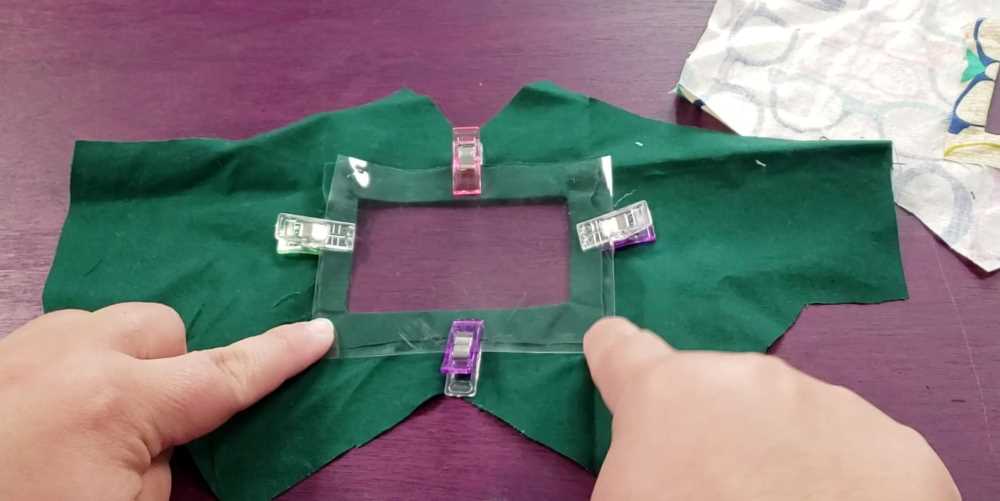
So each of these layers is going to have the window created in the middle. If you’ve ever done a welt pocket this is the same technique. We are going to be looking at the wrong side when we’re sewing, because it has the marks. The facing piece needs to go on the right-side. Put your facing down on your fabric and then hold it up to the light. Is there fabric that goes all the way around my marked window? If the answer is yes, you are good to go.
Now we’re just going to sew on the window line. When you get to those corners, stop with the needle down into the corner. Then lift the presser foot, pivot, presser foot back down, and head in the new direction. Because of the nature of what we’re doing next, you don’t really want multiple lines of stitching, you want this as one line of stitching. Even if that means that your window is a little bit smaller or a little bit bigger, don’t go back and do another line of stitching unless you take the extra line out.
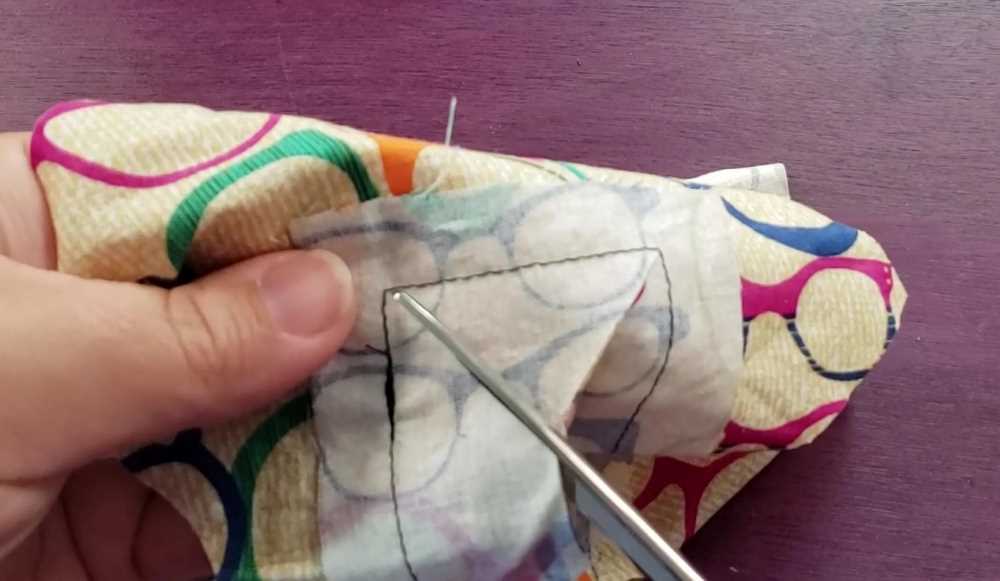
Make The Window
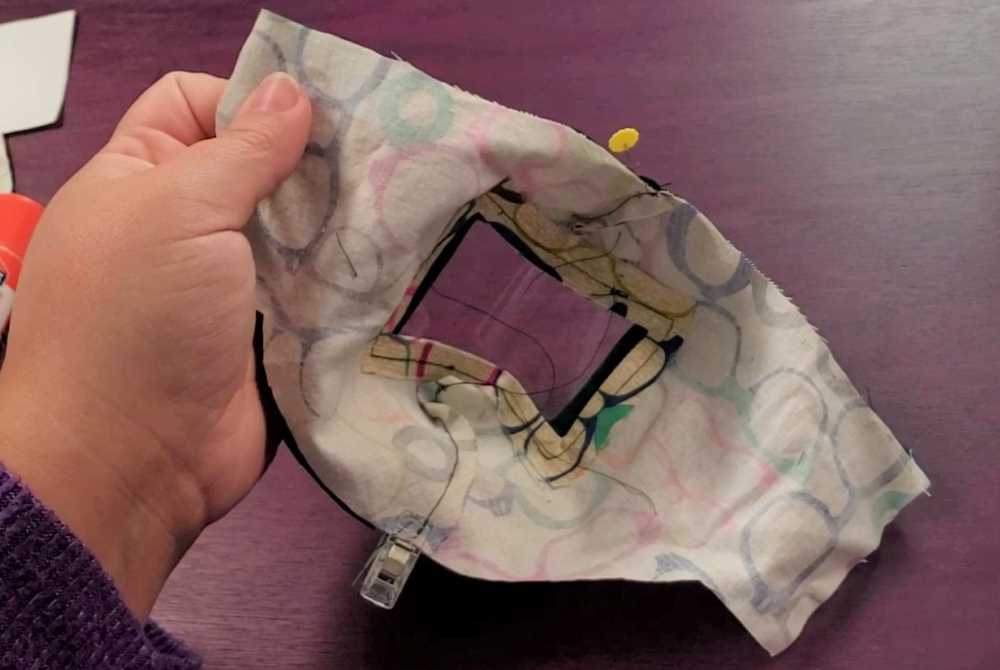
At this point you have the inside (lining) and the outside mask pieces, and they have a piece of facing that’s sewn on the outside right now. We’re going to flip that to the inside to create the window, but first we have to make a hole to be able to flip it. Cut a hole in the center of the window square, and then clip into all four corners, and I mean very far into that corner. That line of stitching is going to keep it safe from unraveling.
There is now extra fabric in the window, you can trim it to 1/4″ from the seam line or just leave it. It will make it look ugly on the inside that nobody sees. So if it bugs you, go ahead, trim it off.
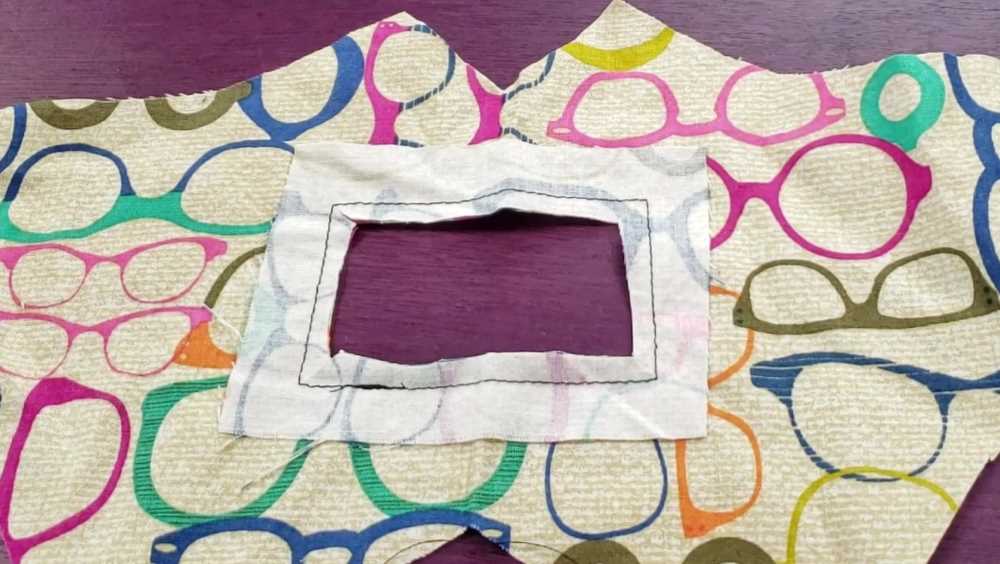
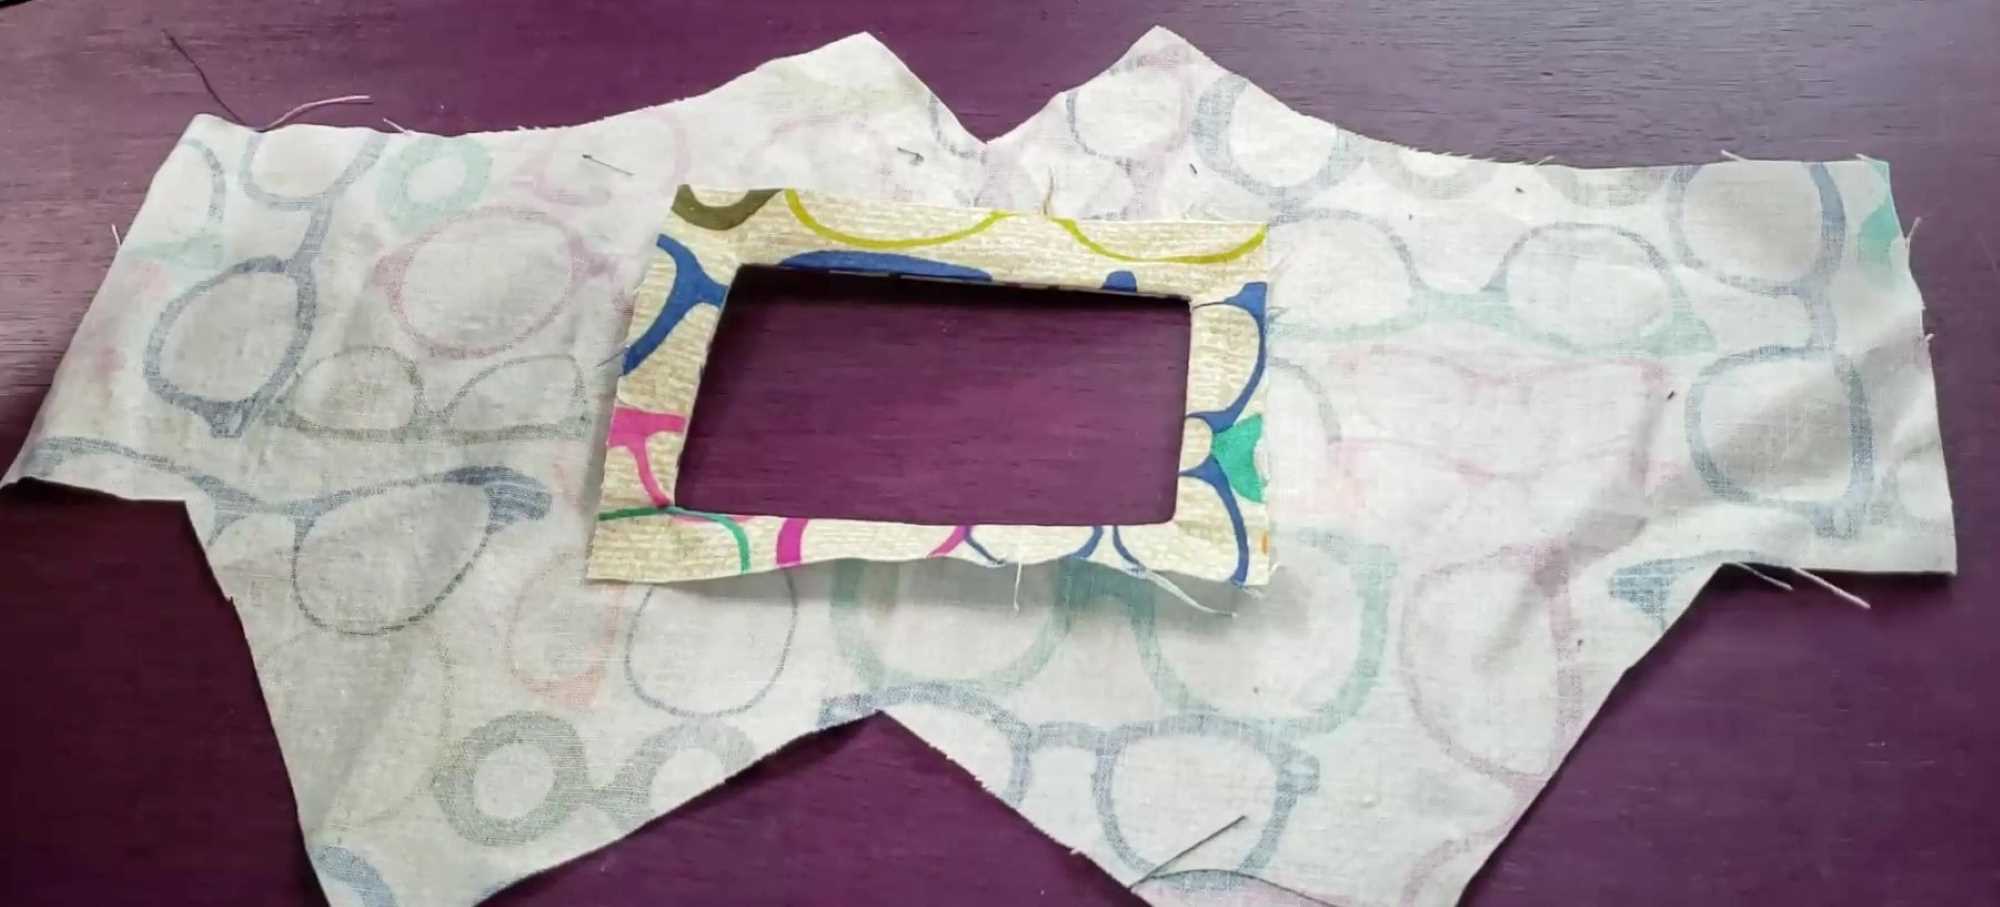
This is where an iron is going to be really useful, but you can also finger press. First press the facing towards the center of the hole and then flip it over. Then you’re going to pull the facing around to the back and flatten it. The seam line will be on the edge of the window. Then iron or pin it into place. And now we do everything again on the other side of the mask.
Top-Stitching
The outside is going to be top stitched with the vinyl, and the inside (lining) is going to be top-stitched alone. Now it’s time to find that piece of vinyl that you have lost. The vinyl goes on the back of the outside mask, and is then clipped to the seam allowance of the facing to hold it in place. If you don’t have clips, you can pin in the far corners of the vinyl.
We are going to top-stitch around the window about 1/8″ away from the edge. The goal is to hold down the vinyl and facing.
I can set my stitch a little bit longer so there are fewer holes in the vinyl, and if this vinyl starts to catch on your foot, you can certainly change to a Teflon foot, or put a piece of tissue over it while sewing. I actually haven’t had a problem with it sticking to my foot, but it will stick to the bed of my machine, so I’ve been sewing with it vinyl up.
Darts
Our next step is going to be sewing both darts on both layers. Fold the right sides together and pin, if desired. Then sew with 1/4″ seam allowance.
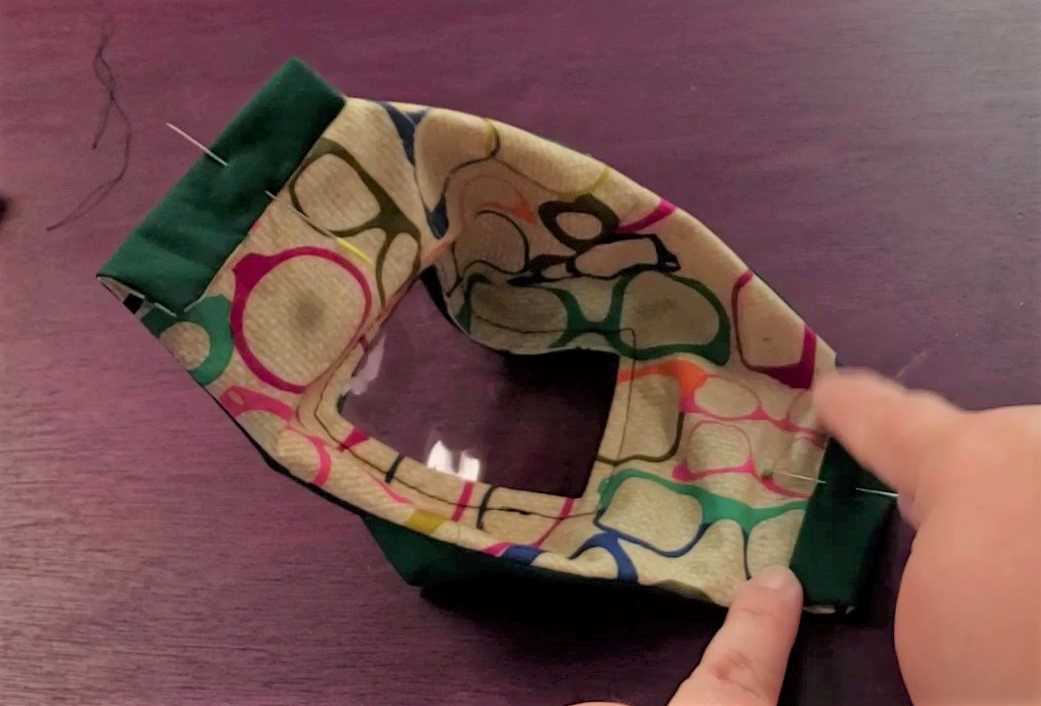
Attach the Outside and Inside
Next to put the two masks right-sides together. Make sure you have the chin matched up to the chin and the nose to the nose, so that they are the same size. Align the dart seams and make their seam allowances go different directions and then pin or clip. This just helps take care of some of that bulk, and keeps everything nice and aligned.
If you’re using the version with elastics or ties sewn in the side, and not the casing, now is the time to add them. The elastic or ties will be inside with their raw edges at the short ends of the mask, between the layers.
Now add any other clips or pins that you want along the edge.. You do not have to leave a turning hole because there is an enormous turning hole right here in the center. Sew around the whole edge using 1/4″ seam allowance.
Flipping Right-Side Out
Just pop everything through to the middle window. Then Smooth everything out and pull out corners. Use your fingers to rock those seams into place and pin if desired. Next we’re going to be top-stitching around the edges.
Make the Casing
I’m going to form the casings at the same time as I am doing my top stitching, as this will save me one step. I sometimes thread my elastic into the casing before I sew it, which also saves me a step. But you have to be careful to not sew through that elastic, otherwise you’ve created yourself a lot of extra steps.
The casings are just folded to the corner between the side and the chin dart. The casings don’t need to be an exact size as long as it’s big enough for your cord and threading device. Now I’m going to top-stitch / edge stitch around the whole thing.
The Loose Lining
Why, why did I leave this loose? Okay, I’ve got several answers here.
- One: If you want to have a filter go in here, it will allow access
- Two: If for some reason you have to replace the vinyl it will be easier.
- Three: If you would like to put a nose wire in, lay that nose wire along the top and do a second line of stitching. This nose dart already fits lots of people, so you may not need to add that.
Add Cord to Casing
String your cord or ties through the casing to make ear loops, or head loops. Add cord lock / toggles to the ends if desired.
Done!
Here’s the smile mask! I issue you a challenge. Next time you see a hard of hearing friend or co-worker, wear your mask. I want you to see their eyes light up.
Go Download the printable instructions, patterns, and SVG file from the Free Resource Library.
Want to remember this post? Save this DIY Mask Tutorial to your Pinterest Board
![]()
I followed your li k from FS and just need to say you are the Bob Ross of sewing! Your voice is so mellow and calming, I could listen to you teach sewing all day! Xp
Thanks so much for the tutorial
Aww you are so kind. I’m glad you liked it. ♥️
Is it possible to purchase one? My daughter is a Speech Path at a school and she needs a mask with a window in it. I have an old machine but haven’t used it in years.
I’m sorry for the delay in responding.
Yes I do sell them. Please send me an email theninja@fabricninja.com or find me on Facebook.com/TheFabricNinja
Do you have a medium size pattern
I have 4 sizes now Small kid, Larger Kid/ Small Adult, Large, and XL. So medium would be the small Adult/Kid size. You can always find an in between size by increasing you seam allowance on a larger one.
Hi Alice,
Loved your video (and commentary) for the smile clear mask but can’t find my way through to the pattern. Can you help please?
I’m writing you an email right now
Do you have this pattern in between the x-large you are wearing (way too big) and the large (way too small)
The XL is the L with 3/4″ added vertically. So the XL is just taller. Just fold the XL pattern piece horizontally to get the size you need, or cut and overlap. I’m surprised that one is way to big an the other too small. The large fits great on me and I can also wear the XL, but sometimes it folds when I talk, but still fits.
Obviously I have to ask if you checked the scale square. You are welcome to email me theninja@fabricninja.com if you’d like to trouble shoot.
-Alice
can’t get the pattern. submitted my email etc. It shouldn’t be this complicated.
I have sent you an email. You can also reach out to theninja@fabricninja.com
My website has had a glitch lately I’m trying to fix
I can’t het the patterns to print portrait, they automatically revert to landscape, help
I don’t know what’s going on. You could try printing to a PDF the correct way and then reprinting that. If you’re not using Adobe Acrobat that’s always a good place to start. And when people are having problems a desktop sometimes solves it. If you have anything you would like me to try let me know and I can send you new files.
I did try the pdf and it didn’t work, could you try sending me just the patterns?
Hello Alice, I just wanted to let you know that I have started wearing my smile mask at work (I am an early childhood educator) because we have an autistic child and his speech therapist has said it would be beneficial. (Up to this point the “powers that be” have told us we must wear medical masks.) the very first day, he noticed but didn’t really react (I wasn’t surprised) but the other children, once they saw my smile for the first time in 2.5 months…well, their eyes lit up and they smiled from ear to ear! I am, this weekend, going to try it with a little wider window. Hopefully it won’t reduce the air flow too much because, like you, I am asthmatic, and this job requires a lot of movement! So thanks for a great mask pattern in general! I have gifted them and sold them and everyone who has one says it’s their preferred design. I’ve even sent fellow sewers here!
Thank you for sharing this wonderful story. I’m so happy to get those kids smiling