
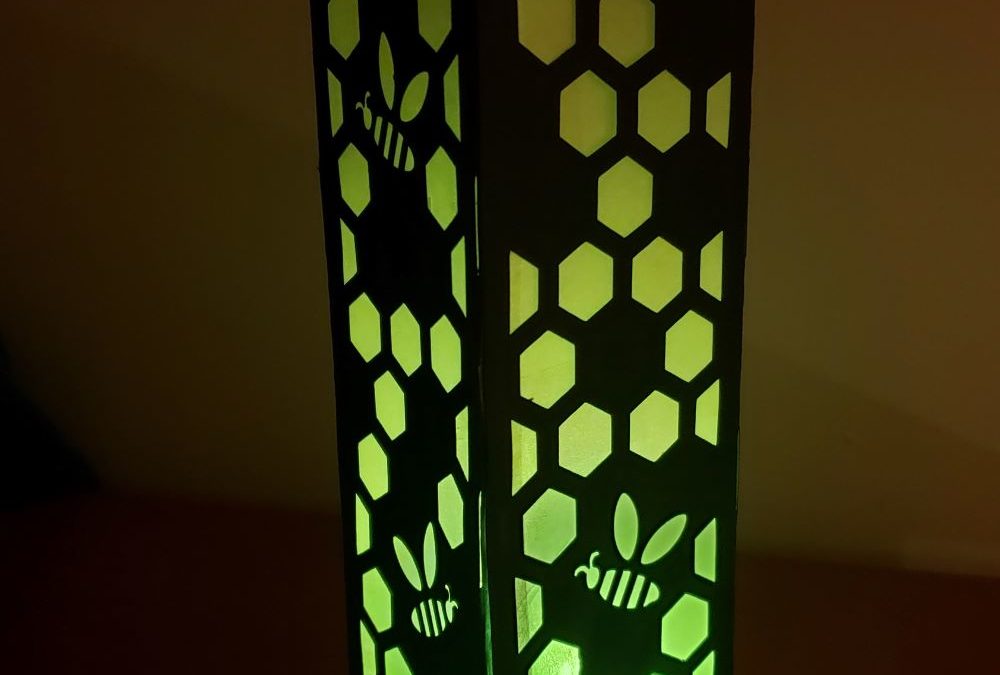
I know paper craft is not my normal gig, but when you have a Cricut it’s bound to happen eventually. Each of my kids now have a bee and honeycomb paper lantern in their room. They are super easy to make on your Cricut, but you could also hand cut them. Find all the Bee projects here!
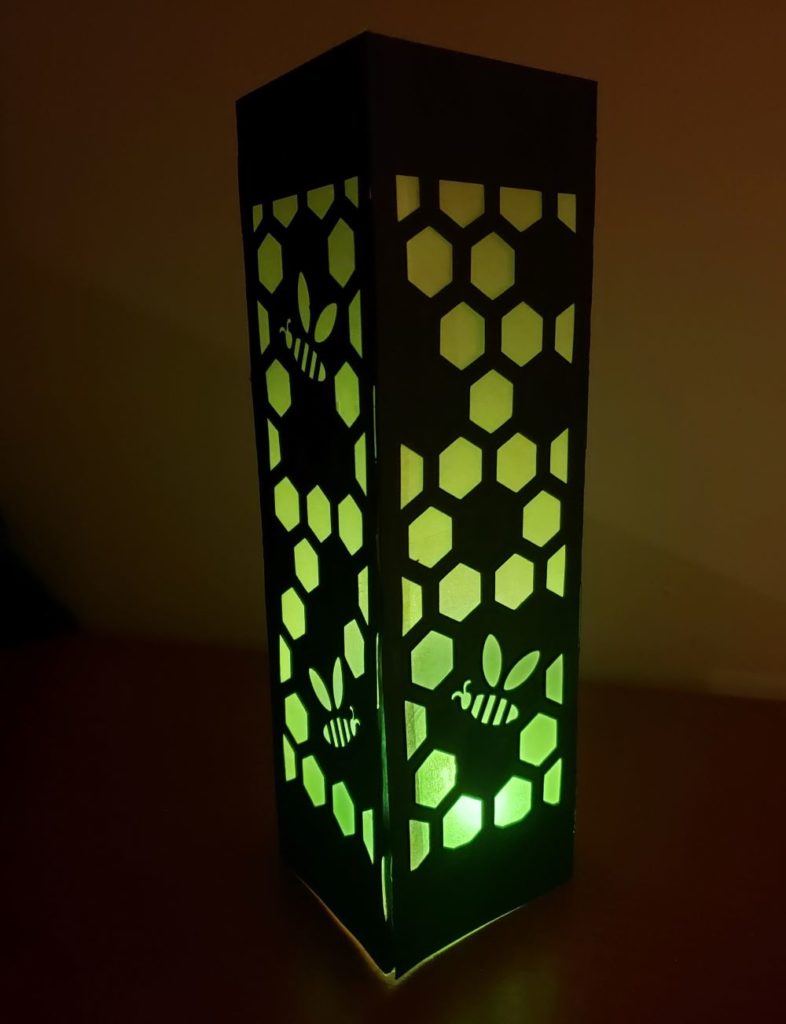
All you need is one piece of black paper, one piece of translucent paper or fabric, and a battery operated light. You might already have one with your Halloween decorations. Our light changes colors, which the kids love. It’s like the lava lamp they used to have. It lulls them right to sleep.
Supplies
The supplies listed here are what I used or mentioned. Do not feel restricted by this list. Use supplies you have and make design choices in line with your style. Finished size: 8” tall x 2.5” square
- Supplies Used:
- 65 lb Card Stock – Black – 8.5×11”
- Gold Vellum – The paper company (Michaels) 10709033 -8.5×11”
- Glue tape
- Battery operated tea light. Color changing is a fun addition.
- SVG & PDF Files From Freebie Library
Tools Used
- Cricut
- Light Grip Mat (Green)
- Cricut Fine Point Blade
Simplified Paper Lantern Instructions
- Get file into Design Space
- Download zip file
- Expand all files (unzip)
- Open design space
- New Project
- Upload
- Add to Canvas
- Check the size of largest piece (8” tall)
- Press Make-It
- Prepare Mats
- Select Materials
- Cut Following the Prompts.
- Weed each mat, flipping over and peeling off paper to keep prevent curling.
Assemble Paper Lantern
- Glue inside material into place covering all openings. I like to apply glue throughout the bee and honeycomb design and not just around the edges. Let dry if needed.
- Crease Bee Lantern along vertical slits. Using a ruler or folding tool can help
- Glue the small flap to the first edge. If needed, you can temporarily tape it while it dries
- Place battery operated light under it.
- Turn the lights off and enjoy