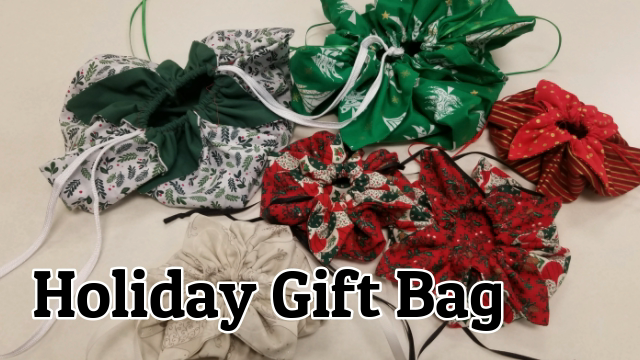
Ditch the gift wrap and have a beautiful, low-stress, and sustainable holiday season! There are many green options that can be used year after year under the tree, but reusable fabric gift bags are simple and affordable.
Once you have made a few, you will be able to whip them up for every occasion, in just 12 minutes. Yup 12, crazy right? That is how long it takes Aimee, the hands of this video, to make the bag in real time. (The video is sped up a little to save your time) Not into videos, keep reading for instructions.
The bag in the video is made from two 12″ squares. You can get one from a fat quarter, or 2 from a half yard. I suggest two fat quarters that coordinate. This size is perfect for a smallish something. A ornament, coffee cup, or jewelry. Also great as sock knitting project bag.
The beauty of this bag is that it can be scaled up infinitely and themed for any occasion – if you want to contain larger gifts, just use bigger fabric – 1/2 yard cuts will yield a medium bag, 3/4 yard cuts a large bag, and a 1 yard cut will produce a bag that will hold a large stuffed animal or other oversized gift. It’s still the same process, no matter the size. Quilters: this project is also a great scrap-buster – piece together your scraps for a unique and low-cost bag.
Brand new to sewing? This is a perfect first project. You will learn a lot of basic skills and it’s incredible “forgiving”. Just follow along and ask questions if you have them.
Supplies:
- 2 fat quarters or larger – pick coordinating fabrics, as the lining of the bag will show. I suggest non-directional prints or solids. One of my go-to online fabric stores is <a href=”http://www.cottoncandyfabrics.com/?AffId=8″>Cotton Candy Fabrics</a>
- 1 spool of coordinating thread (Gutermann, Sulky, or Mettler thread is recommended)
- 2 yards of coordinating string. (¼” twill tape, satin cord, or grosgrain ribbon recommend
The larger you cut your square, the bigger the bag will be. A 6-8” square bag holds a lot of dice, or some jewelry. A 11-13” bag is large enough for a small knitting project or your lunch. A 16” bag will hold larger sewing or knitting projects, trade paperback, etc.
Skills you will practice with this project:
- Getting started with a sewing machine
- Turning corners
- Chipping corners for sharp points
- Top stitching
- Threading through a casing
Instructions:
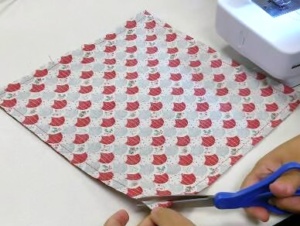
- Cut your fabric into two squares of the same size. Beginning with two squares of fabric is actually important, so take care to measure accurately
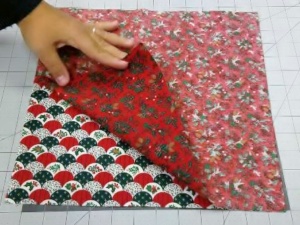
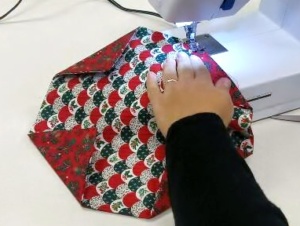
- Place squares right sides together. This means that the pretty sides will be touching each other. I don’t pin, but you can if you like.
 Start stitching in the middle of one side and continue around the square. You can pivot at the corners, or you can sew off each corner and start again going along the next side. (The video show pivoting.) Leaving a 2-3” opening when you get back to where you started. I like to mark this opening with pins, so I don’t forget. I use a ¼” seam allowance, but it doesn’t matter as long as you keep it consistent around the whole bag so that it stays square.
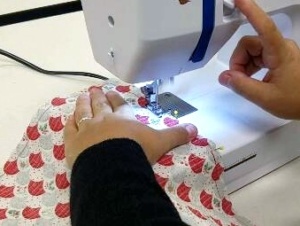
- Clip the corners diagonally to reduce bulk, and to help make sharp corners on your square
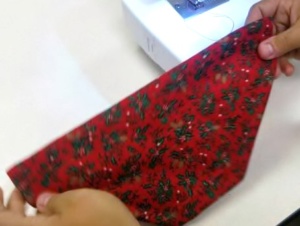
- Turn right side out though the hole. This technique is called birthing, or turn and topstitch.
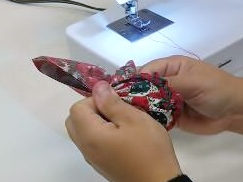
- Pull or push out the corners. Use a knitting needle, end of a spoon, mechanical pencil with no lead, or other bluntly-pointed object to shape the corner.
- Press fabric. Use high heat on cotton, or low heat if you are not using cotton)
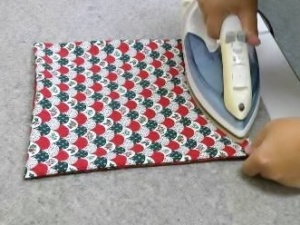 Check the opening. If you left your opening in the middle of one side. Just make sure it is well pressed. If your hole ended up near a corner, whipstitch the opening closed or use iron on hem tape.
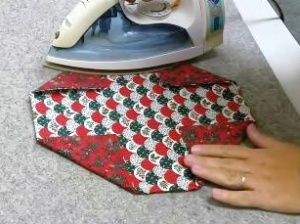
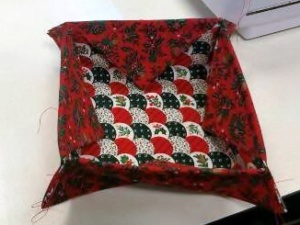
 - Fold the corners/petals down and press into place. Pin, if desired. Again, consistency is the key and there is no “right” depth for your folds, as long as they are the same. Folding over a couple of inches will result in a bag that opens into a very deep bowl shape and prevents the contents from rolling out. Bringing the points of the “petals” almost touching will result in a bag that is very shallow when open. Which will create a very short lip to prevent small objects like dice from escaping, but don’t stop a ball of yarn.
- Topstitch the flaps down along the diagonal to create the casing. Make sure to backstitch at both ends. Sewing about a 1/2″ from the edge will create a good size a casing. Just make sure a safety pin can fit thought it.
- With the flaps up, fold the bag in half along the horizontal axis and stitch both sides very near the edge, stopping a little bit from the top. VERY IMPORTANT: Don’t stitch all the way to the top, or your casing will be sewn shut.
- Repeat along the vertical axis, stitching those sides as well.
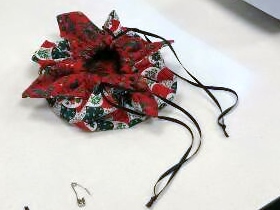
- Thread cord or ribbon thought casing. Go both directions for a balanced handle.
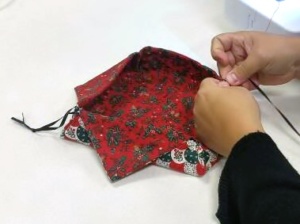
Presto Bag!