

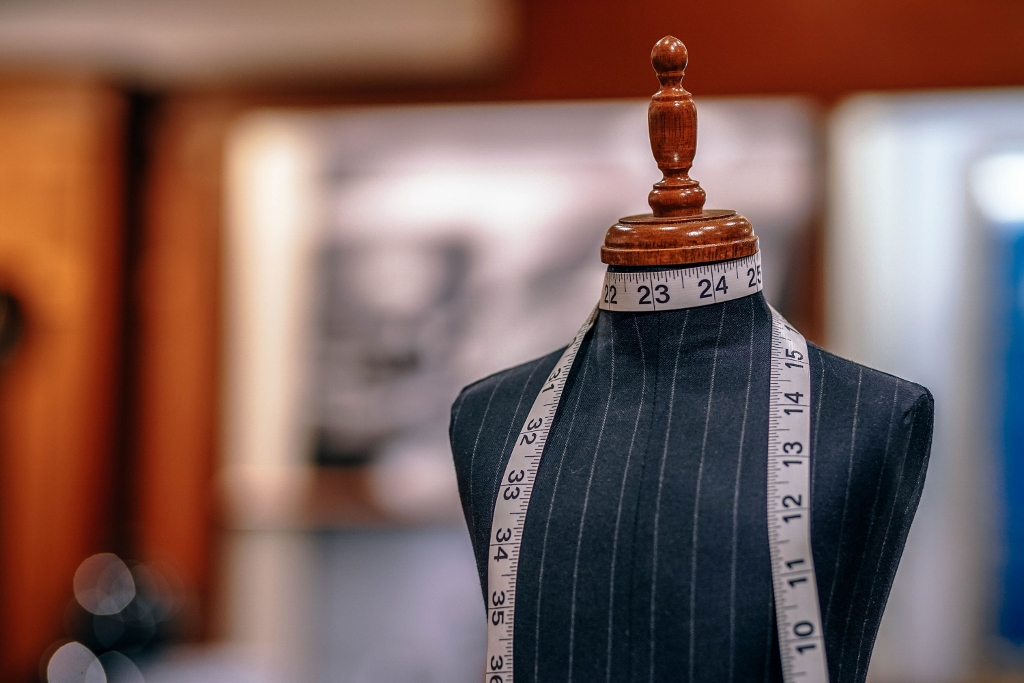
I recently was asked by Redfin.com to contribute to their article on “Creating the Perfect Sewing Room & Craft Room”. You can find a link to the article here. It got me thinking about, what is the perfect sewing room?
The perfect sewing room for me will not be perfect for you. It’s ok if your perfect is a TV tray with a sewing machine on it, so you can binge watch while you sew. Or if your perfect is a “she shed. ” Perfect can also be perfect for now. Perfectly usable. Whatever allows you to create!
I have a pattern for cord wraps and cell phone holders that you might enjoy making. Instantly download them using the form below.
My crafting space / sewing room is so personal to what I make, and how I think. The HGTV perfect feels so unattainable and yet so desirable. Diving too deep into perfect can really make me feel unhappy with the sewing space I have. When this happens, I remind myself that those designer houses are not designed for me! They are filled with things I don’t like or would never make sense in my house. For example, I really dislike farm house sinks. What about you?
(Dismounts soap box)
Inspiration
With all that said, I still love reading about how people solve the storage and work-space problems that we all face. They give me ideas for how I can make my space more friendly to me. This is what I’m going to cover in the rest of this post. You can also follow my Craft Room Organization Pin Board. BTW: You can also get help organizing your sewing space with the free Jennifer Maker 30 day sewing room challenge.
When looking for a new home, a sewing and crafting space for me was really important. We were always searching for that extra bedroom, the den, the attached small efficiency unit, and the dry basement. We found that space in our current house. It ticked all the buttons, save for some 80 ‘s wallpaper that I can live with for now. I have been busy making my sewing space perfect for me. I ‘m not done yet, but every week I seem to be a bit closer to the space that I have envisioned.
Floors
Having a large space is really nice, but solid surface floors in my sewing and craft room are a game changer. I cannot begin to tell you the hours of fishing pin out of the carpet I have done in my life. Magnets help. These floors, concrete, make cleaning up pins and threads so easy, but they are colder. Upside: cute slippers.The smooth floor also allows my office chair to roll between my sewing machine, serger, and work table.
Chairs
Speaking of office chairs, last week I picked up six office chairs off of Facebook marketplace for the sewing classroom part of my studio. (I never dreamed of that in a sewing space, but now I love it.) They are a bit beat up, but the pneumatic height adjustment still work. I know that I can sew up the few holes in the covers or add “boho chic” patches. Then, game change, my friend Molly told me that you can buy stretchy slipcovers for office chairs.
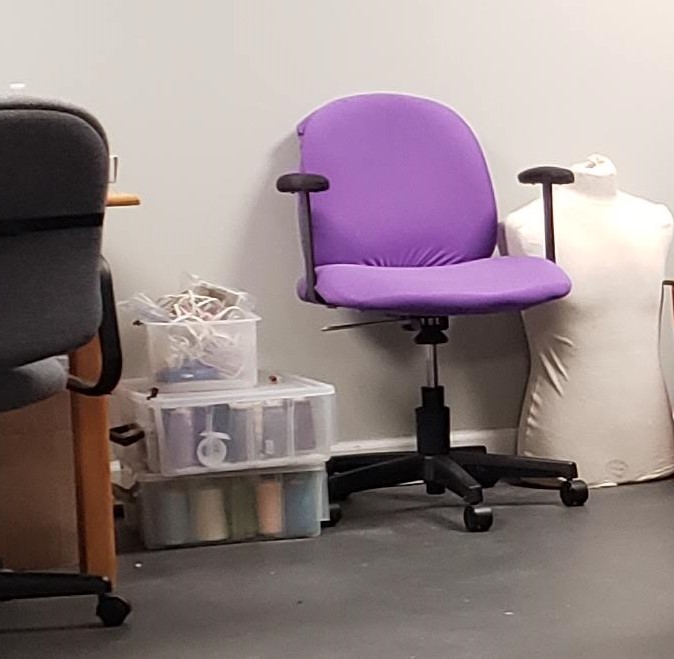
Why didn’t I think of that? An Amazon rabbit hole later, I learned that they are more cost effective to buy than make, due to the cost of the incredible stretchy and yet matte fabric. How many shades of purple can I have in one room? All of them.
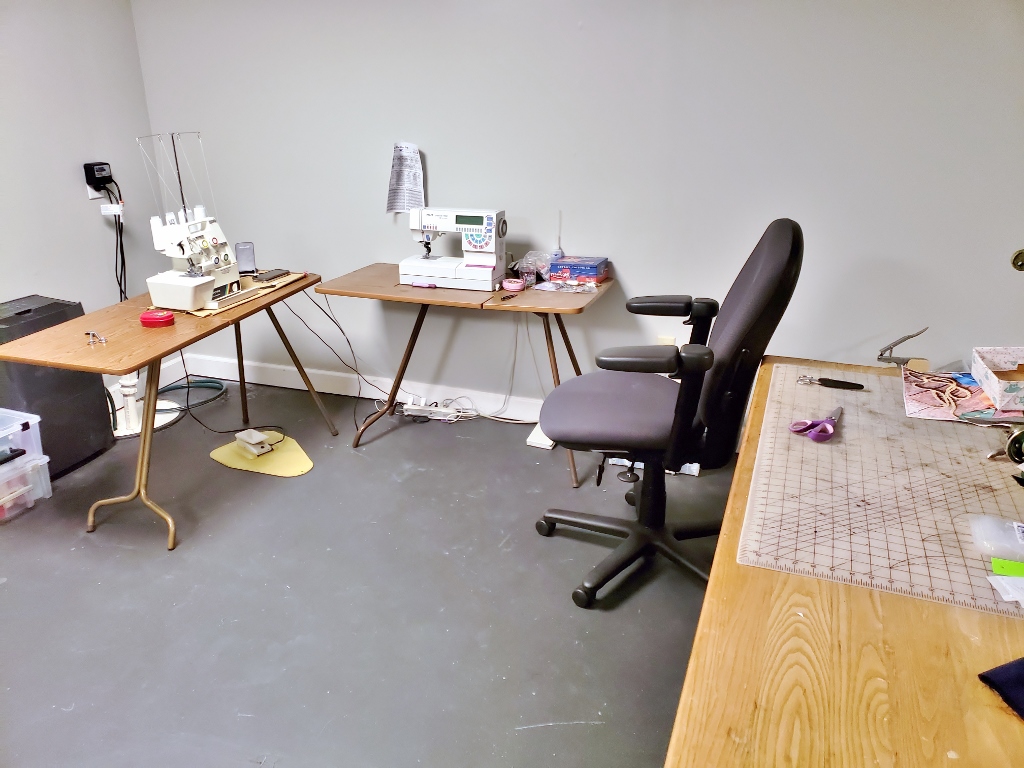
Work Surfaces / Tables
Back to the tables, I have three tables (sewing machine, serger, and work table) set up in a U shape, so I can easily switch between them. I keep all my project pieces on the work table. Then I take the ones I need at that moment and serge or sew before returning to the table for the next pieces. I do all the sewing I can before getting up to iron.
Ironing board
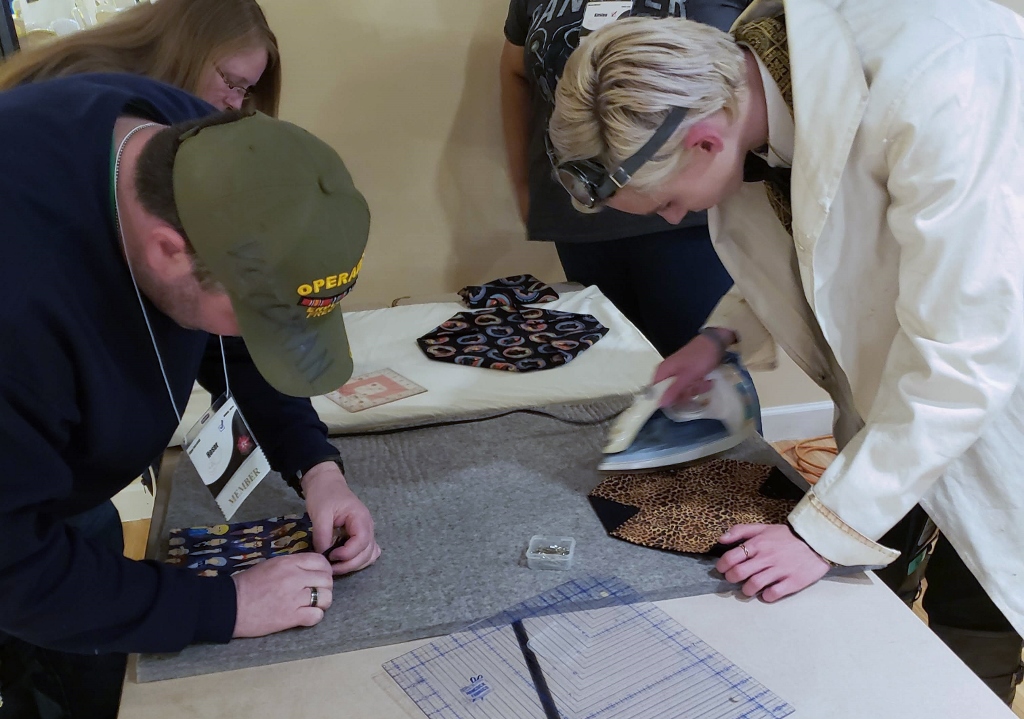
I could totally have an ironing surface right next to my sewing machine, but making myself get up to iron keeps we moving and helps me stay more alert. (And not lose track of time and forget to get the kids from the bus.) Speaking of ironing, I generally use a regular ironing board, but I do also have a thick felted wool table pad meant for ironing. I use this for classes when I travel, but I can also turn my worktable into a large ironing board if needed for the project. You can put these on the top of your dining room table, washing machine, or kitchen counter.
Cutting table
The worktable in the sewing area is at desk height, but I also have a large work table at counter height that is perfect for fabric cutting, especially with a big cutting mat on top. The height saves my back and makes pattern layout a breeze. My cutting table is actually a solid core door blank on top of a kitchen island (from the house I grew up in). I added step up casters so it can roll around the room. A great source for cabinets is the Habitat for Humanity Re-store . They collect and sell home improvement items, some new and some previously loved.
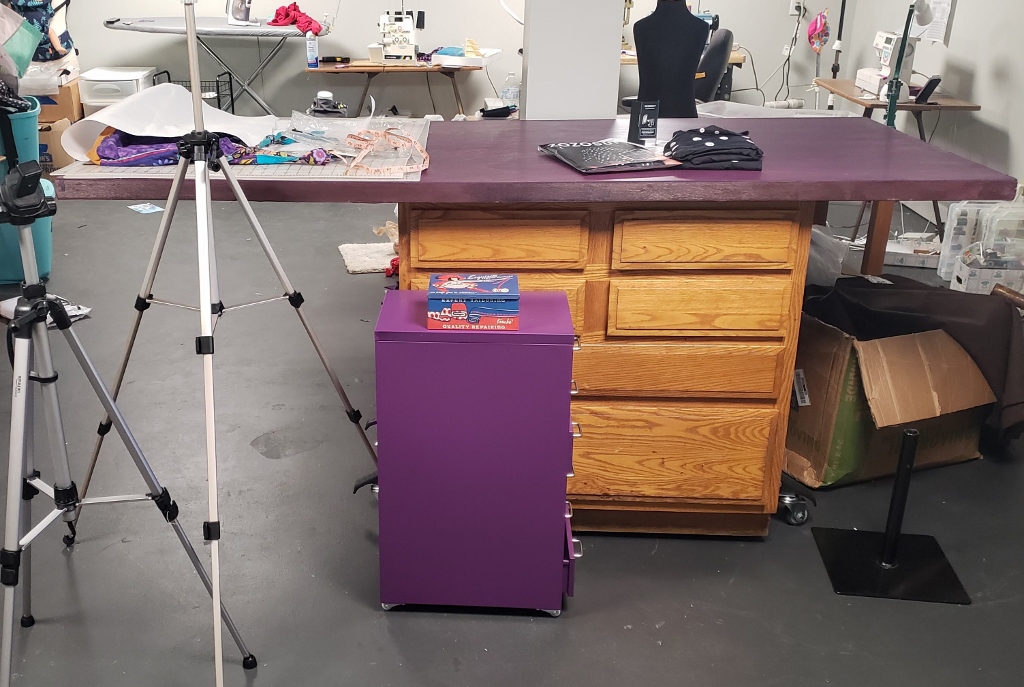
I finished the door, also from The Re-Store, with Unicorn Spit. Yes, you read that right! Thanks to my friend Mary who introduced me to the stain.
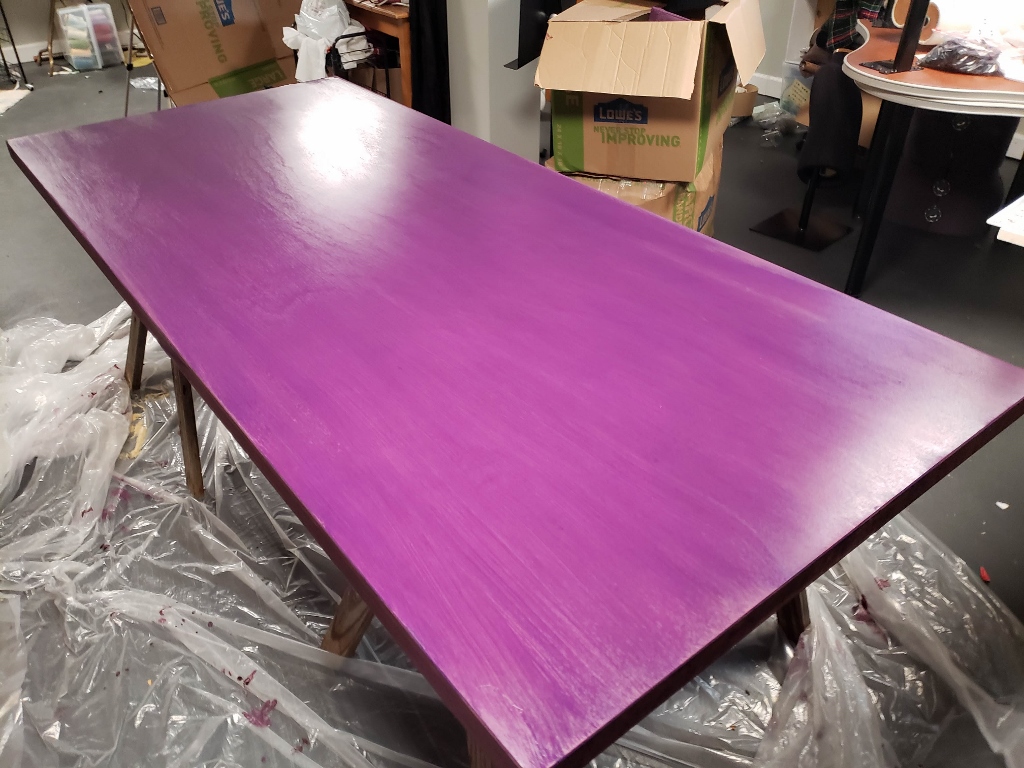
It is non-toxic and water soluble. The colors are totally mixable and you can do really cool effects. I seriously went down a YouTube hole learning all about this. The inventor was inspired to make it so that elderly and disabled adults that she worked with would be able to create beautiful projects and be safe using it indoors with their hands. So I just used it to make a purple counter, but it comes in a gazillion colors. And a little goes a long way.
Can’t invest in a counter height table?
Just put some bed risers under any table to bring the top up to a comfortable level. I do this all the time at the library when I teach sewing classes there. It makes cutting and ironing so much more comfortable.
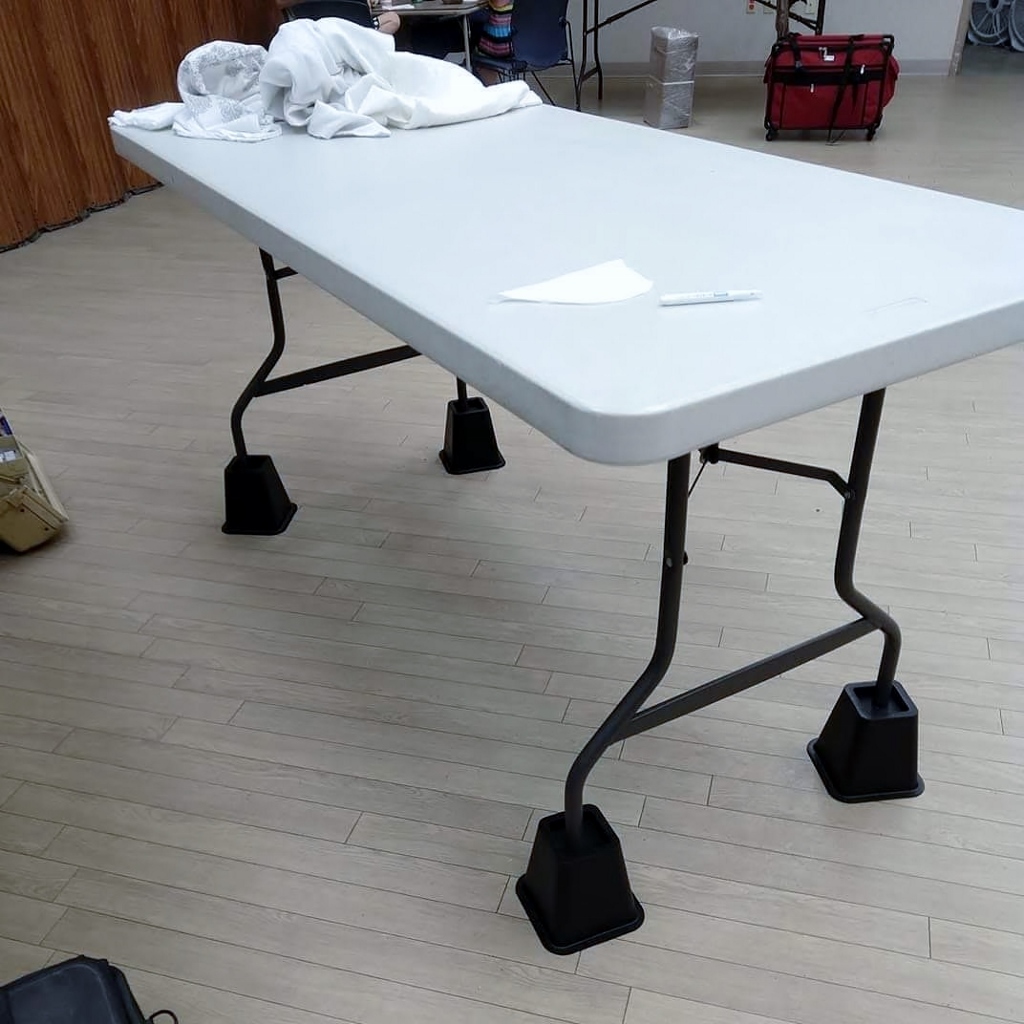
They make them in several heights, for taller and shorter folks. Here is an adjustable set if you are not sure what height you want. Last thing you want is a back ache when you are trying to be creative. Or do all your standing work at your kitchen counter. They are made to be the right height when standing.
Storage Needs
Storage is so important. Sure you can just put a few boxes under your sewing room table, but please label them so you can find what you need. Don’t feel like you need elaborate specialized containers, unless you want them. Storage can be super simple if you have a small collection. Just be aware that sewing stuff tends to grow.
Organizing a craft space can feel overwhelming. If you need some help consider following the free Jennifer Makers’ 30 day Organized Craft room Challenge. It has really helped me think through what is in my space and what I need.
Notion Storage
I keep a small box with sewing machine needles and hand needles next to my sewing machine along with my Sewing Machine Cleaning Log & Needle Change Guide that you can get using the form below.
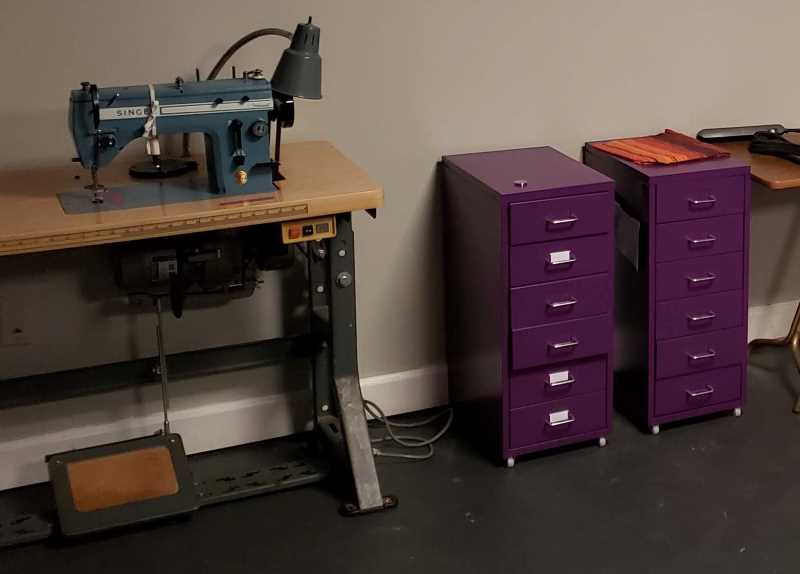
Measuring tapes (I think I have 20 now that they are in the same place), pins, magnets, pens/markers, metal hardware, tape. Everything has its own drawer in these two purple HELMER IKEA drawers. I would put scissors in one if my Cutting table cabinet didn’t have drawers. I use those for scissors, rotary cutters, quilting rulers, marking chalk, spray adhesive, and pattern paper; basically things that I use when standing there.
Fabric Storage
It’s certainly possible to limit the amount of fabric you have to store, but you have to be strict, and only buy what you need for a project you are doing now. I’m just not that disciplined. So I have a lot of fabric.
Has this ever happened to you? “OMG that fabric is amazing. I’ll just get 3 yards so I can make a fabulous dress.” Two months later, “I decided to make it a pillow! Now what am I going to do with the extra 2.5 yards? Oh I’ll just keep it. I’ll use it later.” This is such a familiar conversation. I have it basically every time fabric “speaks” to me. So I own a large fabric collection that I have purchased over time.
I have also been given lots of fabric. I inherited all of my mother’s sewing collection when she died in 2000. Then over the years many non-sewers have gifted to me their great aunt mumble mumble’s collection to “someone who would appreciate it.” And I assure you I have appreciated it. I love vintage patterns, and notions. They make me unreasonably happy…so I guess Marie Kondo would let me keep them. But seriously, over the years I have acquired more sewing stuff and fabric than any reasonable person should have. I’m not ready to KonMari it, and doubt I ever will be, so I have found ways to store it.
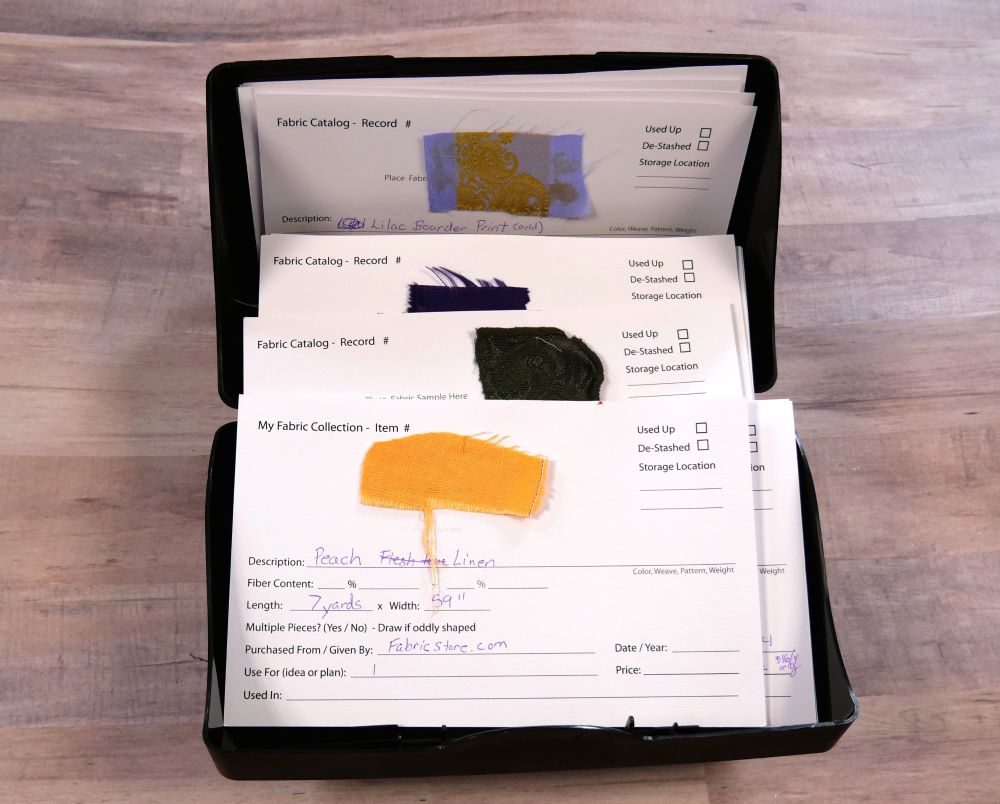
I use a fabric catalog to keep track of the large pieces (I also have them for yarn).
Quilting Cotton Fabric
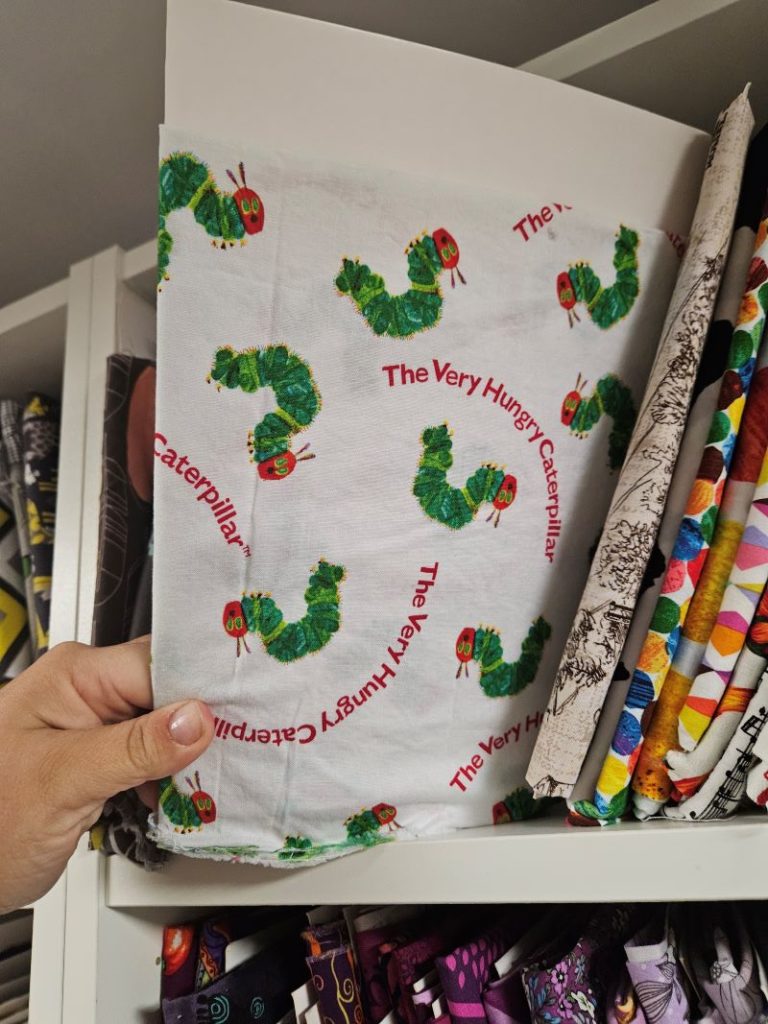
For my smaller pieces of fabric I use visual storage. For pieces larger than 1/2 yard, I wrap them around a comic book board. As a bonus, they are acid free and will not discolor your fabric. I also love that it makes my work space look like a fabric store, and it’s easy to pull out individual fabrics.
Currently my favorite fabric online store is By The Water on Etsy they have some beautiful fabrics if you are looking for something beyond what is at your local fabric store or JOANN Fabric & Craft Stores Every time I look through her shop my cart fills up quickly. (I had a chance the meet the owner of By The Water on Etsy and we had a lovely afternoon chatting. She loves fabric as much as I do.)
For pieces smaller than 1/2 yard, I just fold them and stack them on the shelf. You can try to wrap them onto boards if you like, but I doesn’t work well for my collection.
Storage Boxes
When I move or store different groups of fabric, I use Bankers Boxes that I get at Costco. They are designed for lots of paper work, so they can handle the weight of fabric. Plus they stack really well. While I am loading a box, I set it upright and make a pile of fabric fold out. This way I can see all the fabrics in that box when I open the lid. I like to keep fabric from the same series together, but I also sort by color, and topic depending on my mood. Christmas fabric and Halloween fabric have their own boxes, or two, or three. Did I mention I love fabric?
Please be aware that cardboard boxes are not the best idea for LONG TERM storage. Clear plastic is a much better long term option.
- Cardboard can get wet and hold moisture. If your boxes are in a basement, put a pallet under them or something else to keep them off the damp floor. This also helps with air flow, which keeps things from getting musty. Or add a plastic bag inside the box to protect your fabric.
- Cardboard boxes are not acid free. Over a long time the acid in the cardboard will discolor the fabric touching it. Museums use special acid free boxes to store fabric items. (stick a clean plastic bag between your box and fabric as a quick fix)
- Cardboard boxes are inexpensive, which is a huge selling point. So just be aware of the downsides and consider a clear plastic container for any vintage fabric or for your “non sewing collection “
Snap storage
I love these snap close divided boxes from Michaels for storing my snaps. They allow all the parts to be in separate places, so I don’t accidentally set a stud when I mean to set a socket.
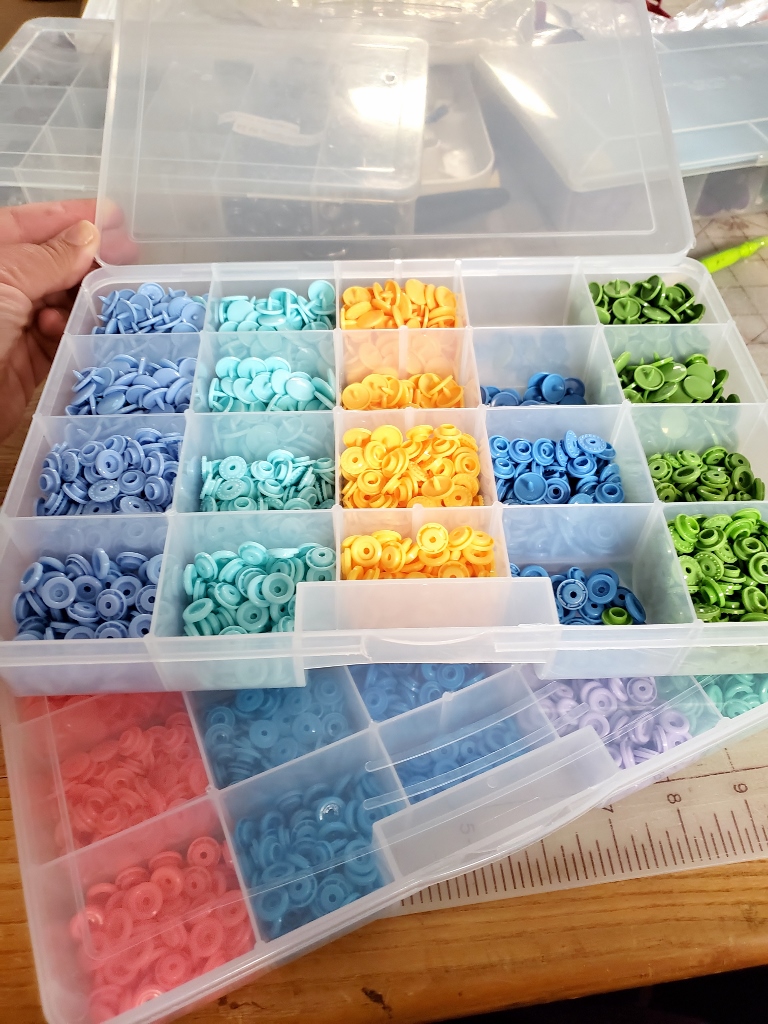
You can see that I don’t organize them by color, I know this would drive some people crazy, but I have a reason for it. They are organized in groups of colors that often appear together. So colors of the same tonal family. Recently I made drool pads with a dory fabric. The box of snaps that had the “Dory Blue” also have the bright yellow and the “Nemo Orange”. A fabric that has one paste color is likely to have other, so I have one box of my pastel shades, and another of my neon shades. I also have a box for black, white, and grey. Grey is so hard to match that I need them all in one place to try them all.
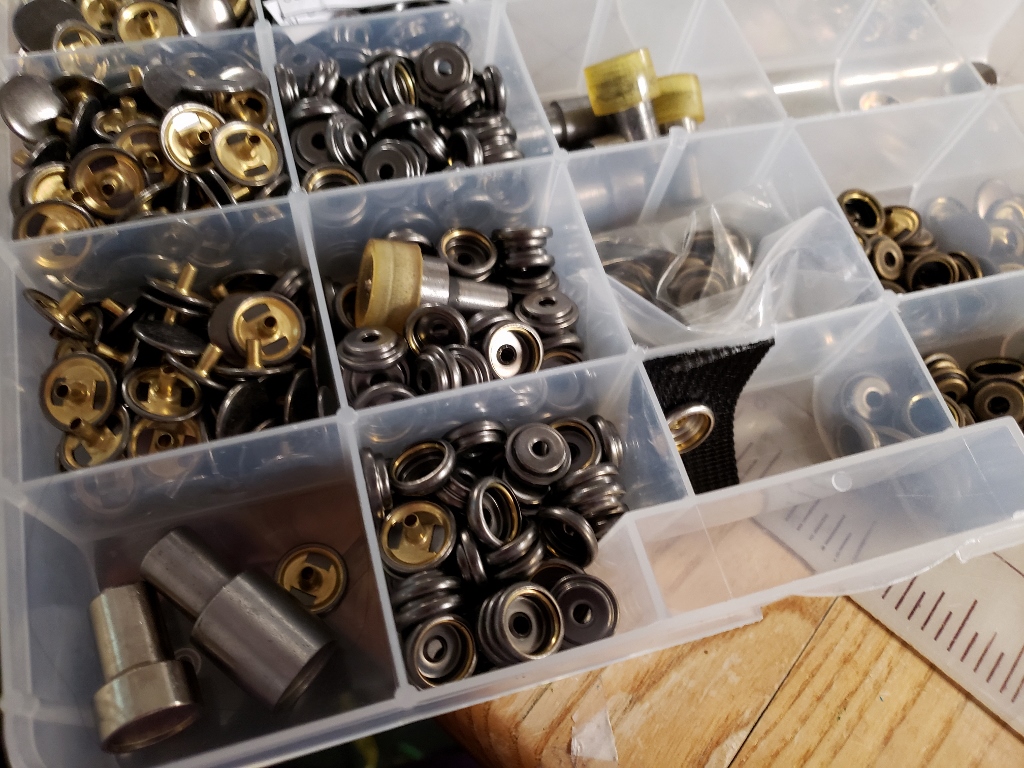
I use KamSnaps mostly, but also have a collection of other snaps, like metal ones. I tend to store the application die in the same box as the snaps, so I never have to dig around for them. I also have a magnet on the side of my snap press to hold the other part of the die so it doesn’t roll away while I work.
Thread Storage & Why I Don’t Display It
The most popular way to store thread is by mounting thread holder on your sewing room wall. I totally understand this, colors are absolutely beautiful. It’s decor and function all in one. This is NOT how I store my thread. Thread and ALL materials have limited life span. That life span is greatly decreased with exposed to light and dust. Did you know thread can dry rot in place? It takes a long time, but it certainly can. My museum training (MA in Museum Studies), just won’t let me expose the literal “thread that binds it all together” to conditions that will damage it. I also have other reasons, like it’s really easy to grab one box when I teach a class or run a sewing day away from home.
So I store all my thread in these containers. “Creative Options Plastic Thread Organizer-Clear” from Joann Fabric.
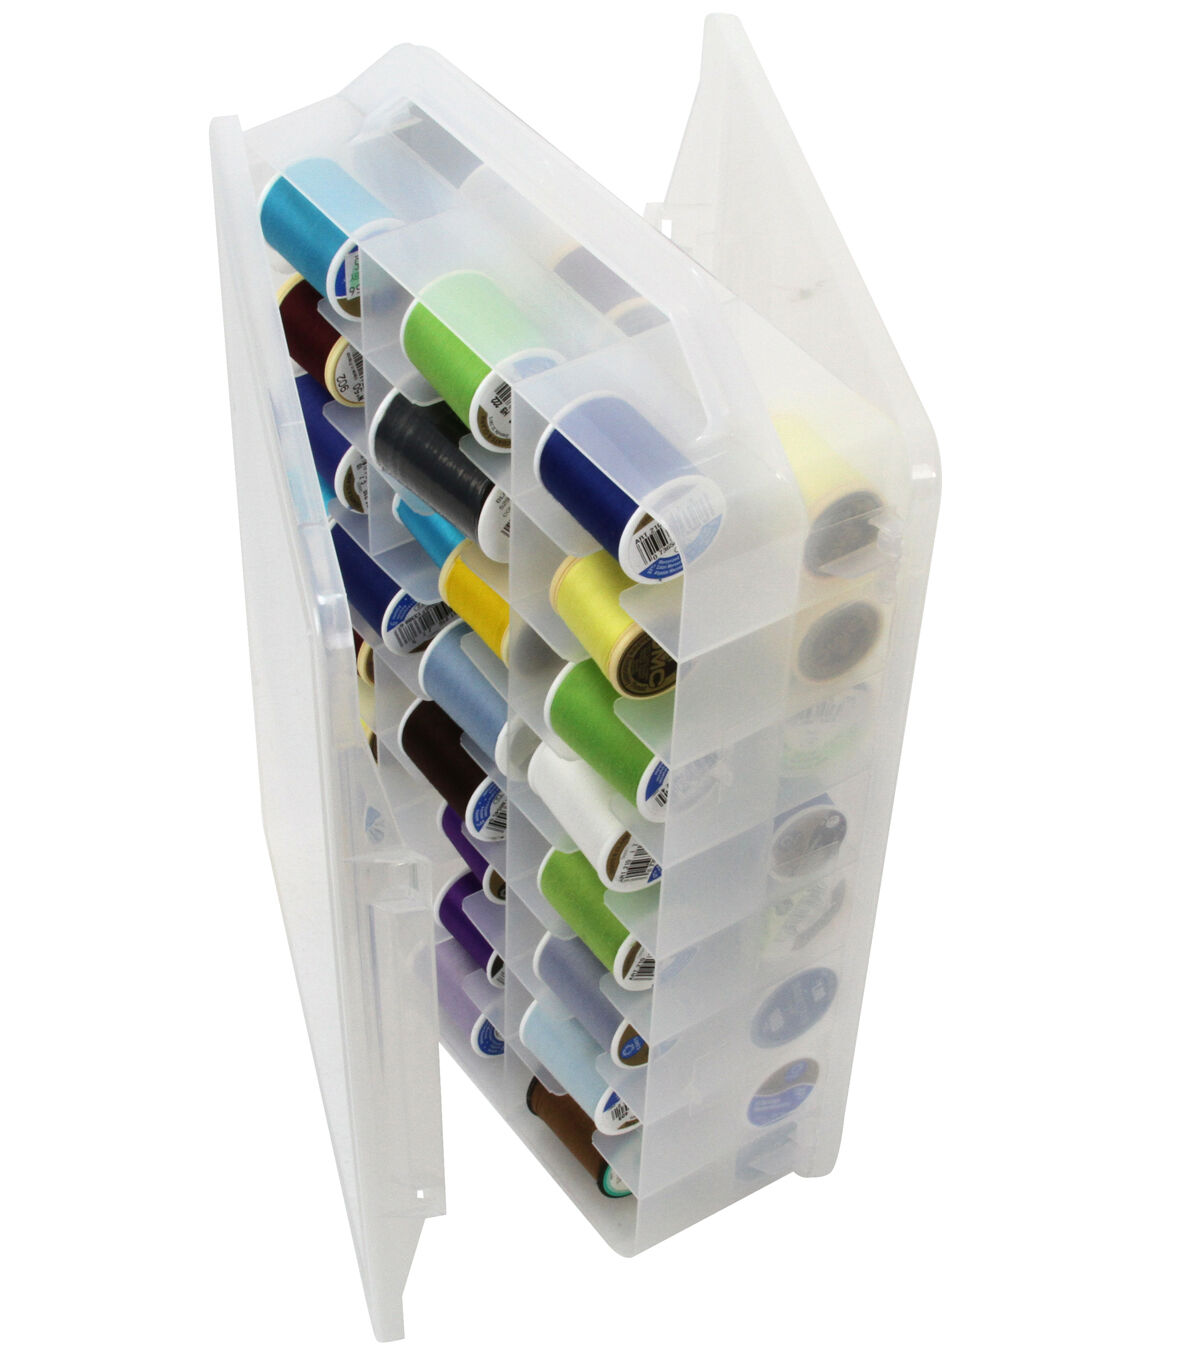
These containers for regular thread are double sided. They are clear so you can see the colors. I store them in color families. Being clear, they offer minimal protection from light, but do protect from dust. I store them next to each other so most of the sides are also protected from light. Either way they are not in direct sun light. (well my studio is in a basement, so not really an issue, but my old sewing room had lots of natural light).
Serger Thread
The serger thread cones go in a double deep art bin. You can get spool pin inserts for these, and I even have a set.

They make everything look super pretty, but you don’t really need them. Want to know more about my preferred type of thread and why getting quality thread is so important? Pop over to this post.
Lighting
And now for the all-important lighting! I used to work primarily at night, once my kids were in bed. As you know good light is important to eliminate eye strain, plus I needed to be able to take photos at night. For photos I could have totally made a light box, but I also needed good overall lighting. I choose to use high powered day light LED bulbs in my regular fixtures. (Blink, blink.) Wow they are bright! I think they honestly screwed up my circadian rhythm they were so bright, but they were exactly what I needed at the time. In hind sight, I could have used programmable bulbs to give me a softer light when I didn’t need it to be quite so bright.
If you don’t want to do whole room lighting, or just can’t, task lighting is the way to go. Everywhere from a simple lamp with a regular bulb, a full spectrum (daylight) blub, or an Otte light. All of these options work for task lighting. Just make sure you can position it where you need the light.
Sewing Machine Lighting
Most sewing machines have a built in light, does yours? Is the light bulb burnt out? Well either way, if you don’t have light down there, you need it. I love these LED light kits that go right inside the arm of the sewing machine. The light is exactly where you need it.
So you have a place to sew, storage for your stuff, and light to see. Let’s start creating!
Wow, that was a lot. I’m sure I’ll have more to say about my sewing space as I try out new things. Just remember, think about what YOU need for YOUR stuff. The “Perfect sewing room” only has to work for YOU.
Want to learn more about how other people design their sewing space? As mentioned at the beginning of the article, I contributed to a Redfin.com article on “creating the perfect sewing and craft room” you might like. You can also follow my Craft Room Organization Pin Board.
Want to remember this? Add this Sewing & Craft Room Design post to your pinterest board!
love your practical ideas! thankyou.
Great ideas for storage
Great ideas. I use a table like the one you pictured for my cutting table. It’s easy to move if necessary. Instead of the bed risers, I use PVC pipe. It can be cut into any length, and will slip over the four legs. Just be sure to get the correct diameter that will fit snug. No more back aches.
Please share details about the two tables with your sewing machines.
These sewing tables are from the early 90s. They have a portion that swings up and creates a flat area, like a table extension. Although it seems really useful, and should be, I barely use that feature. I can’t find a link to the same design, but there are tons of modern options. Either a flat bed that sits around your machine or a table with a dropped area. Just like these tables, the extension has to be made for your machine size.